- Step-by-step guideline
- How to place the nodes
- Node installation
- Node start-up
- Working example
- How to replace the battery
Deployment and installation
Step-by-step guideline
Once you receive the Smart Parking batch, the steps involved in the deployment of the network are:
- Nodes provisioning: Once the client owns a LoRaWAN Network Server license, it is mandatory to register the nodes with the configured identifier and keys for each node. The client must decide whether they use the factory default LoRaWAN unique identifier and random private keys provided by Libelium or they prefer to configure their own identifier and keys. You must keep in mind that every node is provided "ready to install" with factory default identifier and keys. If client-configured identifier and keys are desired, then each node will have to be configured separately using the Smart Devices App. This 2nd option increases the provisioning time. So Libelium recommends using the default IDs and keys. If factory default keys are used, then a CSV file exported from Libelium Cloud can be used to ease the bulk import into the LoRaWAN Network Server. Find the factory default IDs/keys in the Node keys tool section.
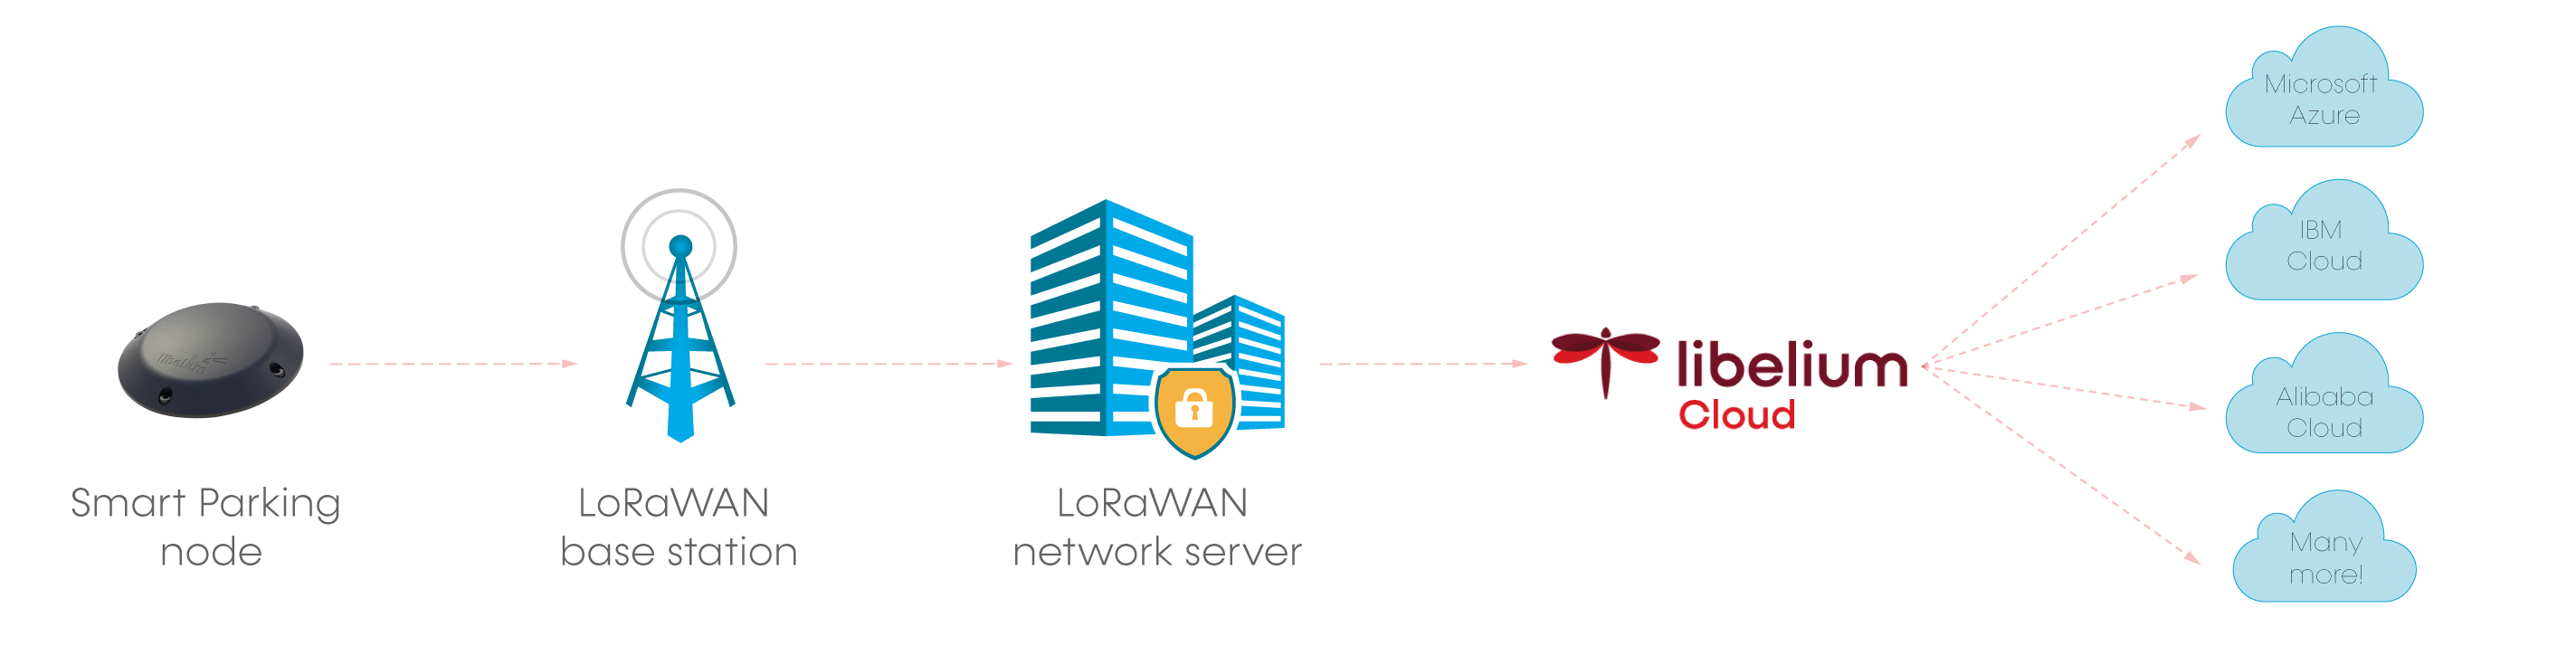
Please refer to the "Smart Devices App" chapter for further information about the Smart Devices App. - Libelium Cloud: It is used to receive, store and exploit data. The user can also perform remote configuration of nodes and forward data to a 3rd party cloud. The LoRaWAN Network Server must be configured to properly forward all packets to Libelium Cloud.
- Nodes installation: Each node must be placed on the proper parking slot and then follow the "magnet start-up" protocol explained in the "Magnet start-up procces" section.
How to place the nodes
The correct installation spot is the center of the parking slot to ensure the best detection. It is possible to install the nodes on different parking slot configurations:
- Parallel
- Perpendicular
- Angled
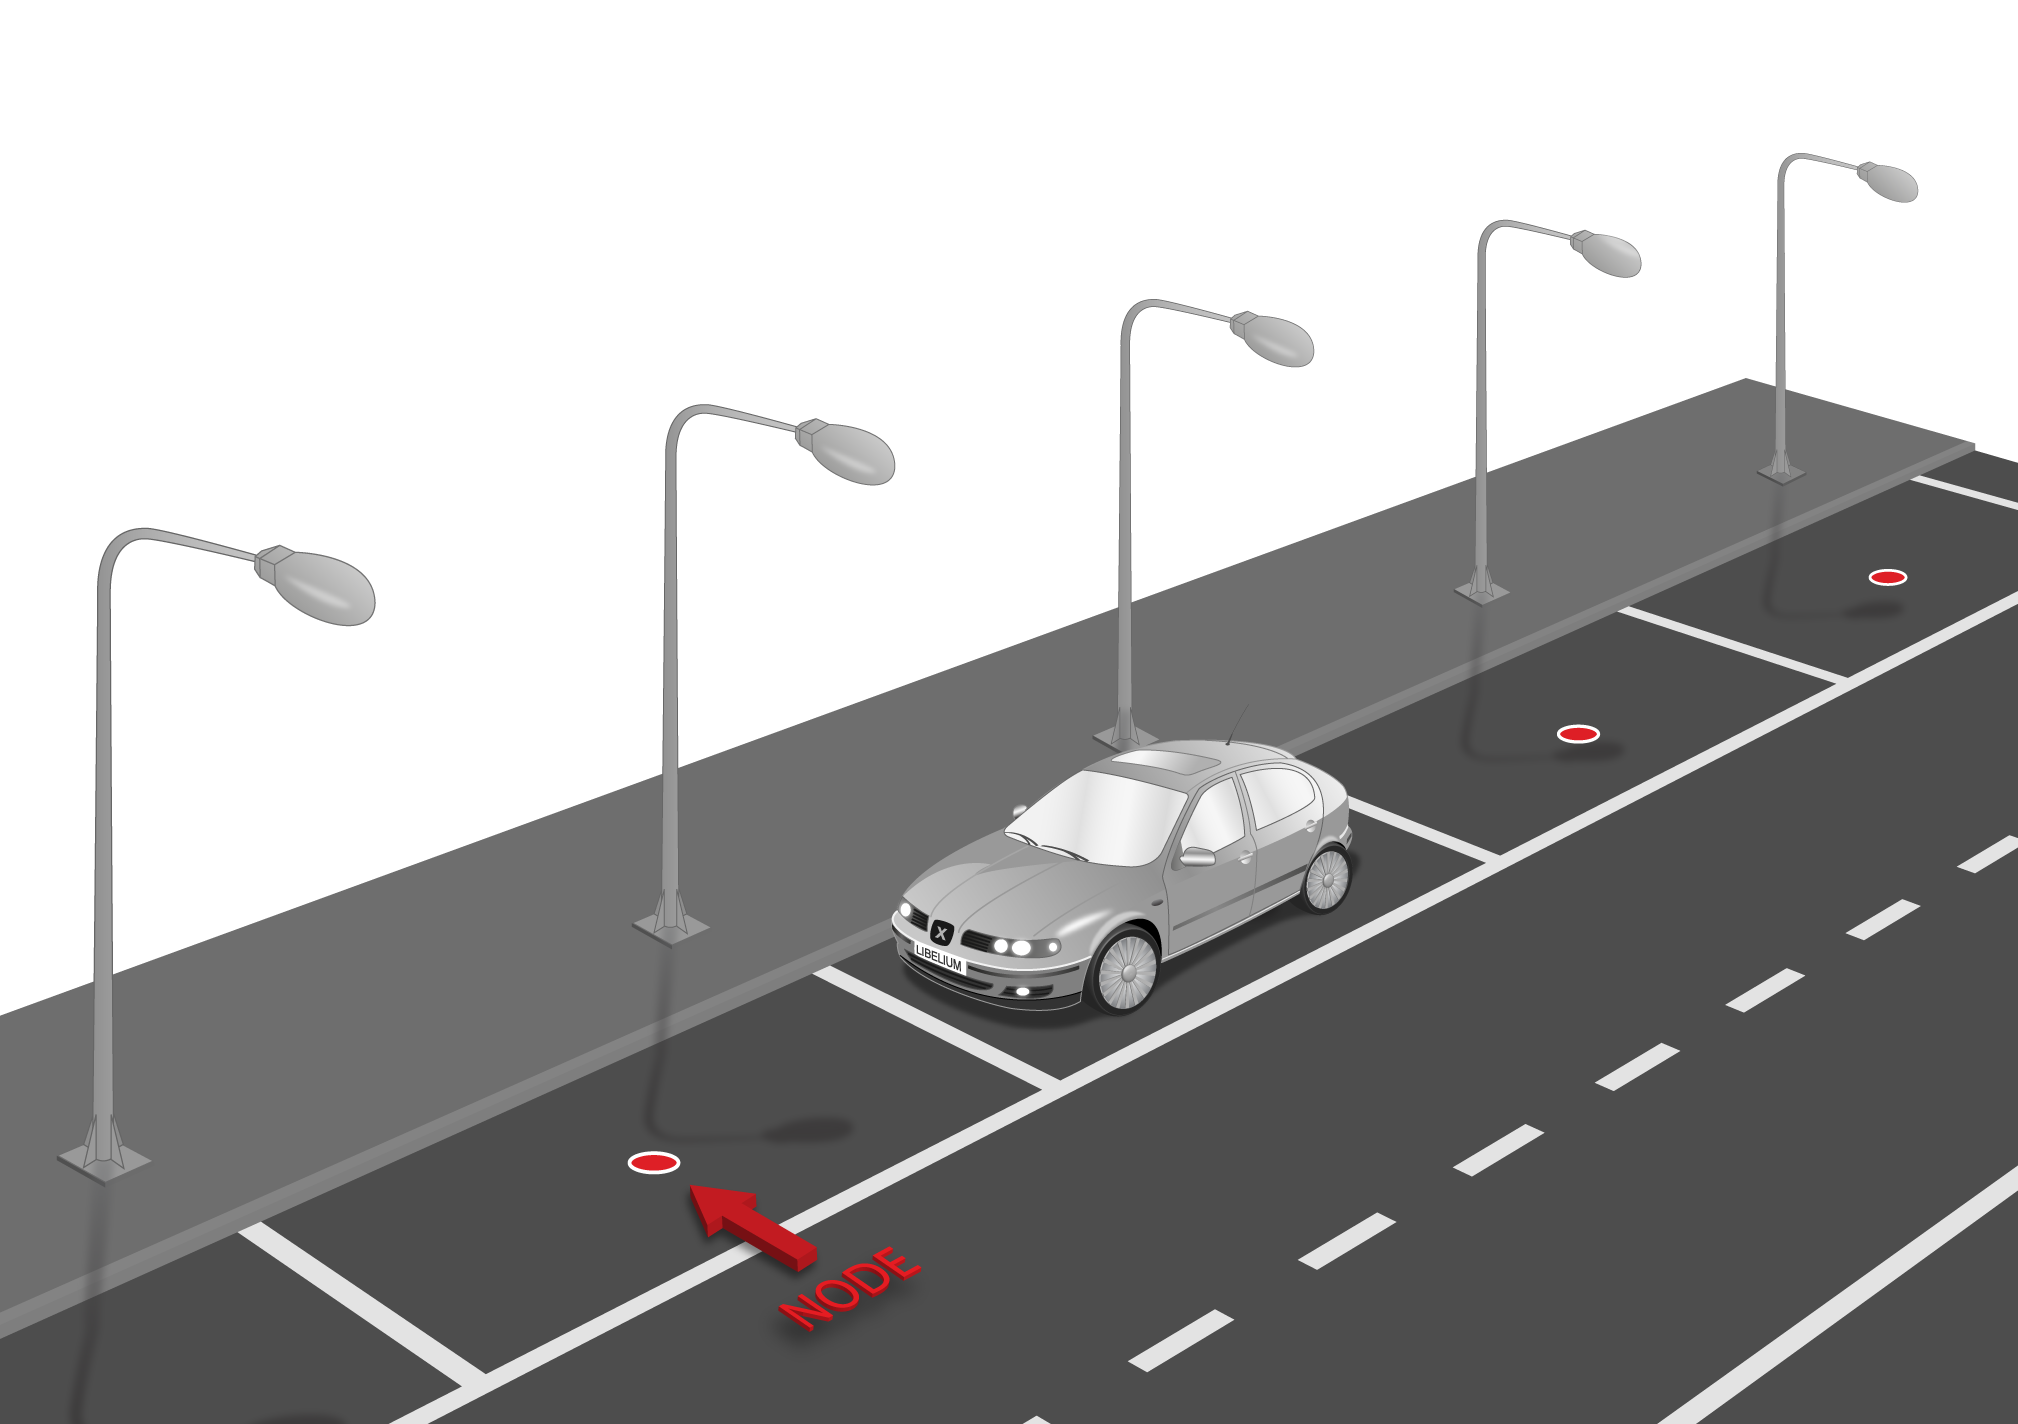

It is important to keep in mind that parking slots must be delimited by lines so the node is placed in the center of the parking area. Placing the nodes with no line definitions may lead into bad behaviour.
Node installation
The user can choose among different types of installation for the node. This table summarizes pros and cons:
| On-surface installation | Semi-underground installation | |
|---|---|---|
| Type of enclosure | Vaulted | Vaulted |
| Presence of node over the ground | Full node (40.25 mm) | Part of node (6 mm) |
| Rain immunity | Yes | Yes |
| Puddle immunity | Yes | Yes |
| Vandalism/robbery immunity | Medium | High |
| Snowplow immunity | No | Possible |
| Installation process, | Fast and easy | Special tools needed |
| Tools needed | Normal drill | Industrial big crown drill. Epoxy. |
| Can be dismantled for maintenance | Yes | No |
Note: Since 2022, the "Underground" installation type is no longer supported.
On-surface node installation
Firstly, mark 4 holes in the asphalt. Select an area as flat and regular as possible, avoid irregularities on the terrain. You should place the enclosure in the final location and use the 4 holes as a reference to drill 4 little marks on the ground. You can also draw 4 dots with ink.
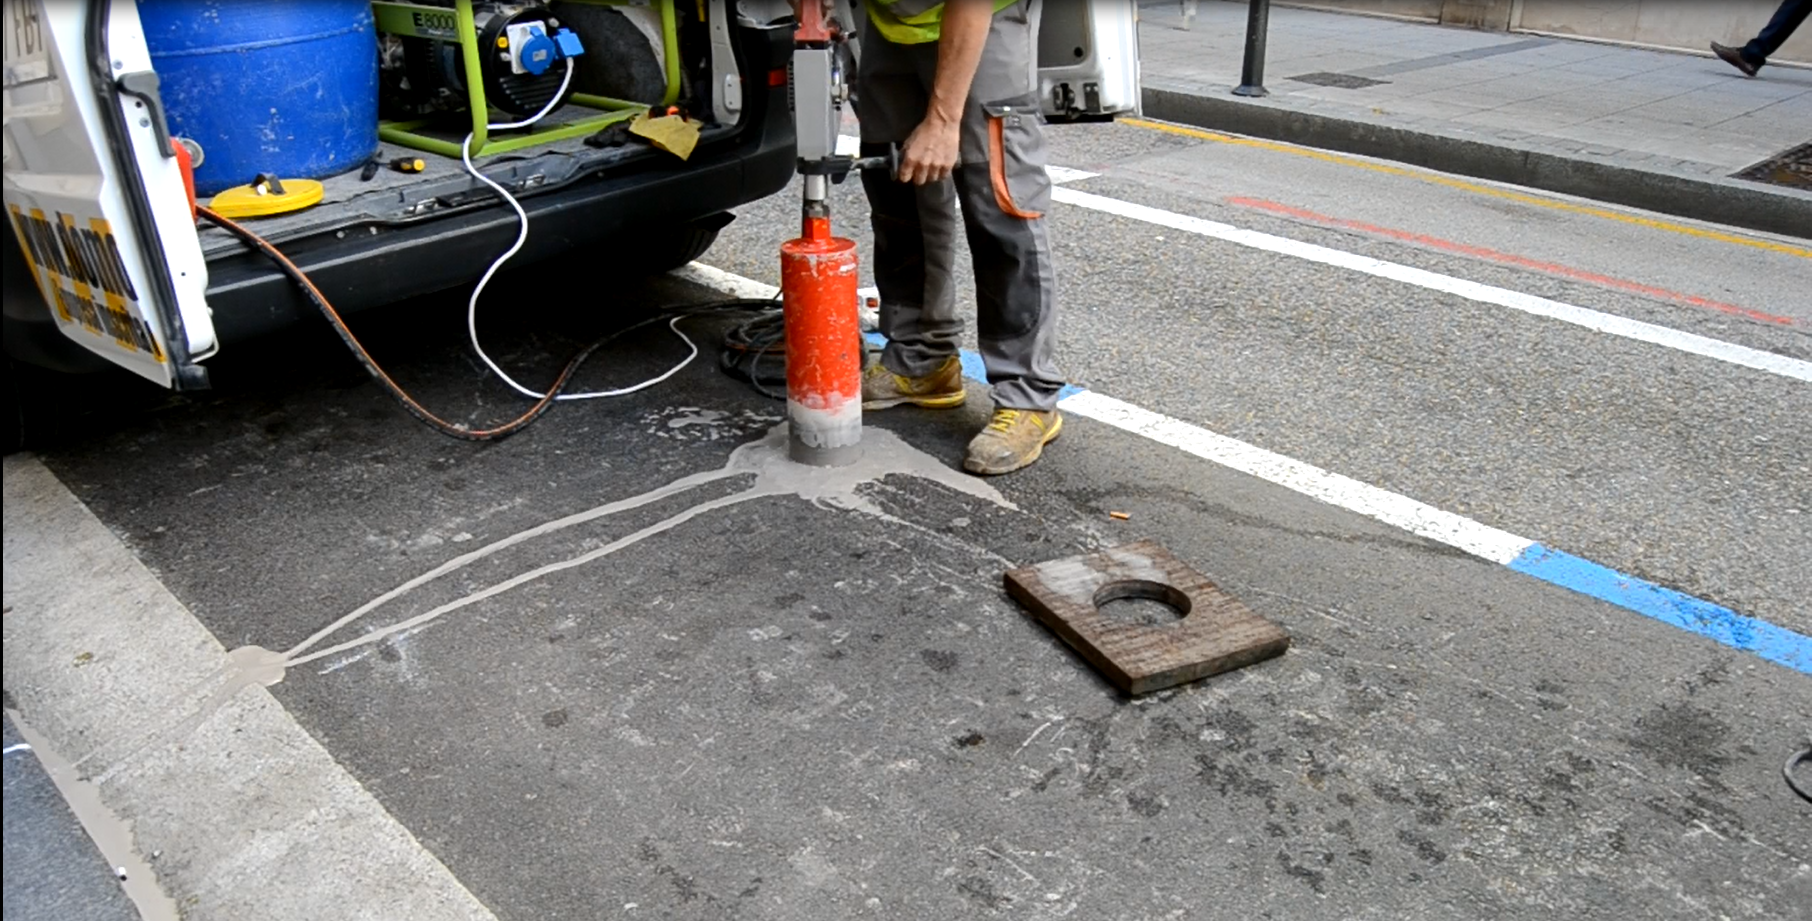
Then continue with the chemical fixing installation step by step as described above. Also, in the next video you can see how the installation is done chemical fixing installation.
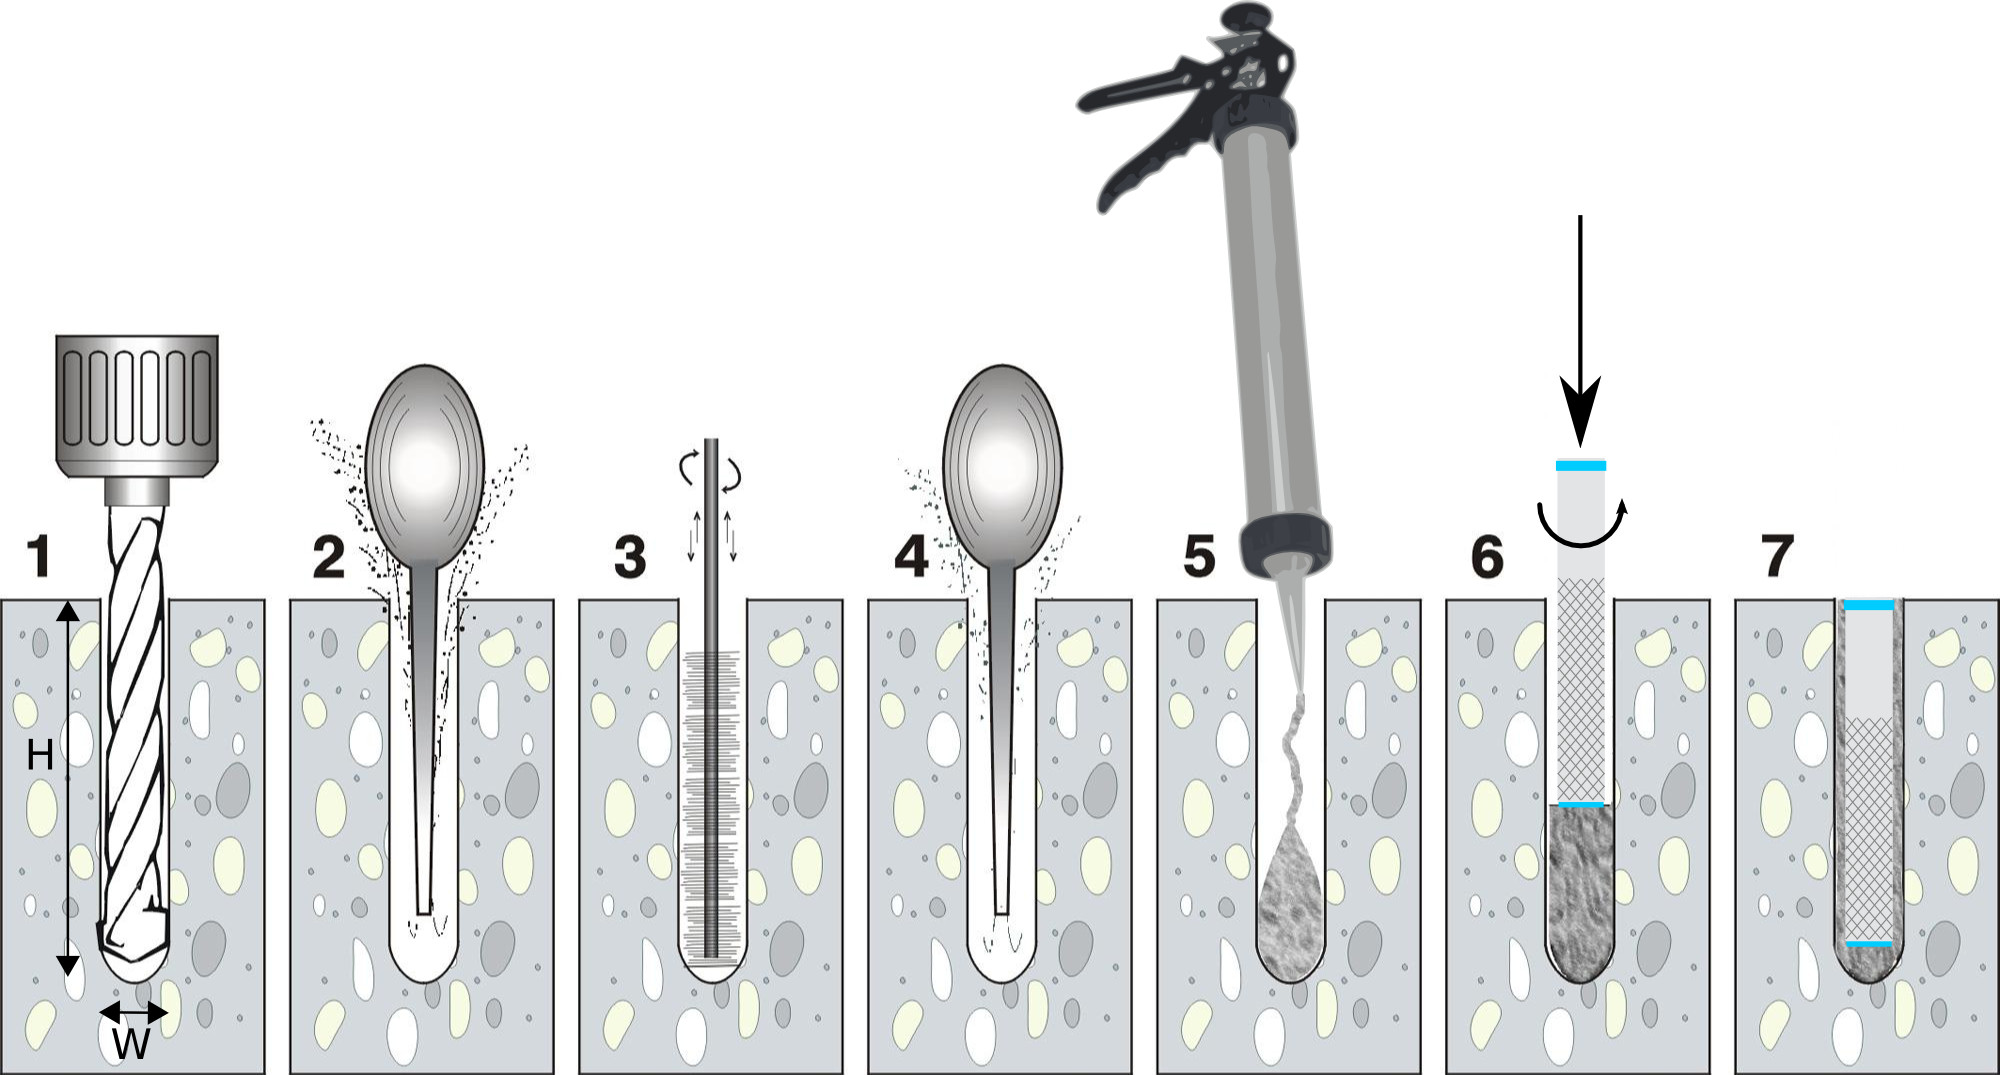
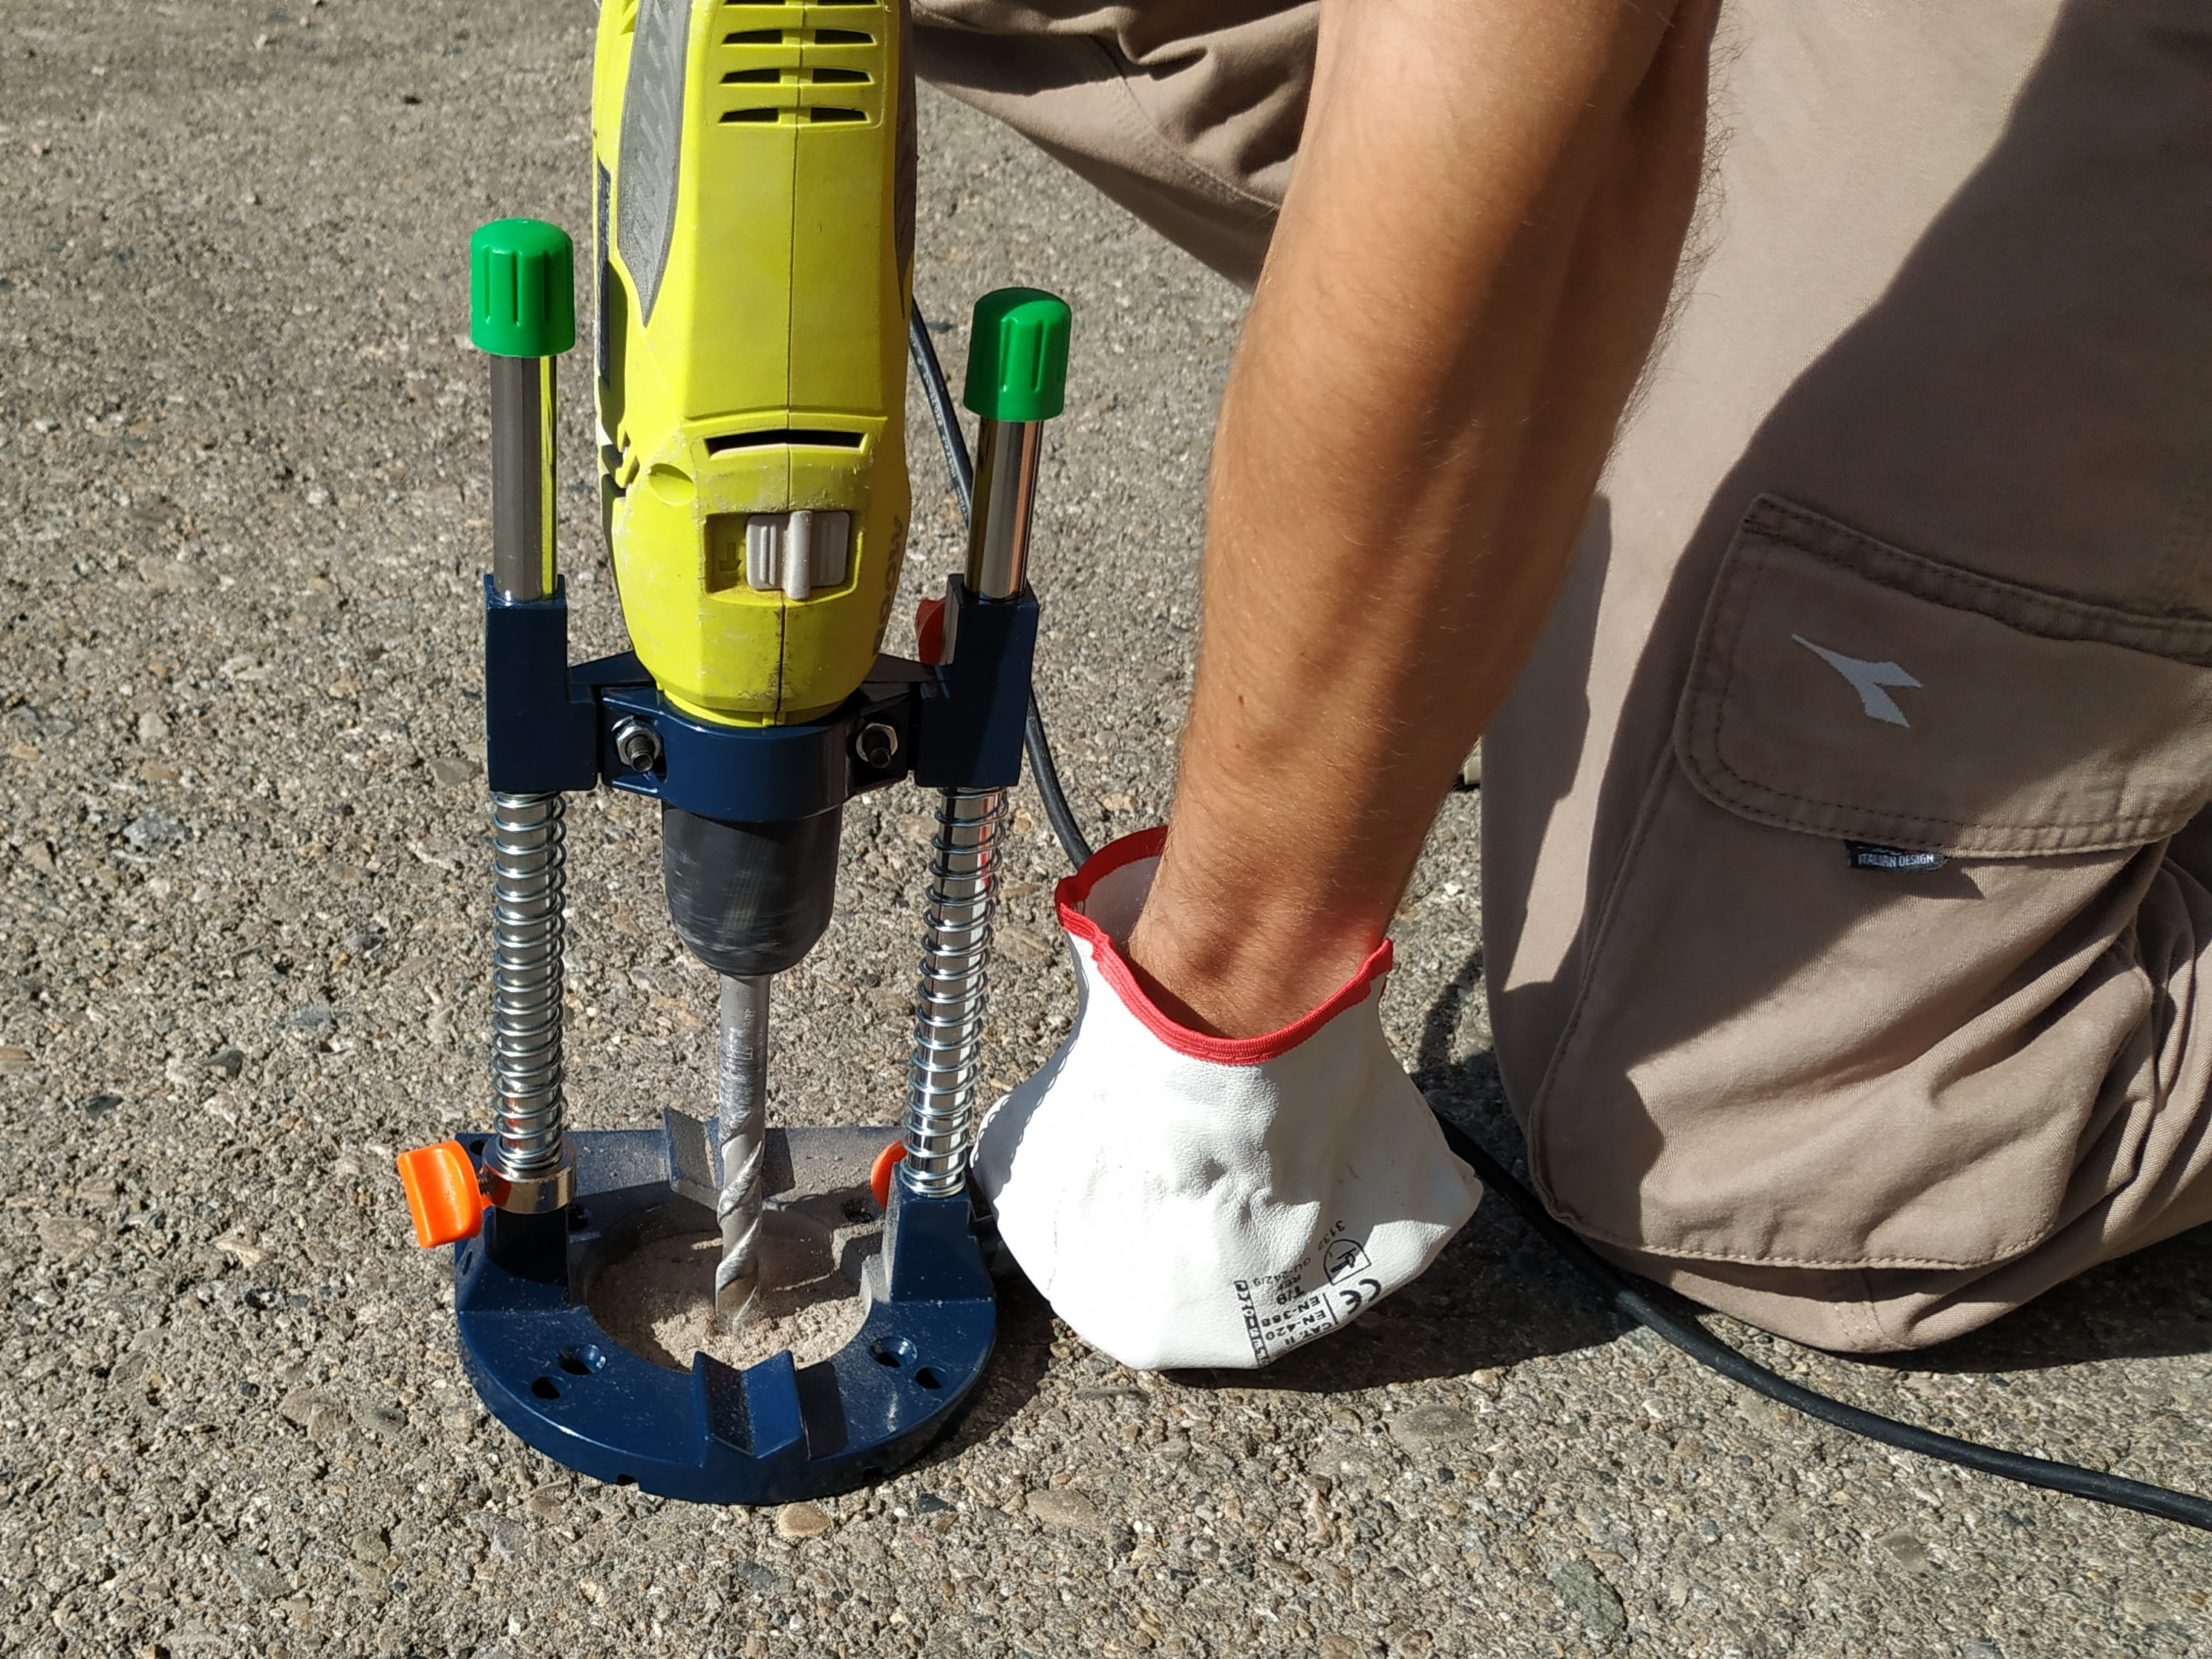
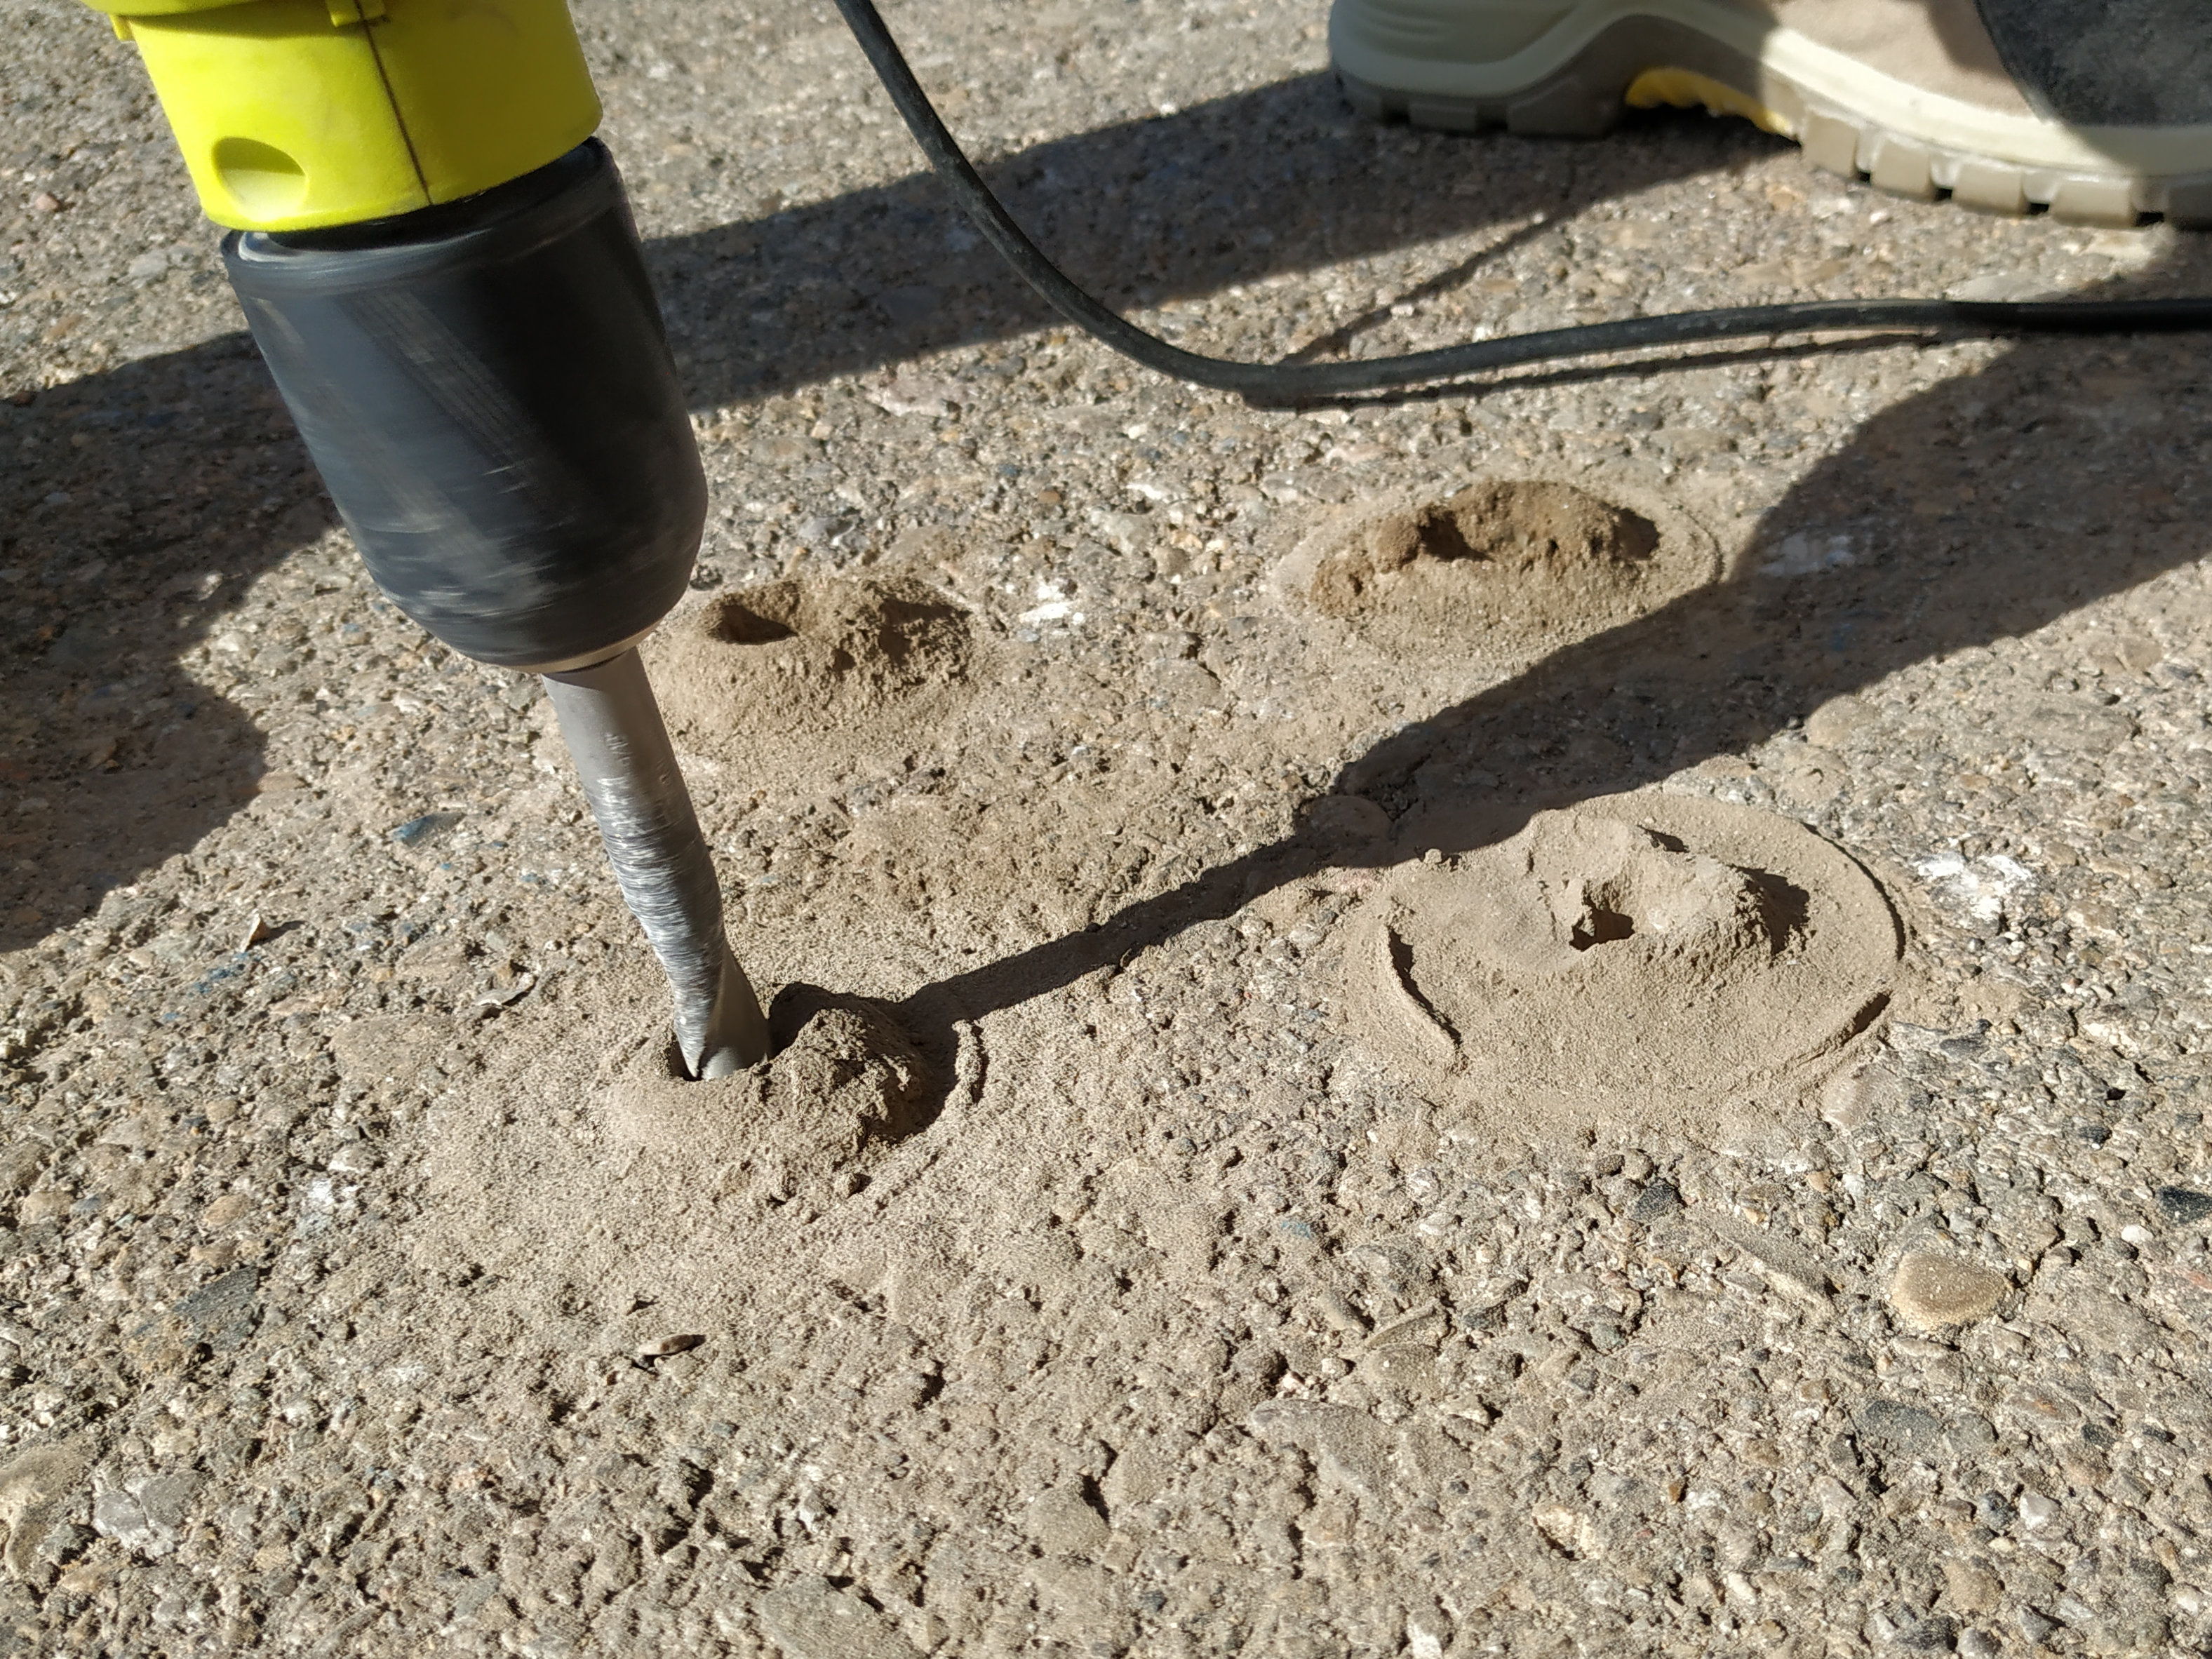
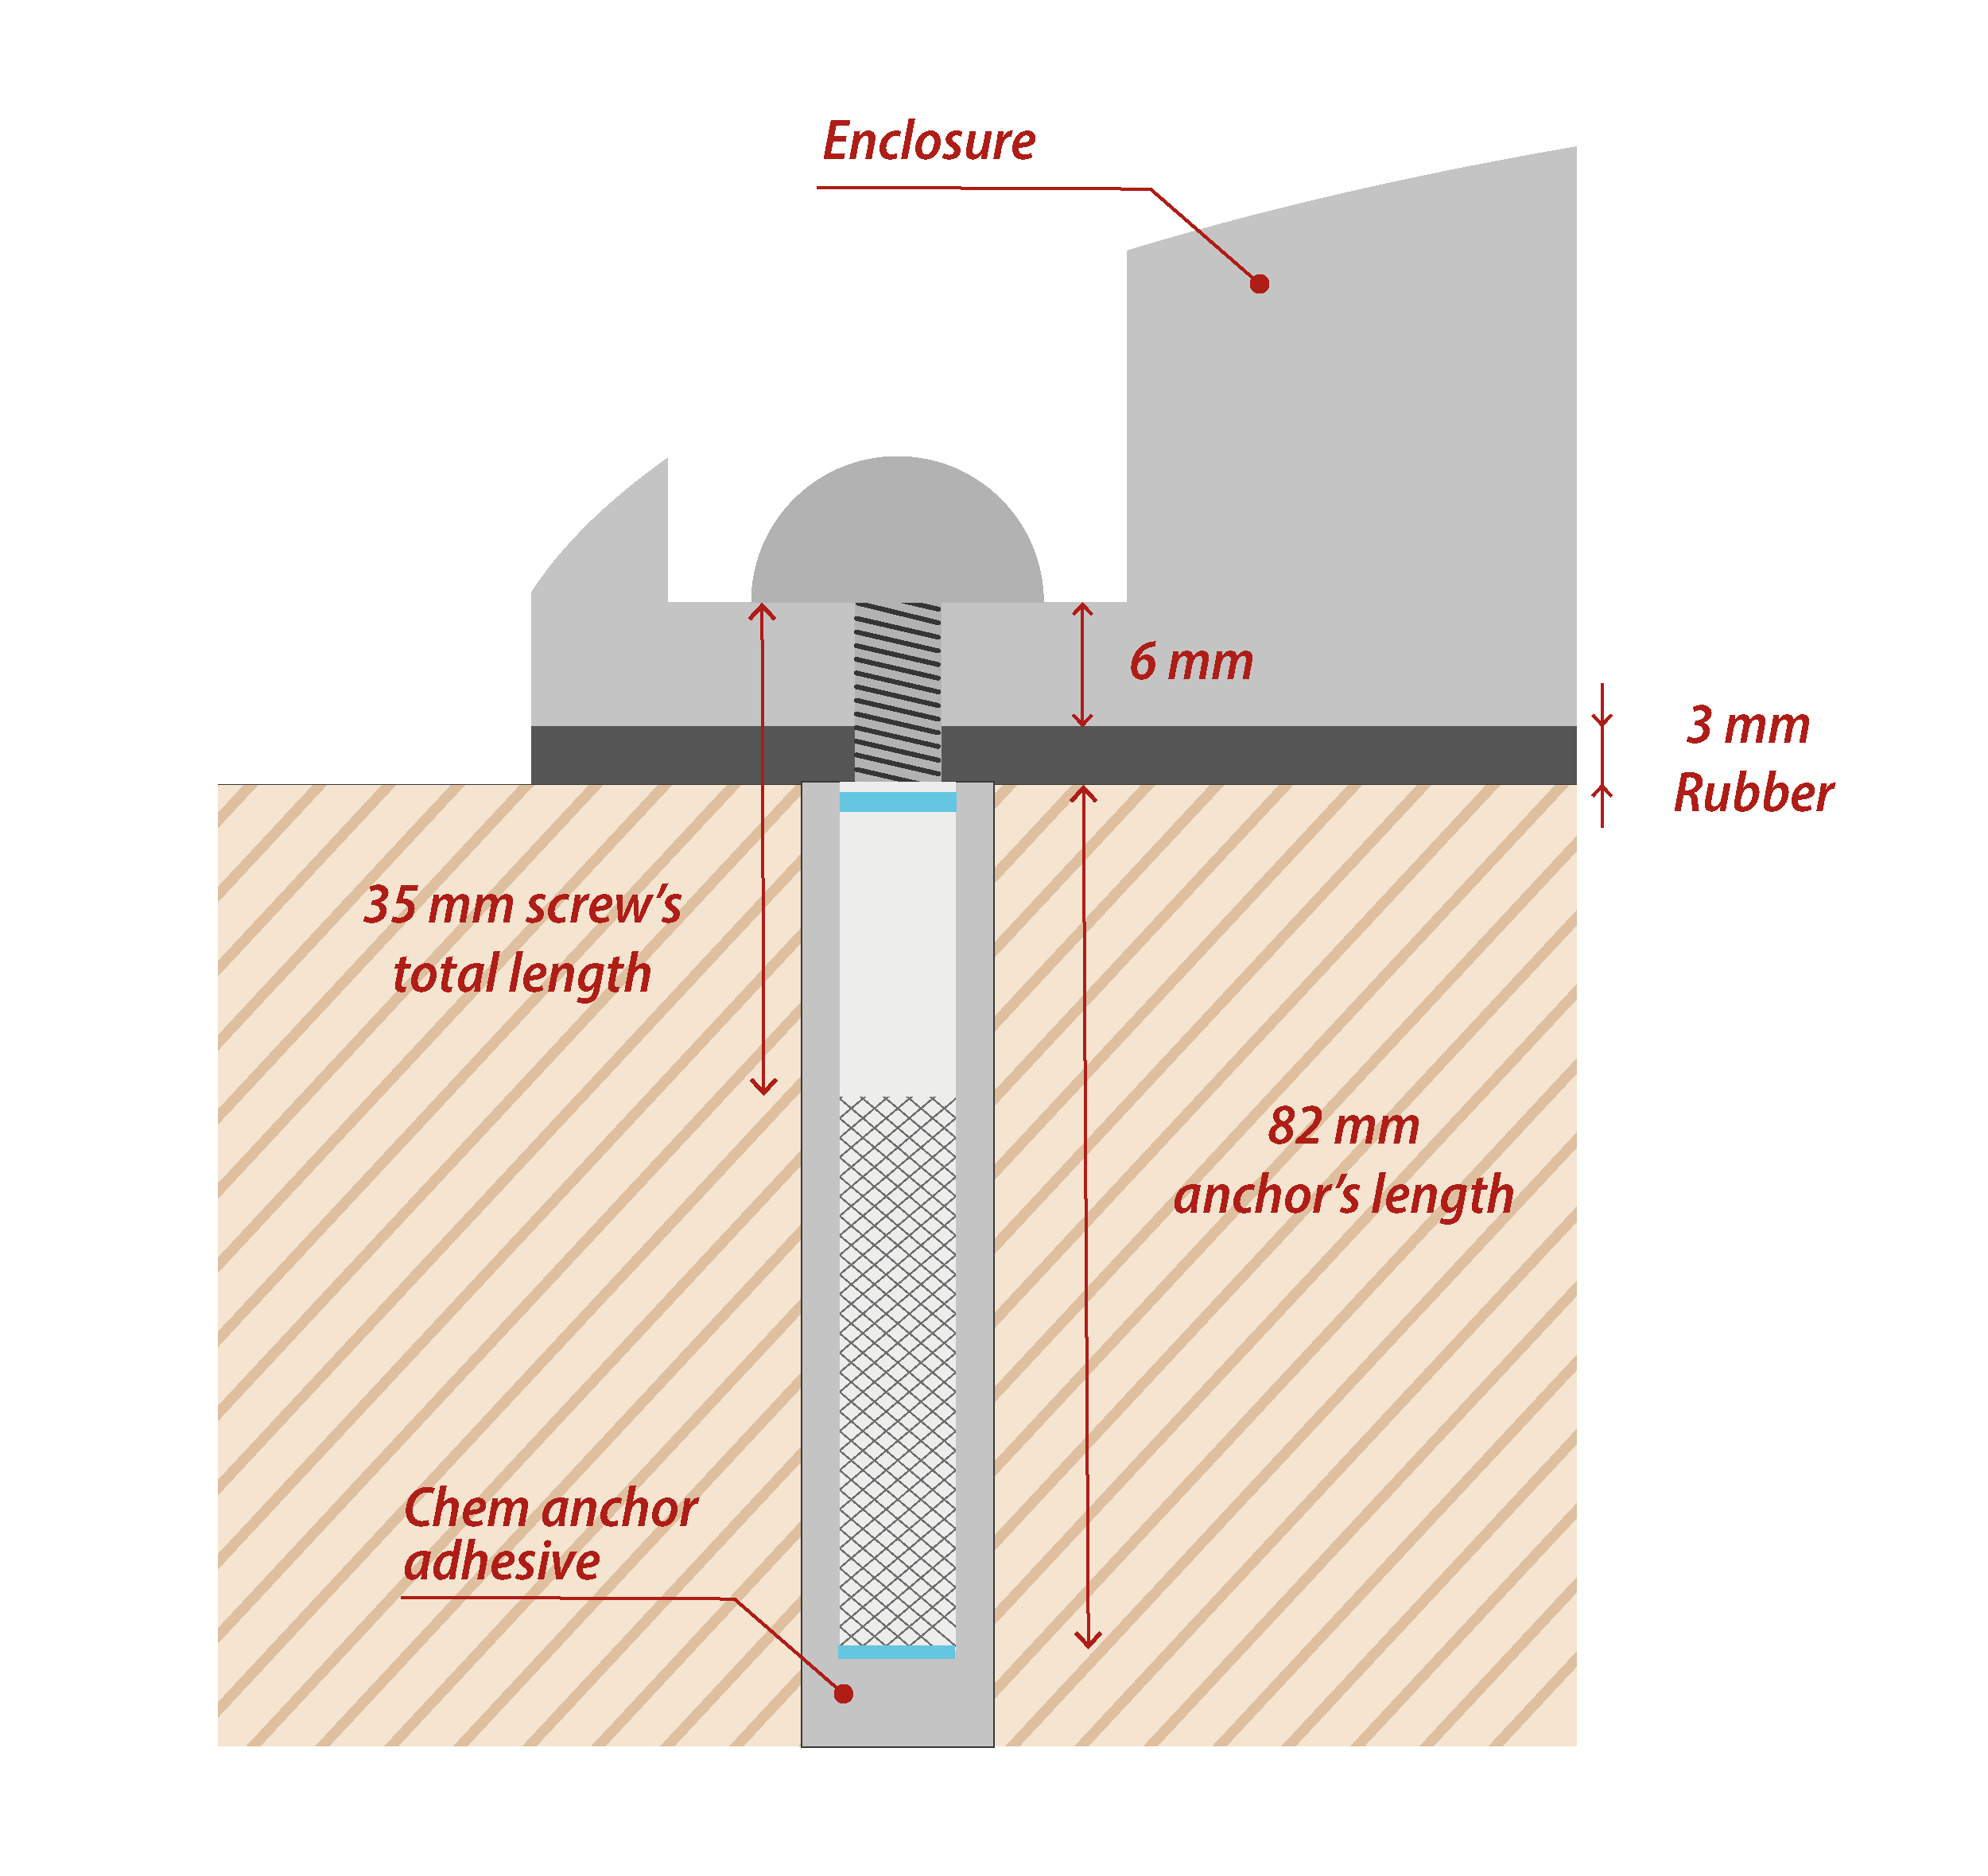
Step 1: Drill the holes. The drill diameter must be W=14 mm minimum. Try to drill as vertical as possible to enable the best enclosure installation. The length of the hole must be about H=85 mm.
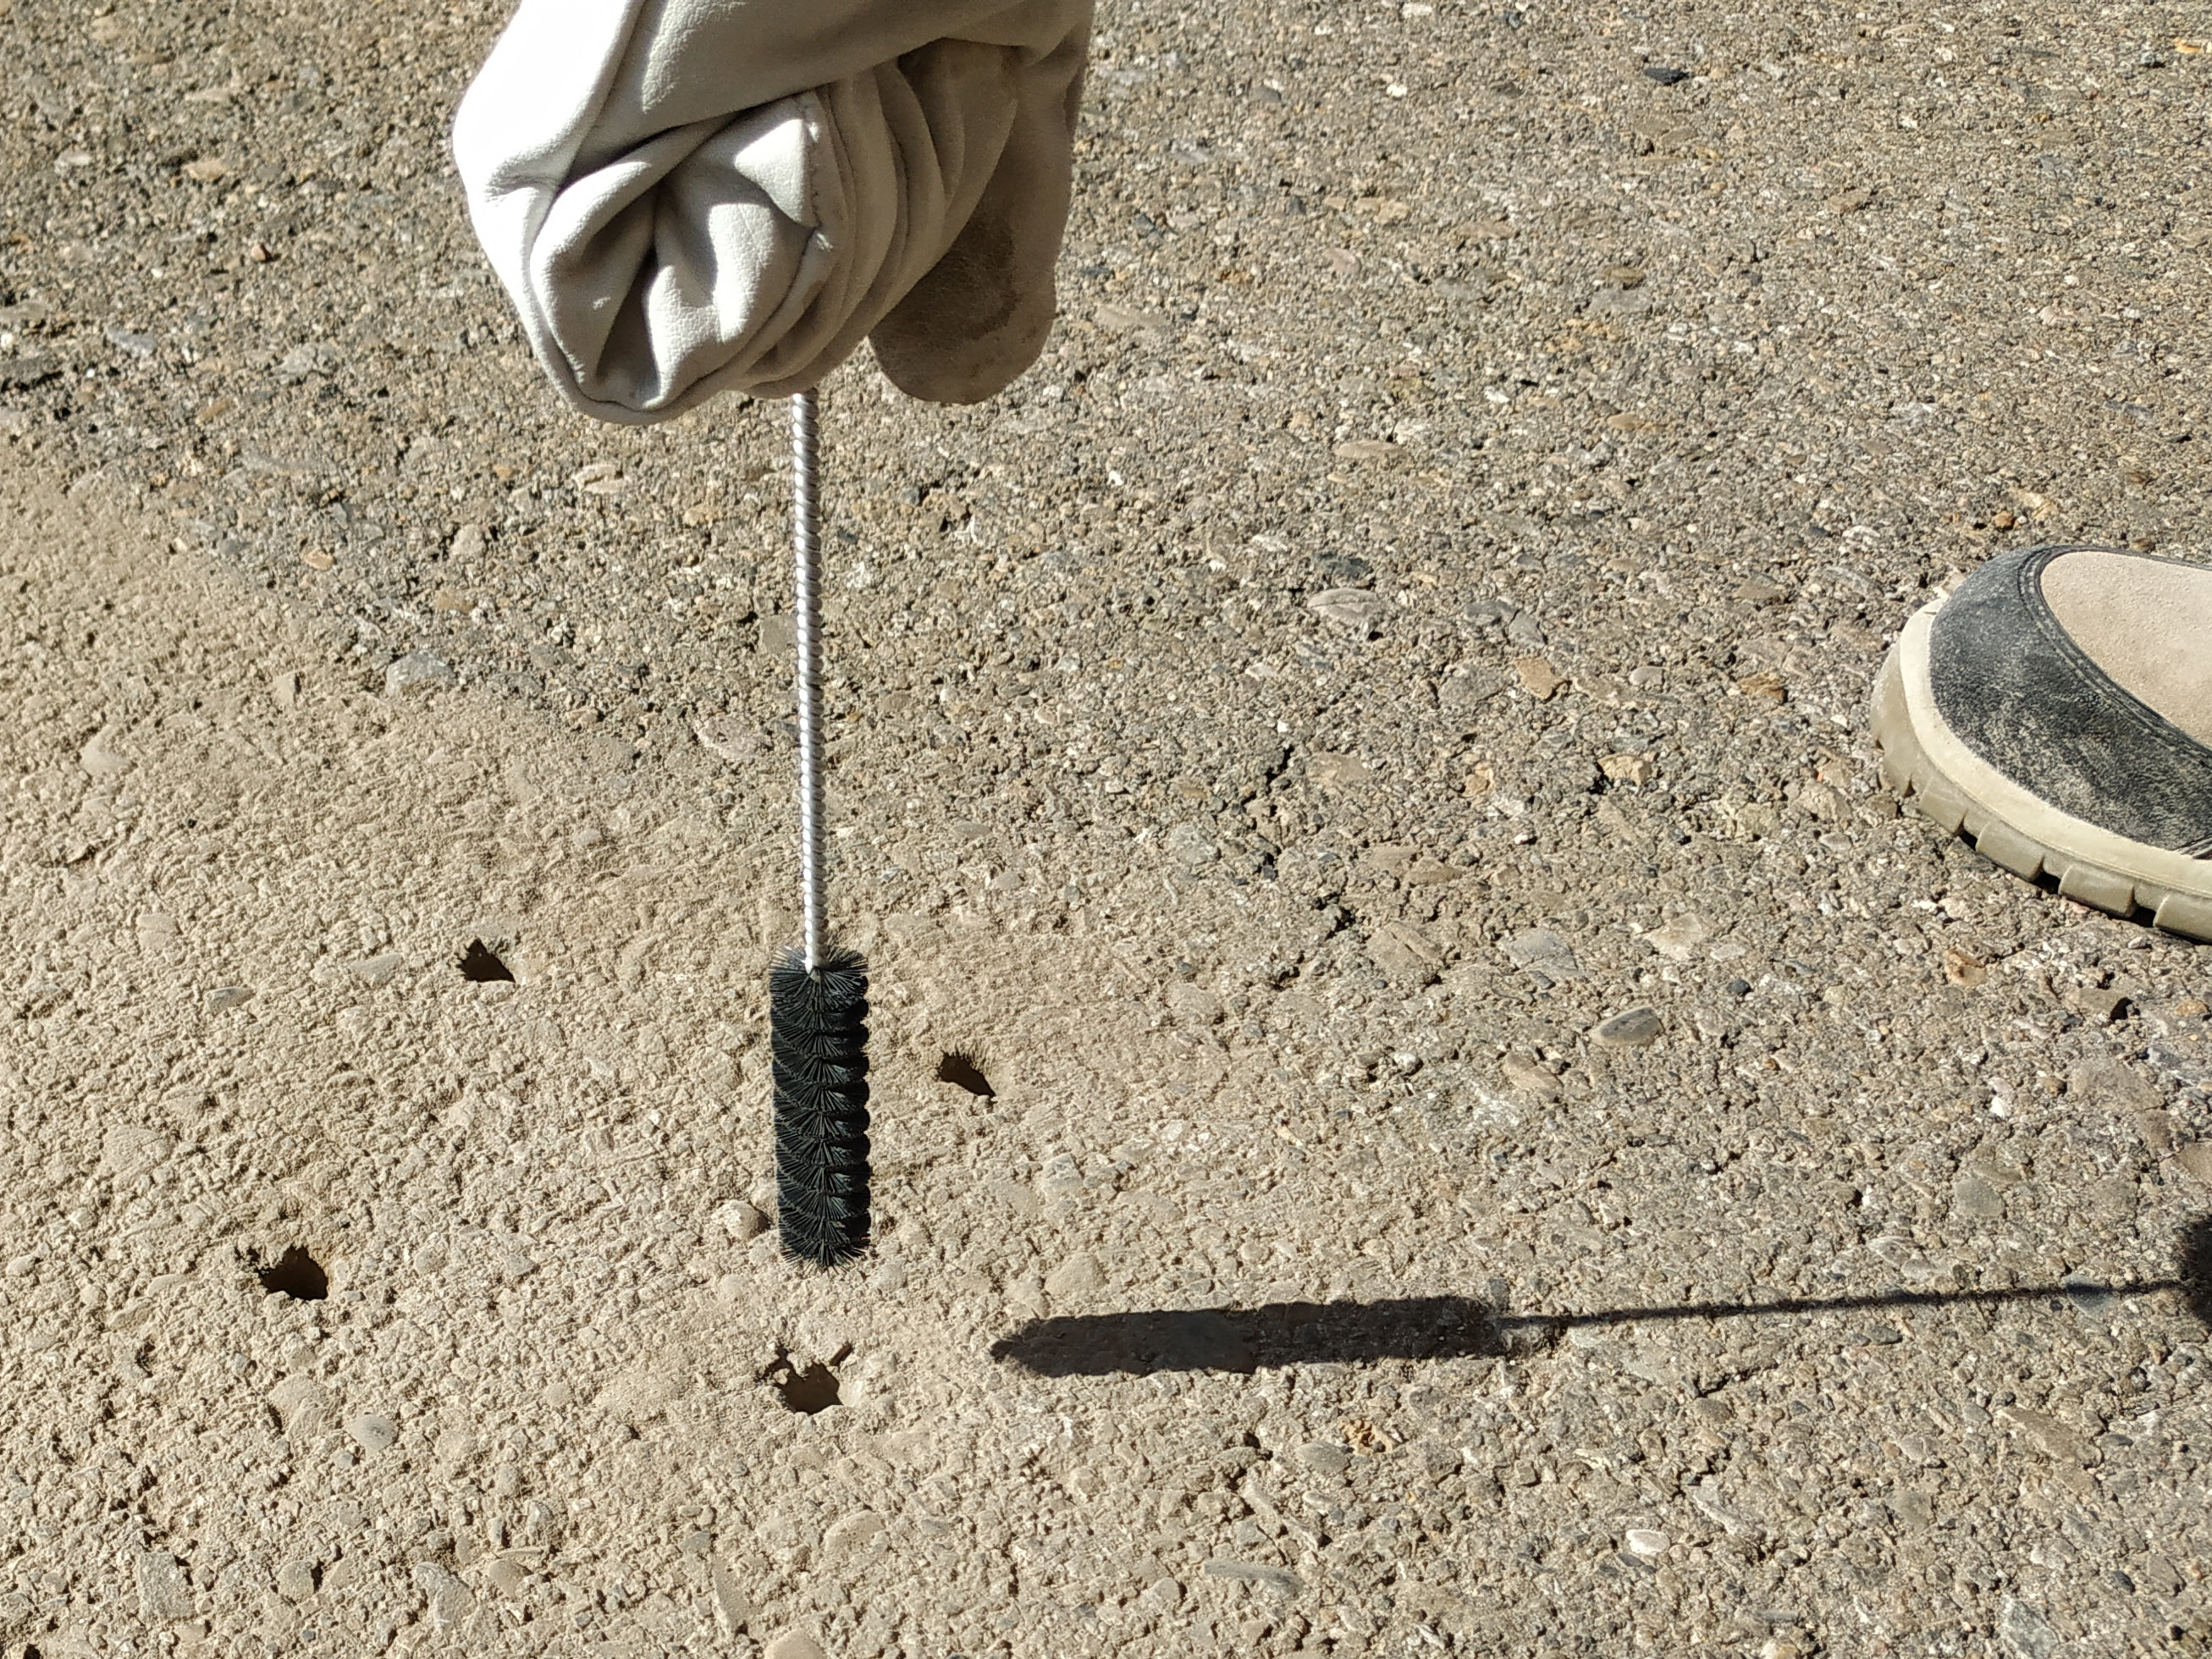
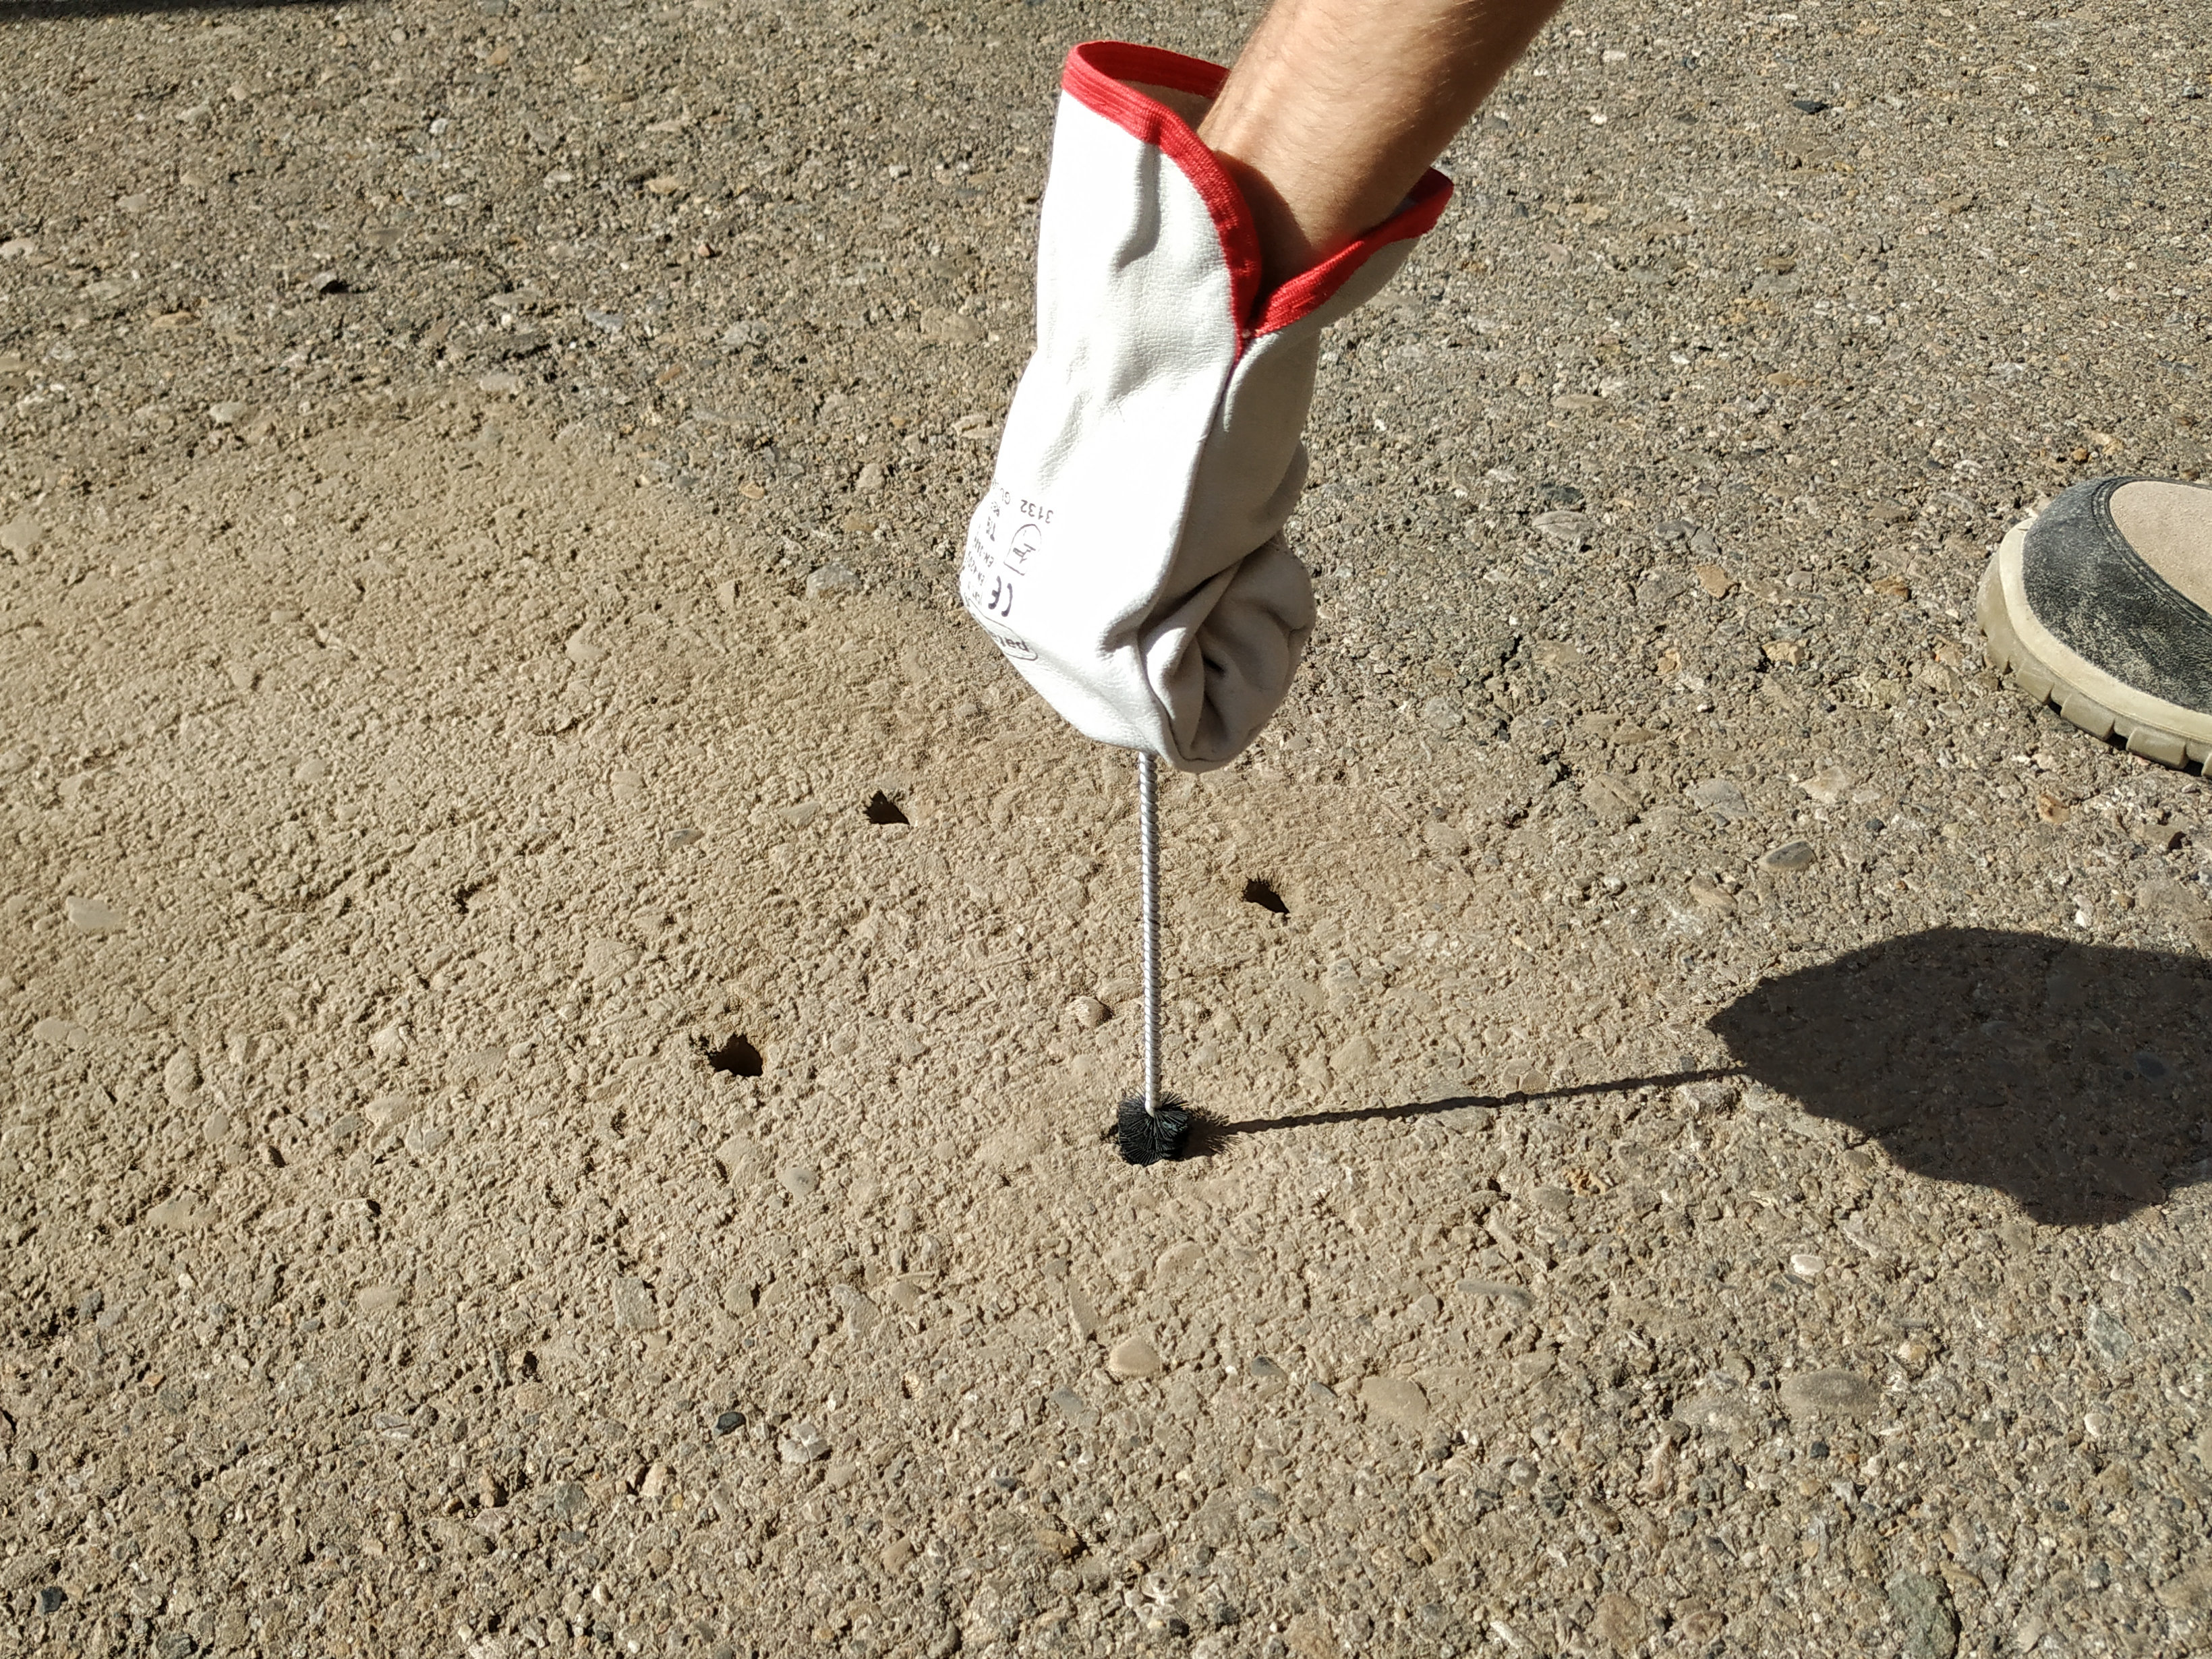
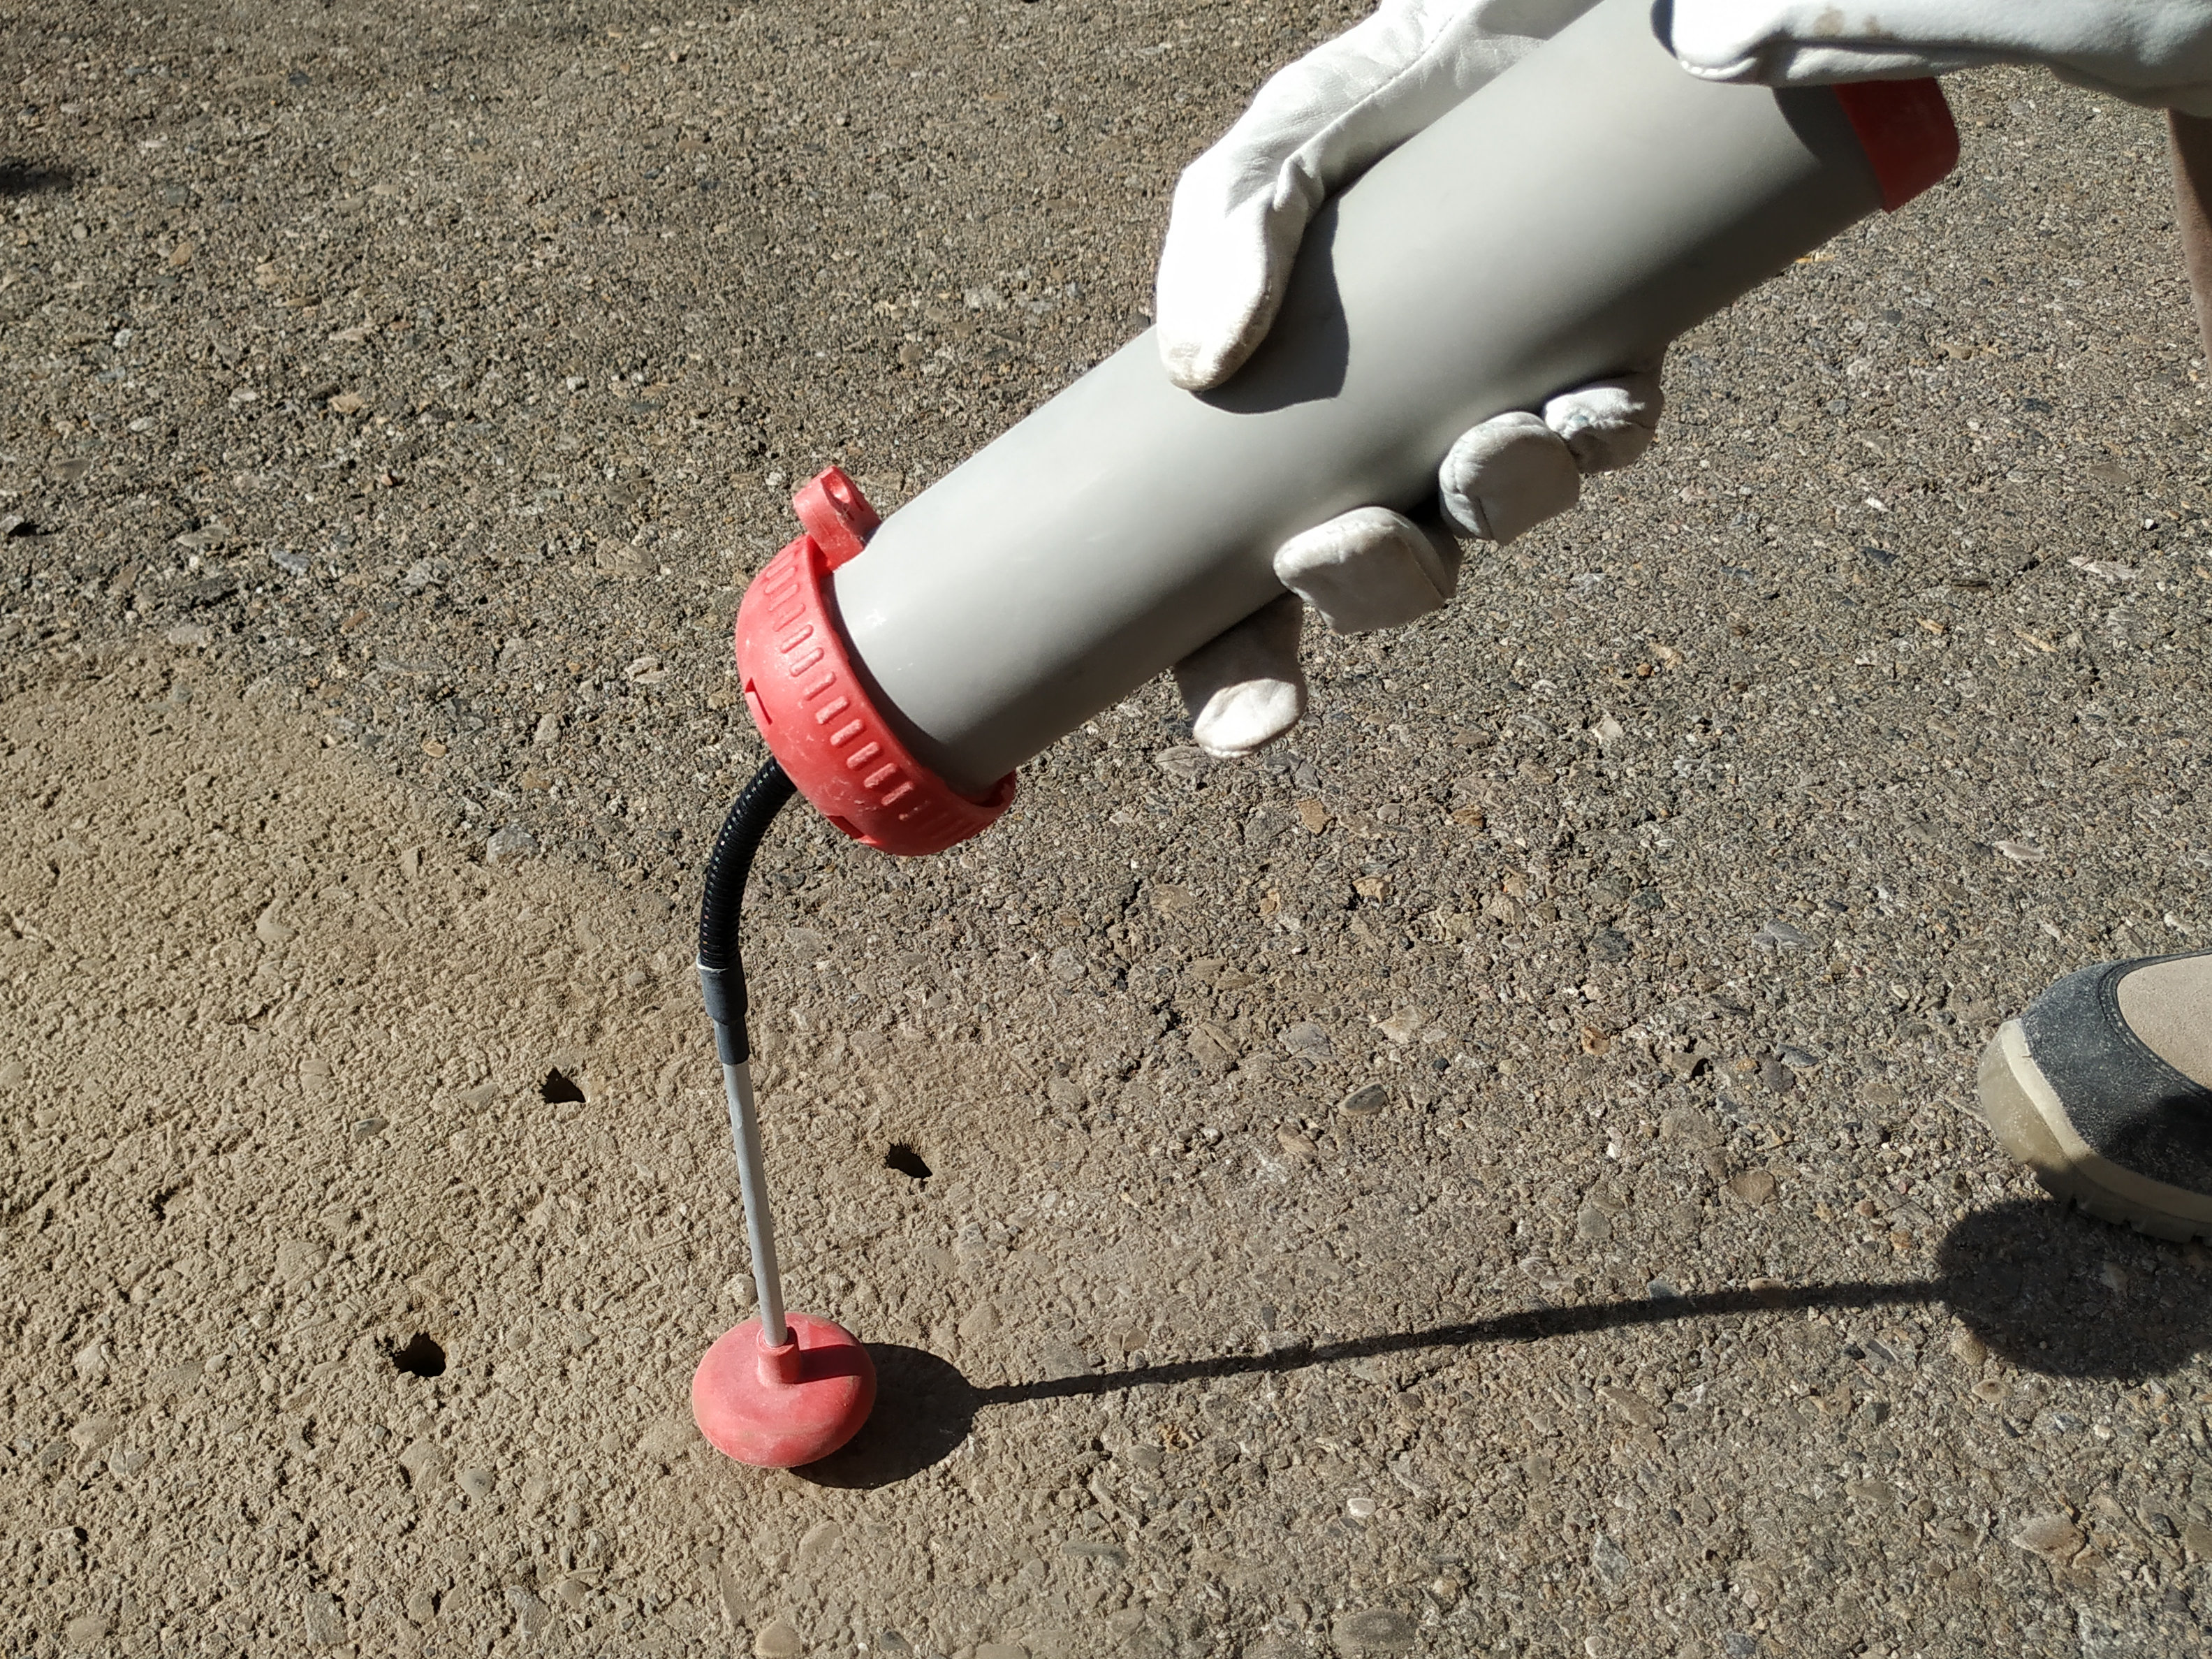
Step 2, 3 and 4: Blow out dust and loose materials. Remove all the dust and little rocks inside the 4 holes, created during the drilling operation. This is important to allow the anchors go all the way down. You can clean each hole mechanically and then use a bottle of spray duster (high-pressure air bottle). Make sure that the real depth of the hole is enough.
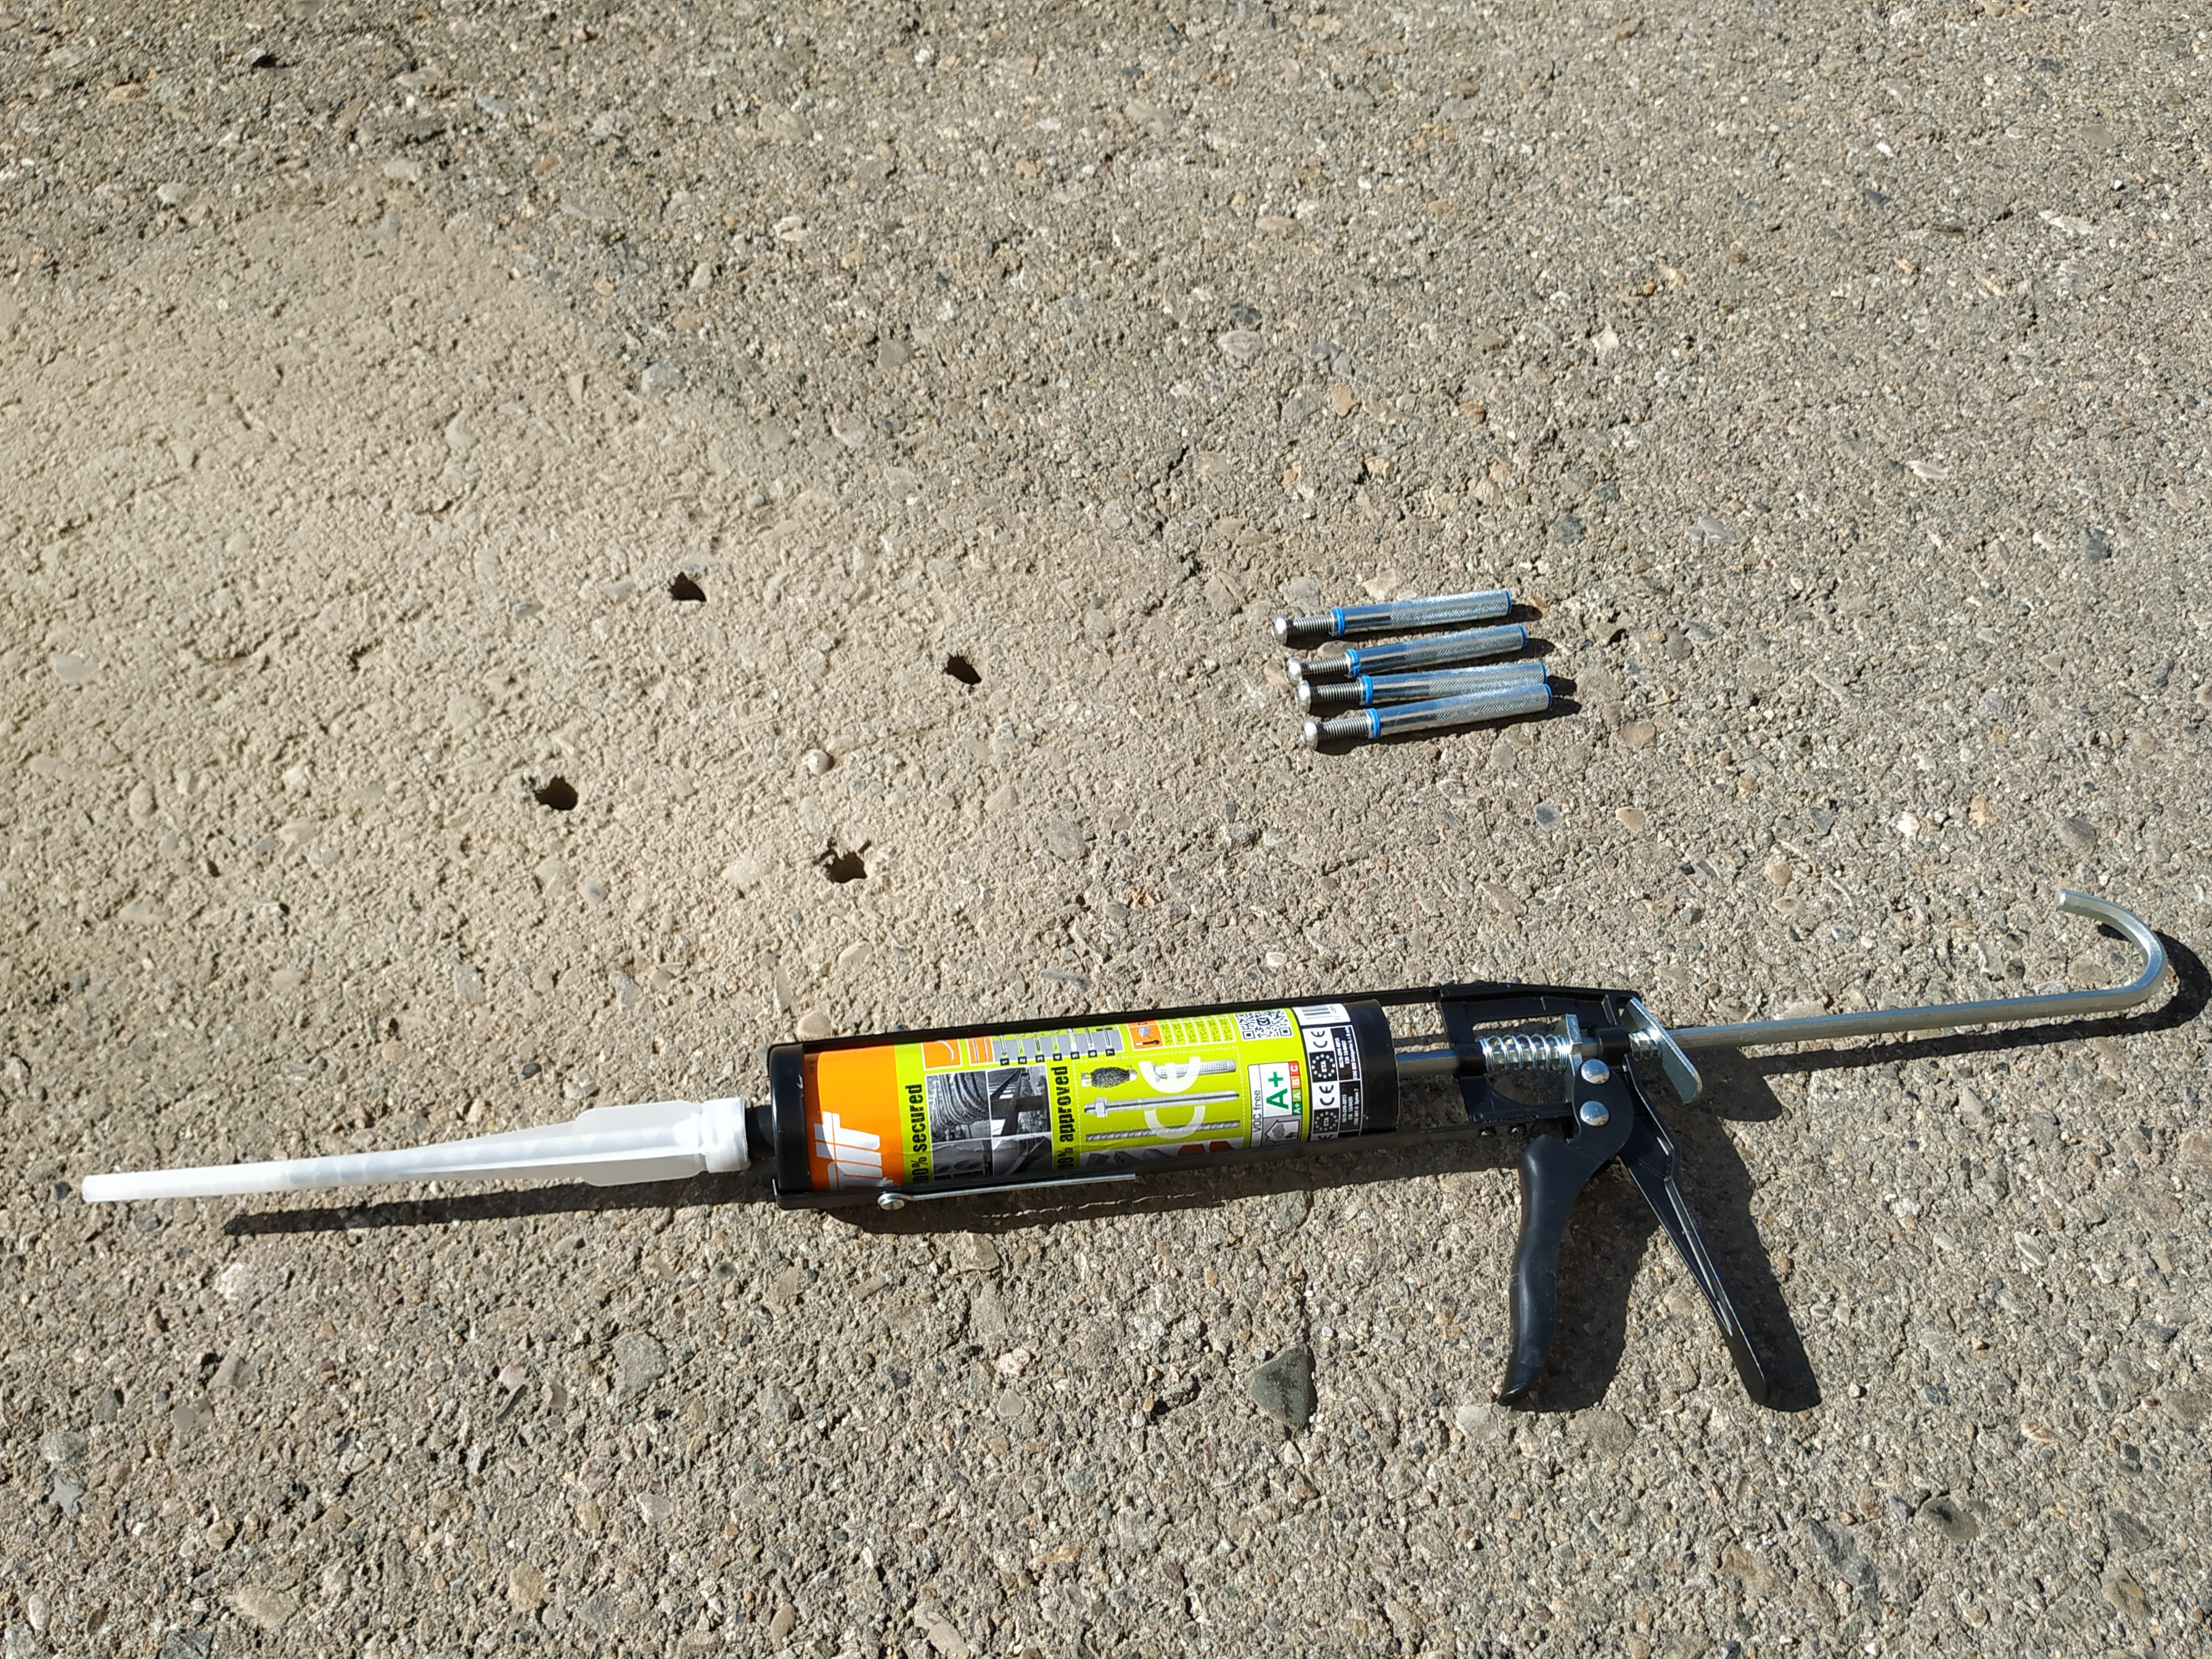
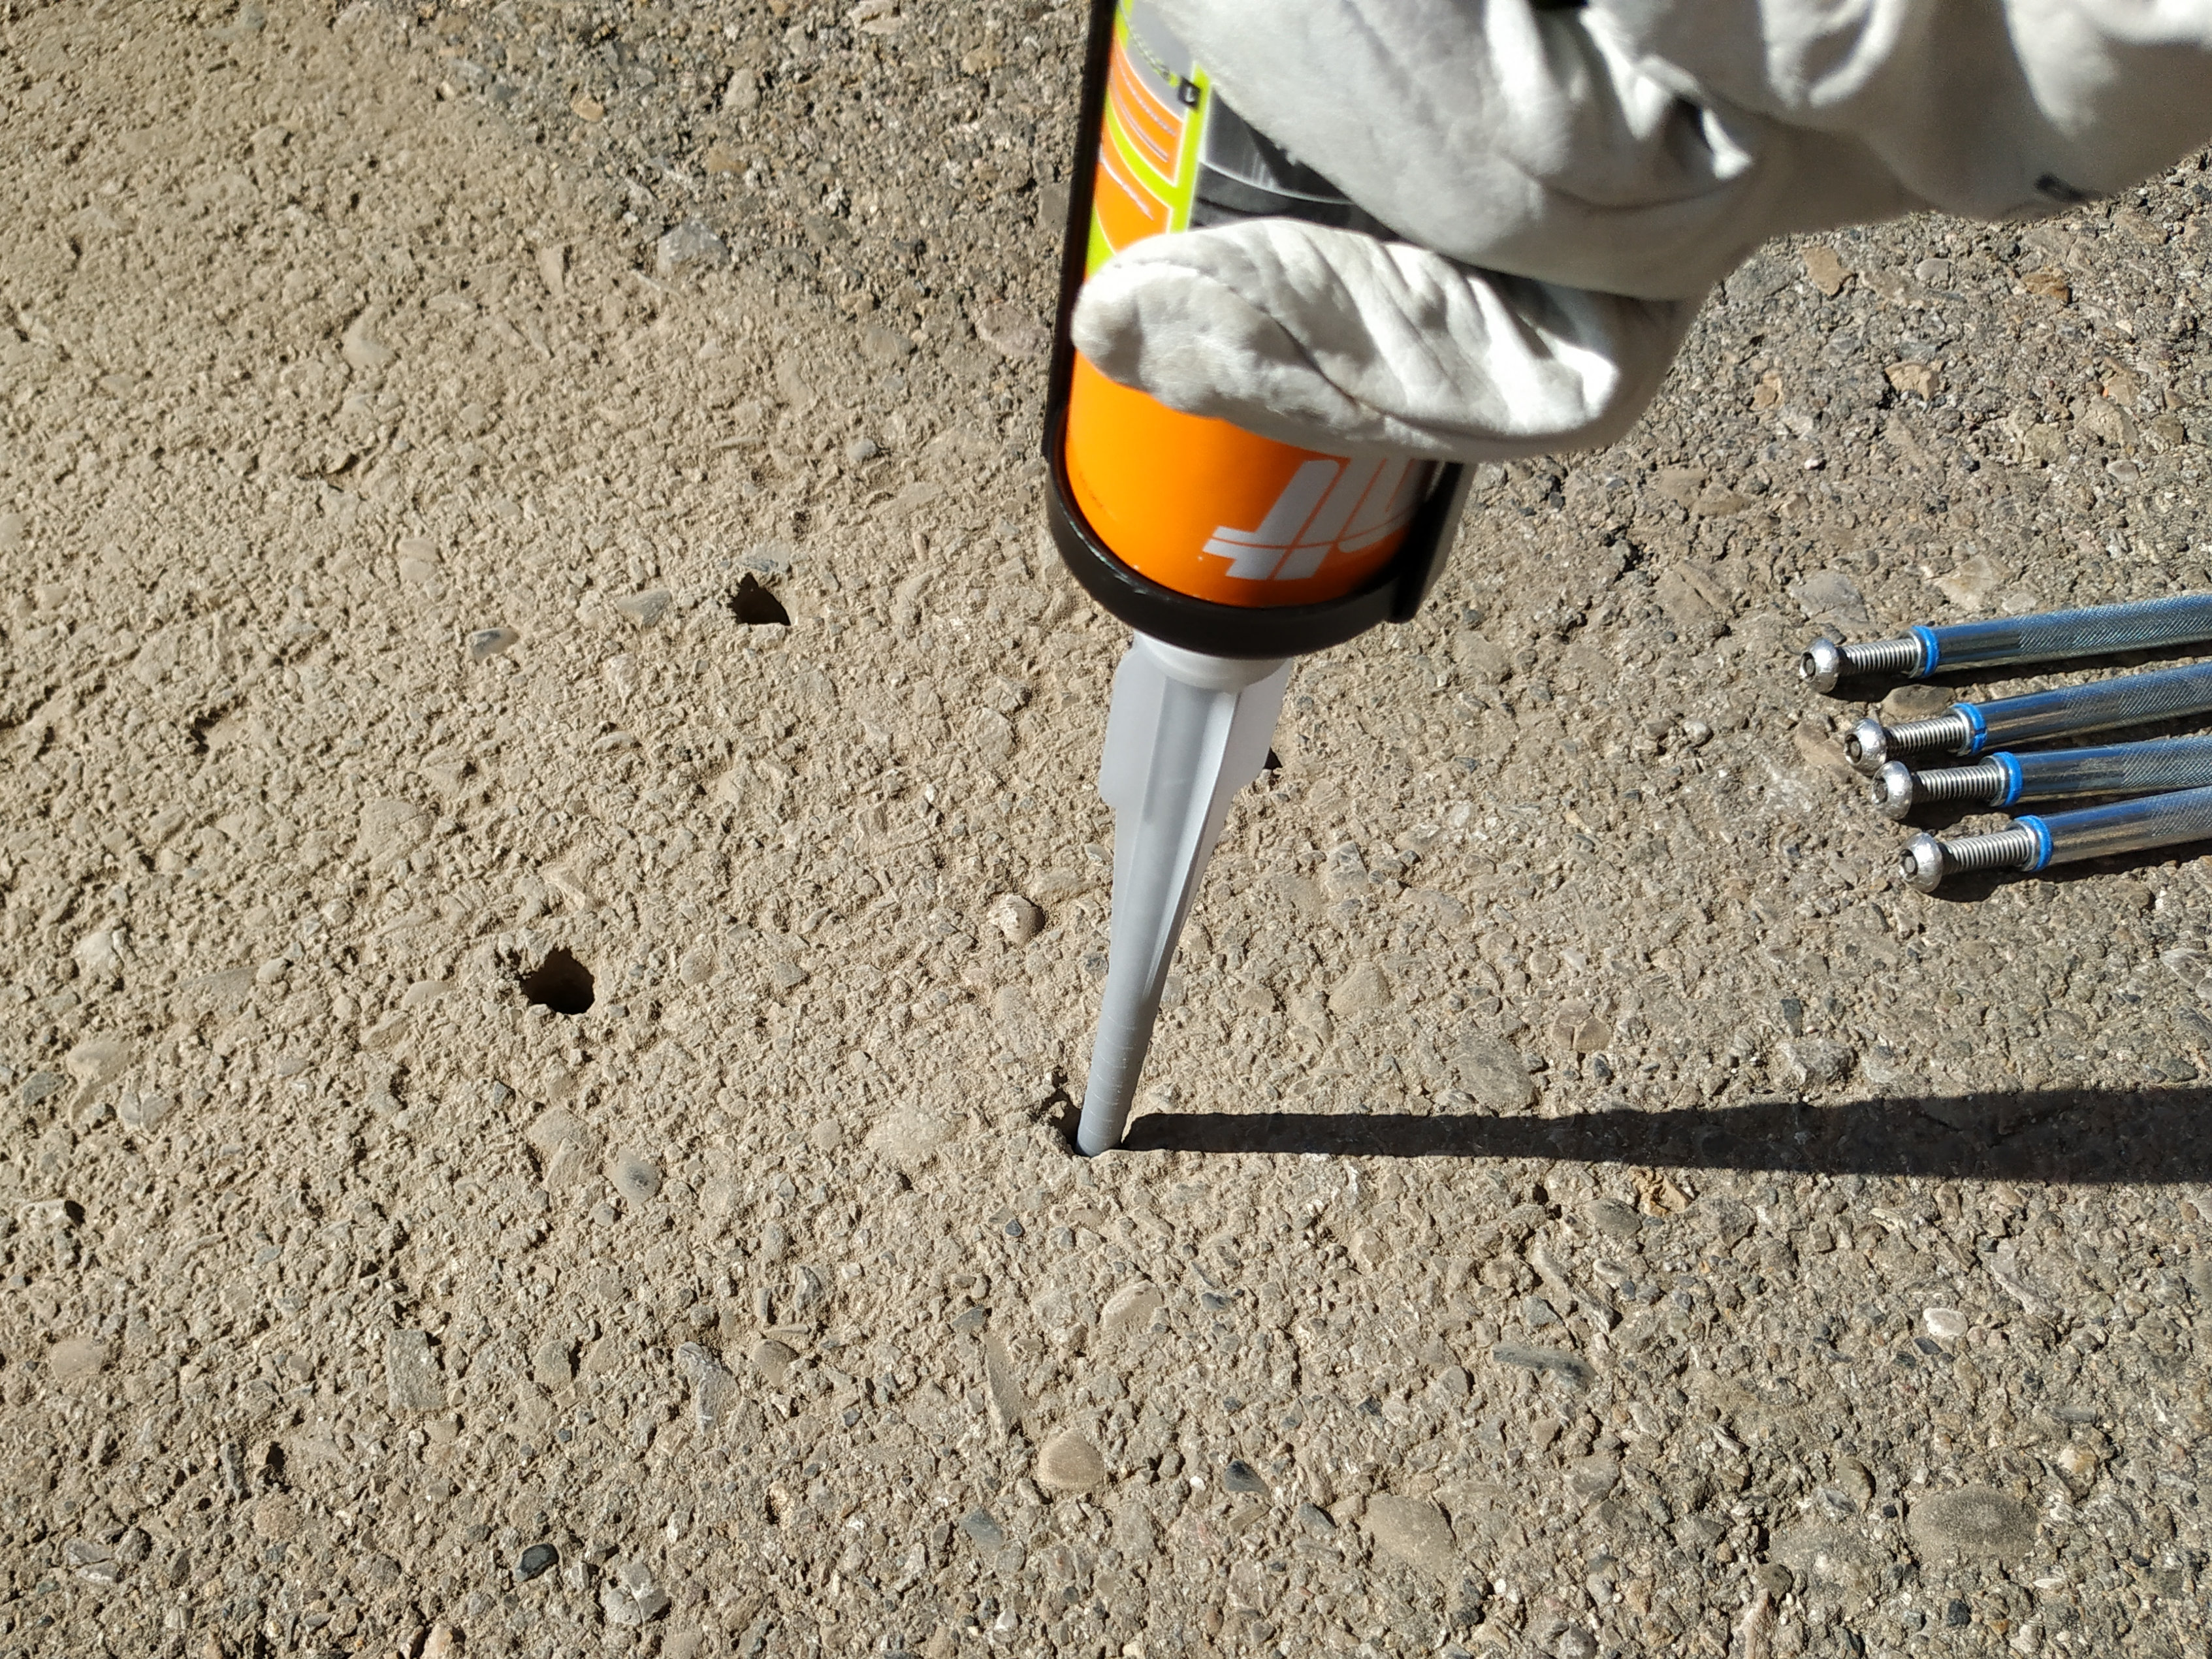
Step 5: Inject the chemical fixing. The chemical fixing shall be injected into the 4 holes carefully. You must keep in mind that this chemical adhesive must fill the complementary space the anchor leaves in the hole. So the whole hole does not have to be fully filled with adhesive because there is no space left for the anchor. The chemical adhesive quantity to be injected will depend on the dimensions of the holes.
Step 6: Insert the anchors. Once the adhesive is injected, the anchor must be carefully inserted into the hole. Rotating the anchor by hand while inserting it is a good practice. Therefore, the adhesive fills and completes all the empty space left by the anchor in the hole. Once the anchor is correctly inserted, some adhesive might exceed from the hole. This residuary adhesive must be removed from the installation so the are no extra adhesive and the anchor installation is clean and smooth.
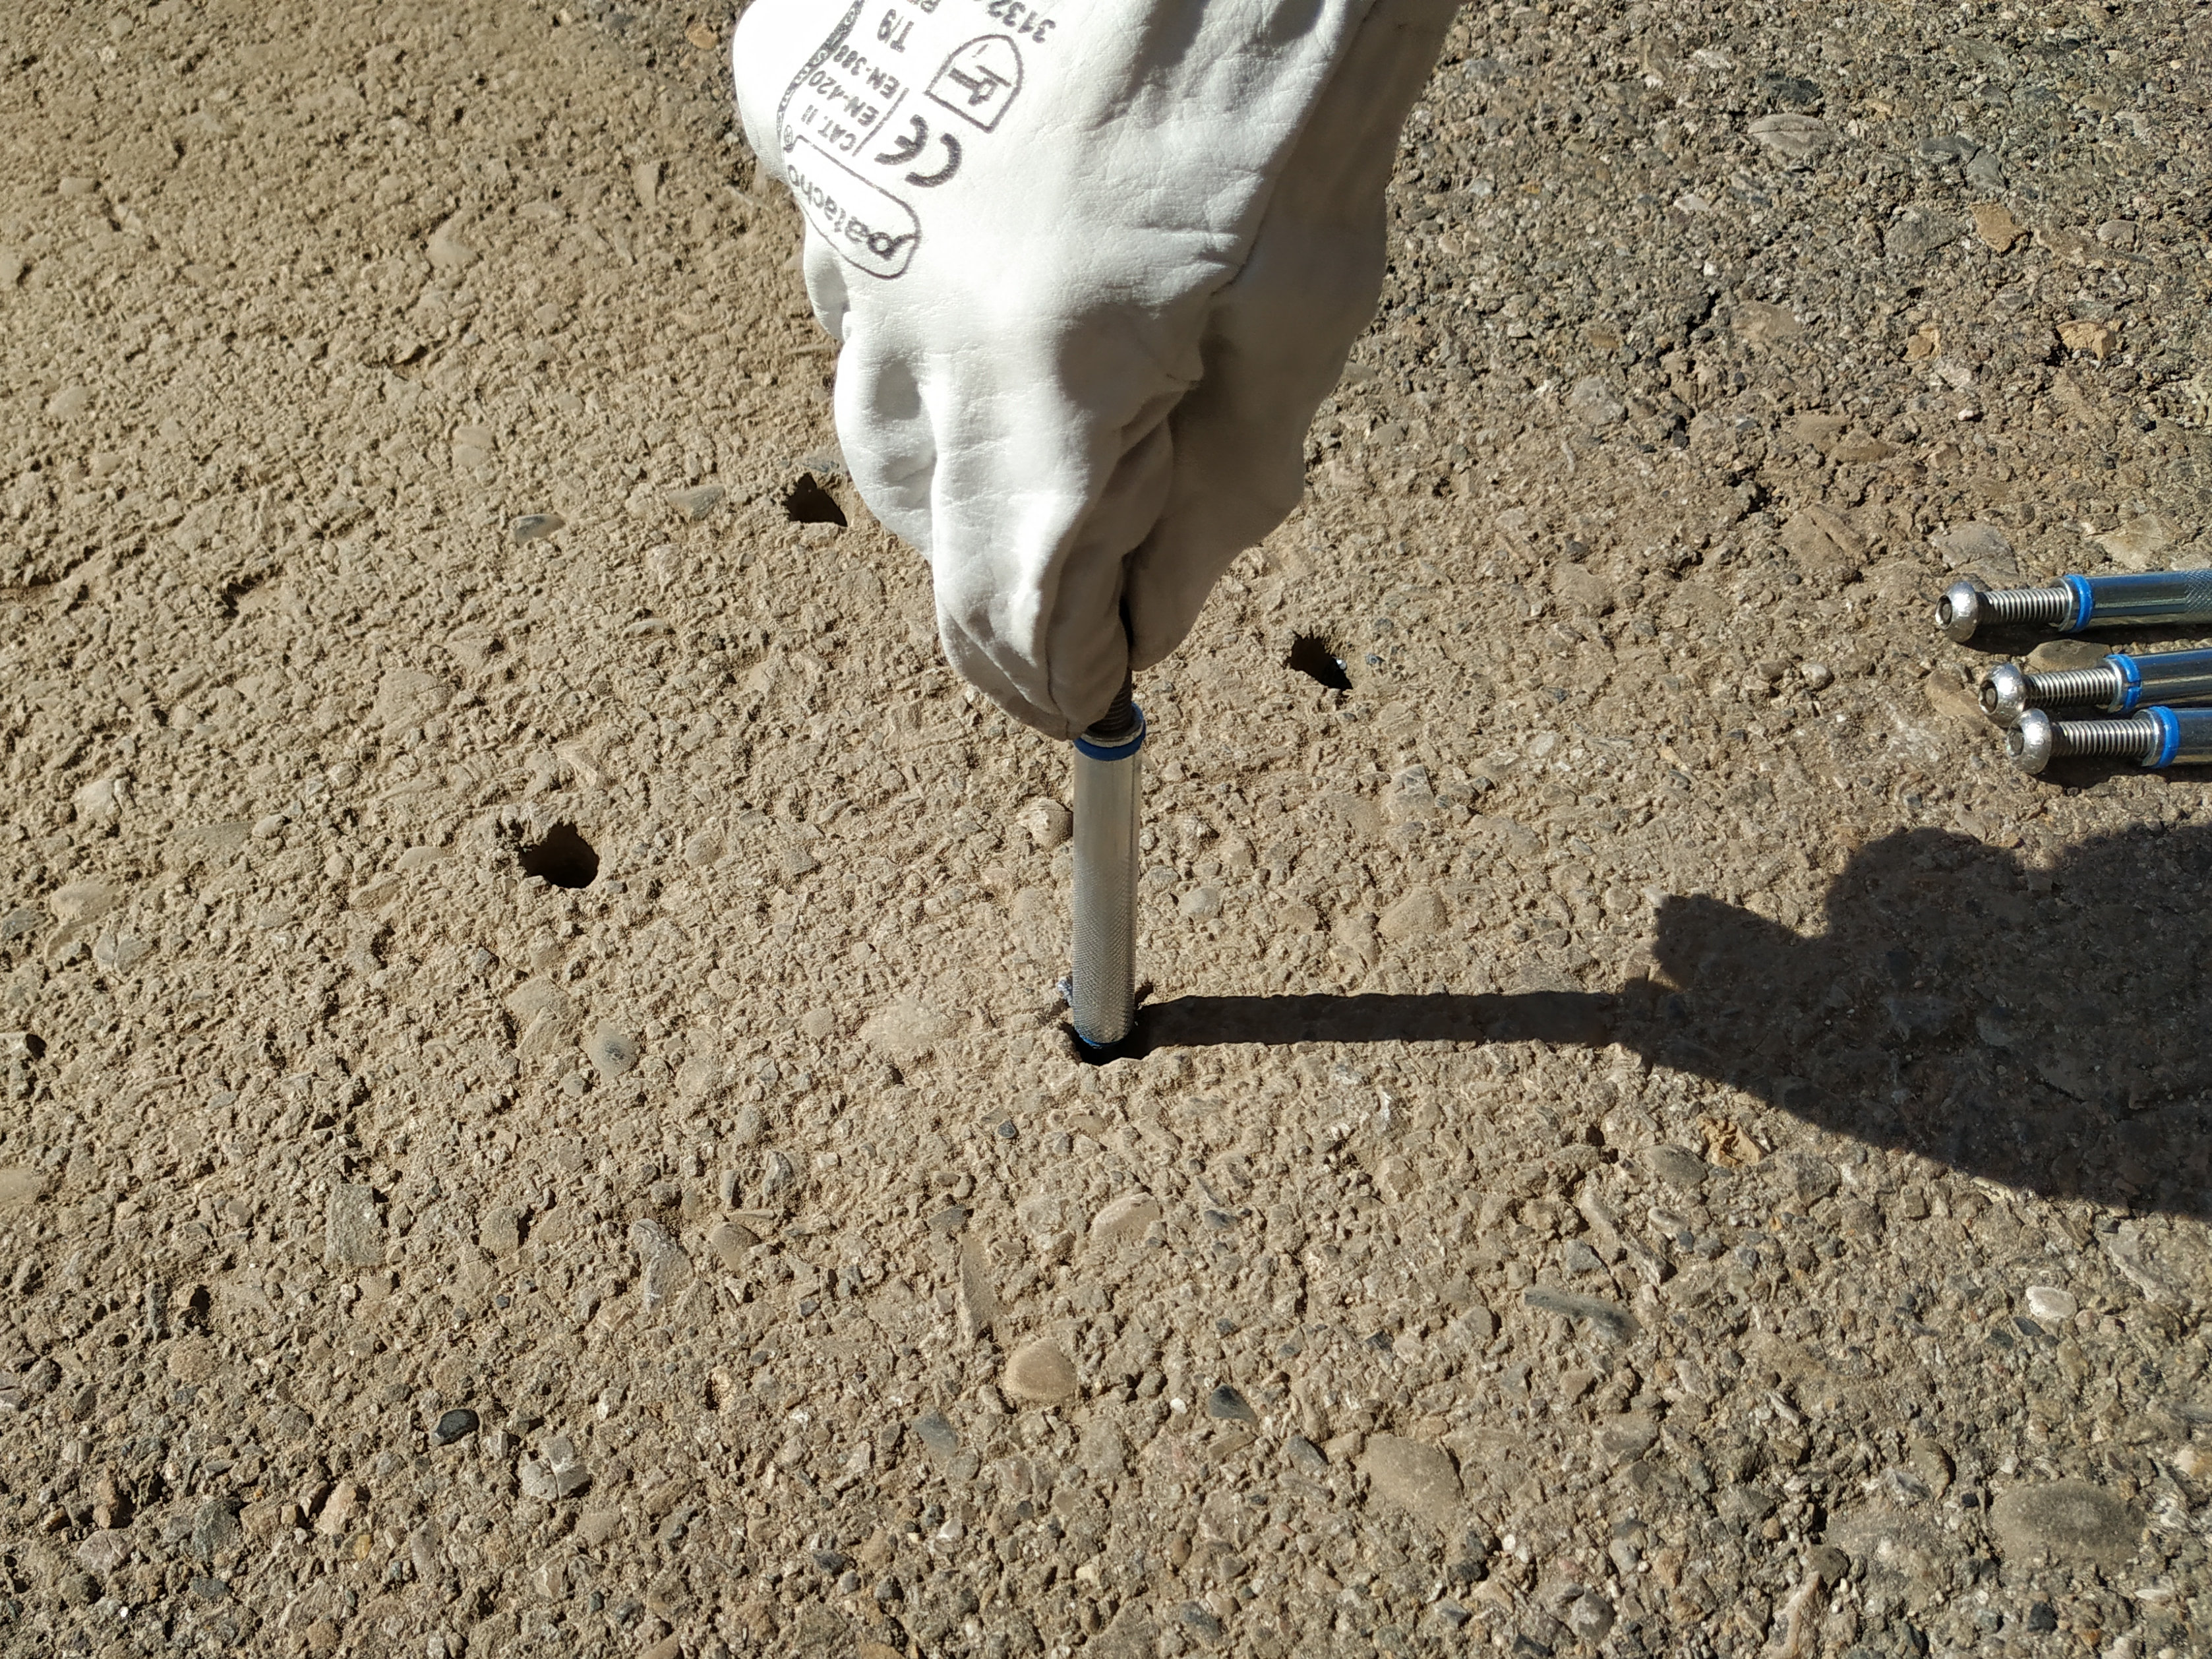
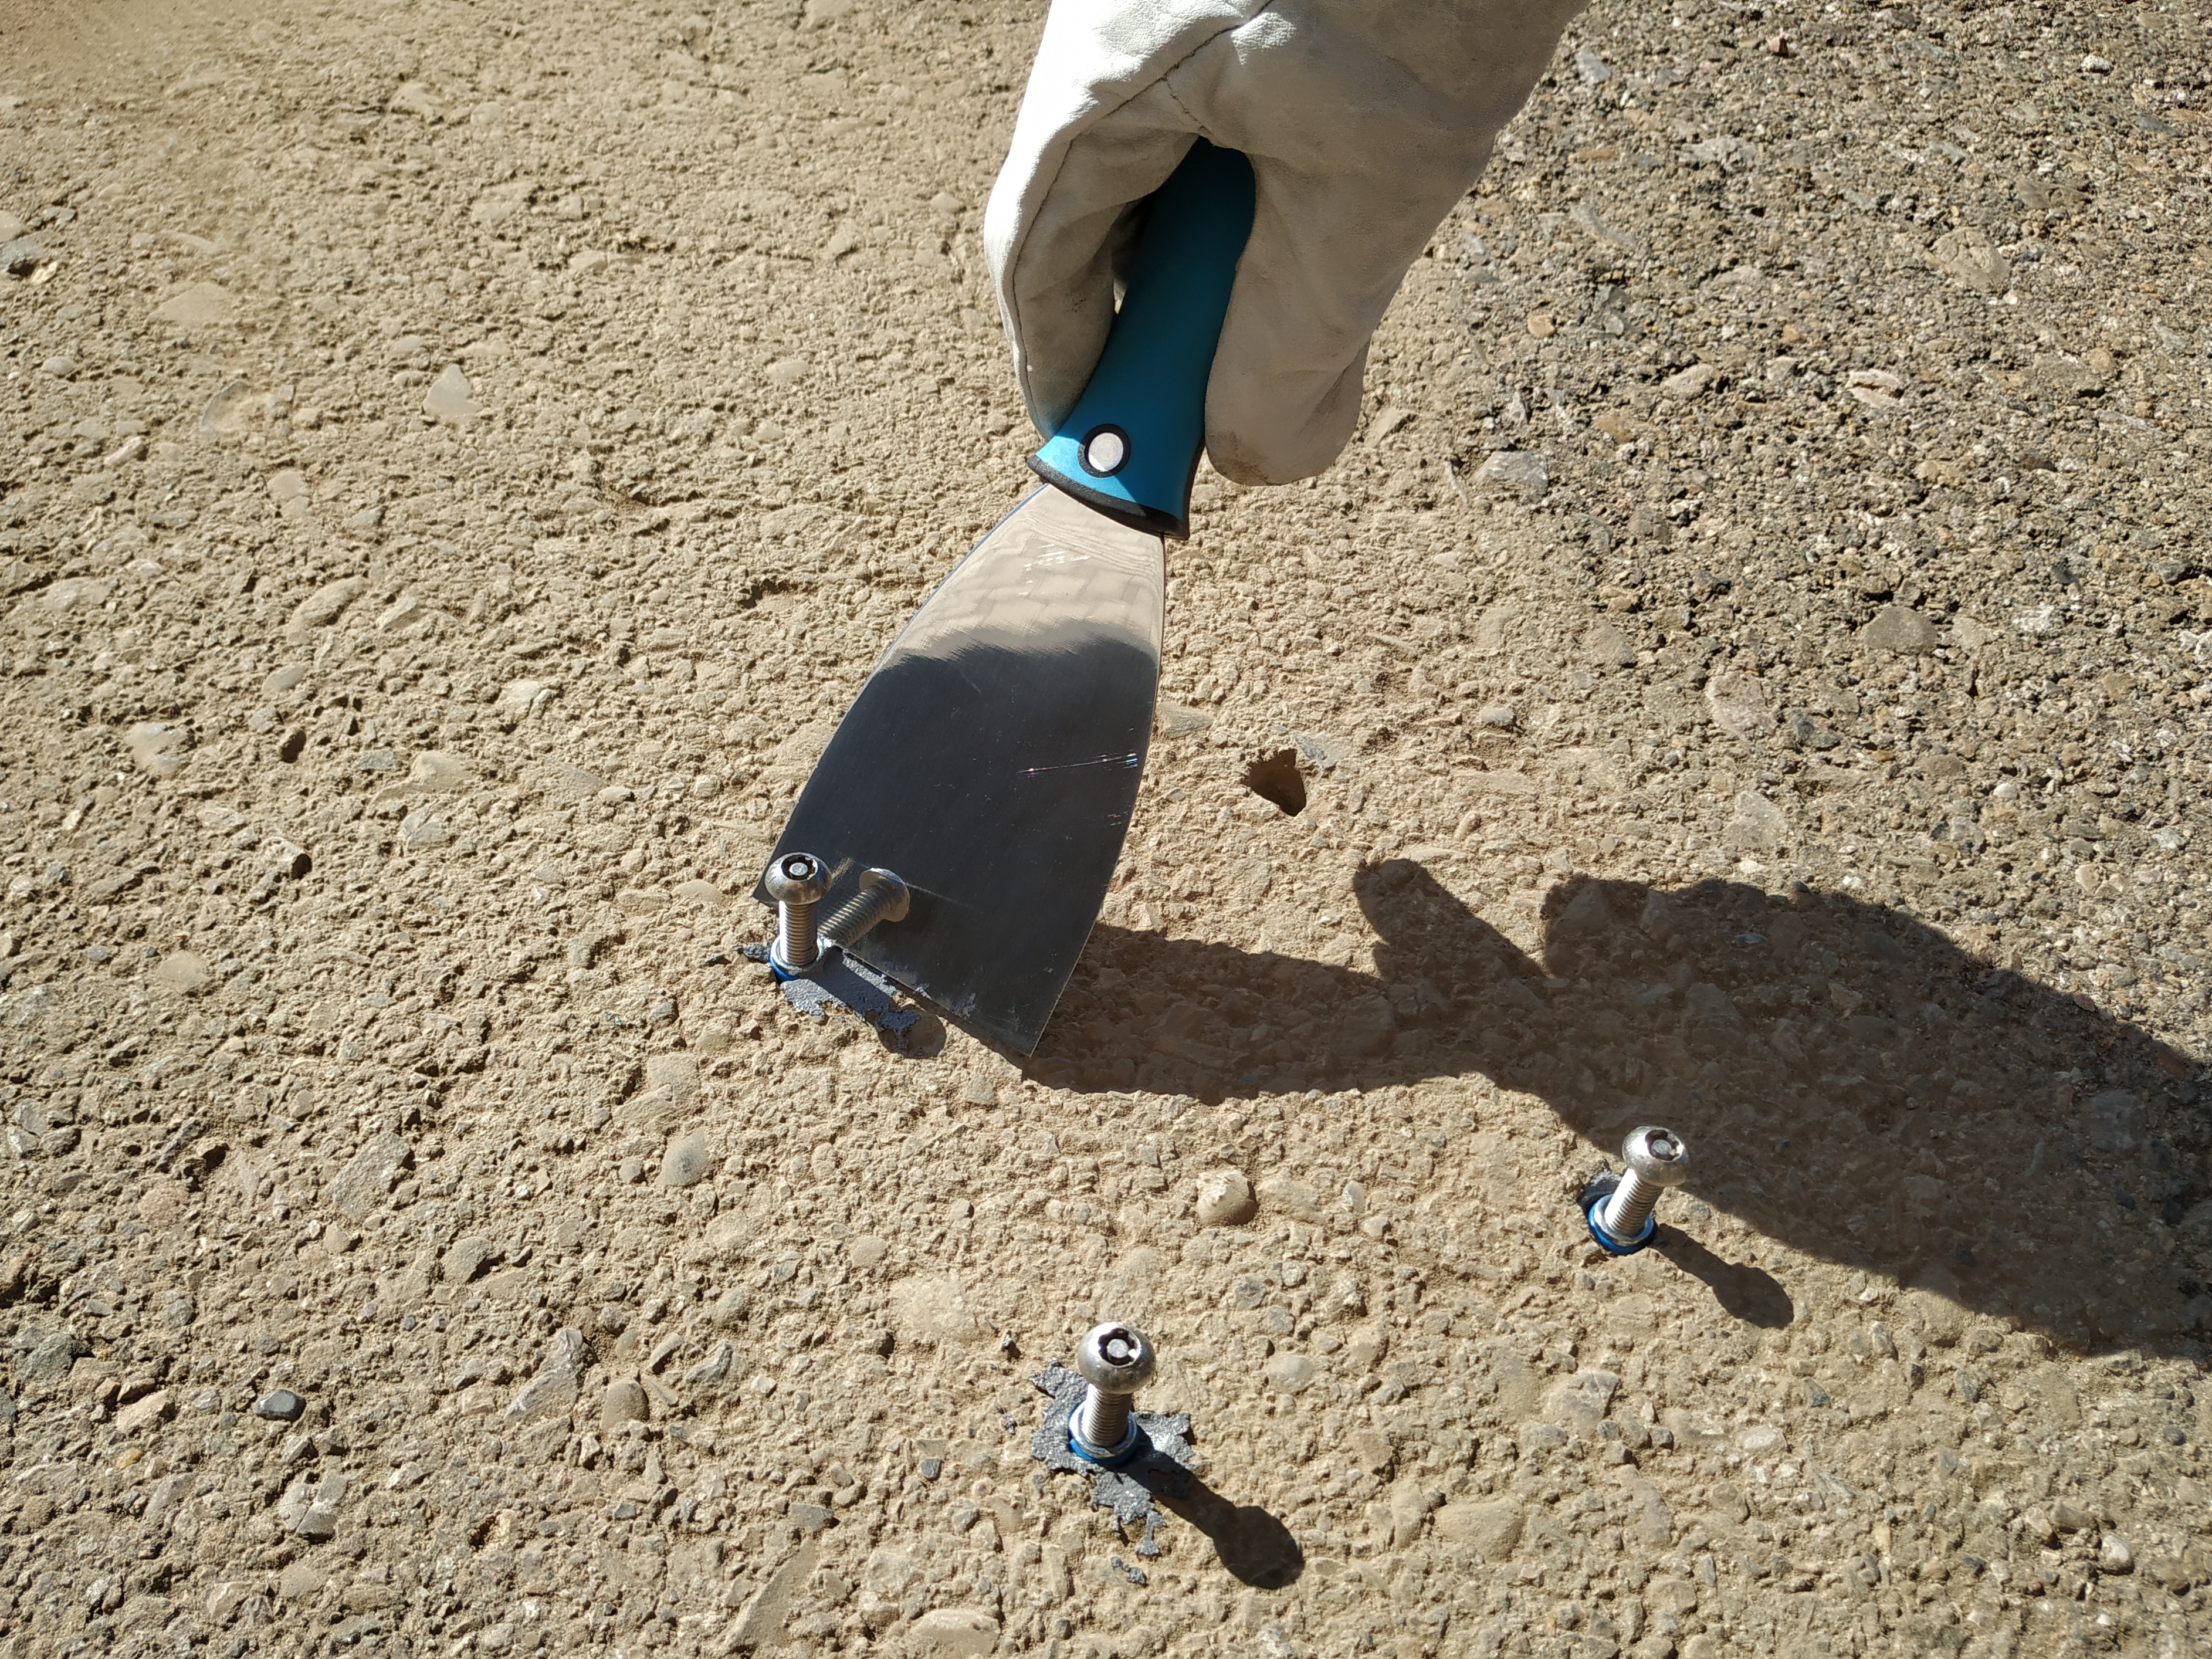
Step 7: Finish anchors installation. The anchors have an internal thread to screw the screws. Inserting the anchors with the screws partially inserted might be a good practice in order to place the anchor correctly aligned within the hole (that means you can use the screw as a tool if it is partially inserted inside the anchor). Also, if the screw is inside the anchor, avoids that the adhesive accidentally gets inside the anchor. After cleaning the remaining adhesive from the hole, the user must wait some time until the chemical resin is solid and stable. After this period of time, the screws can be removed from the anchors and the installation is finished.
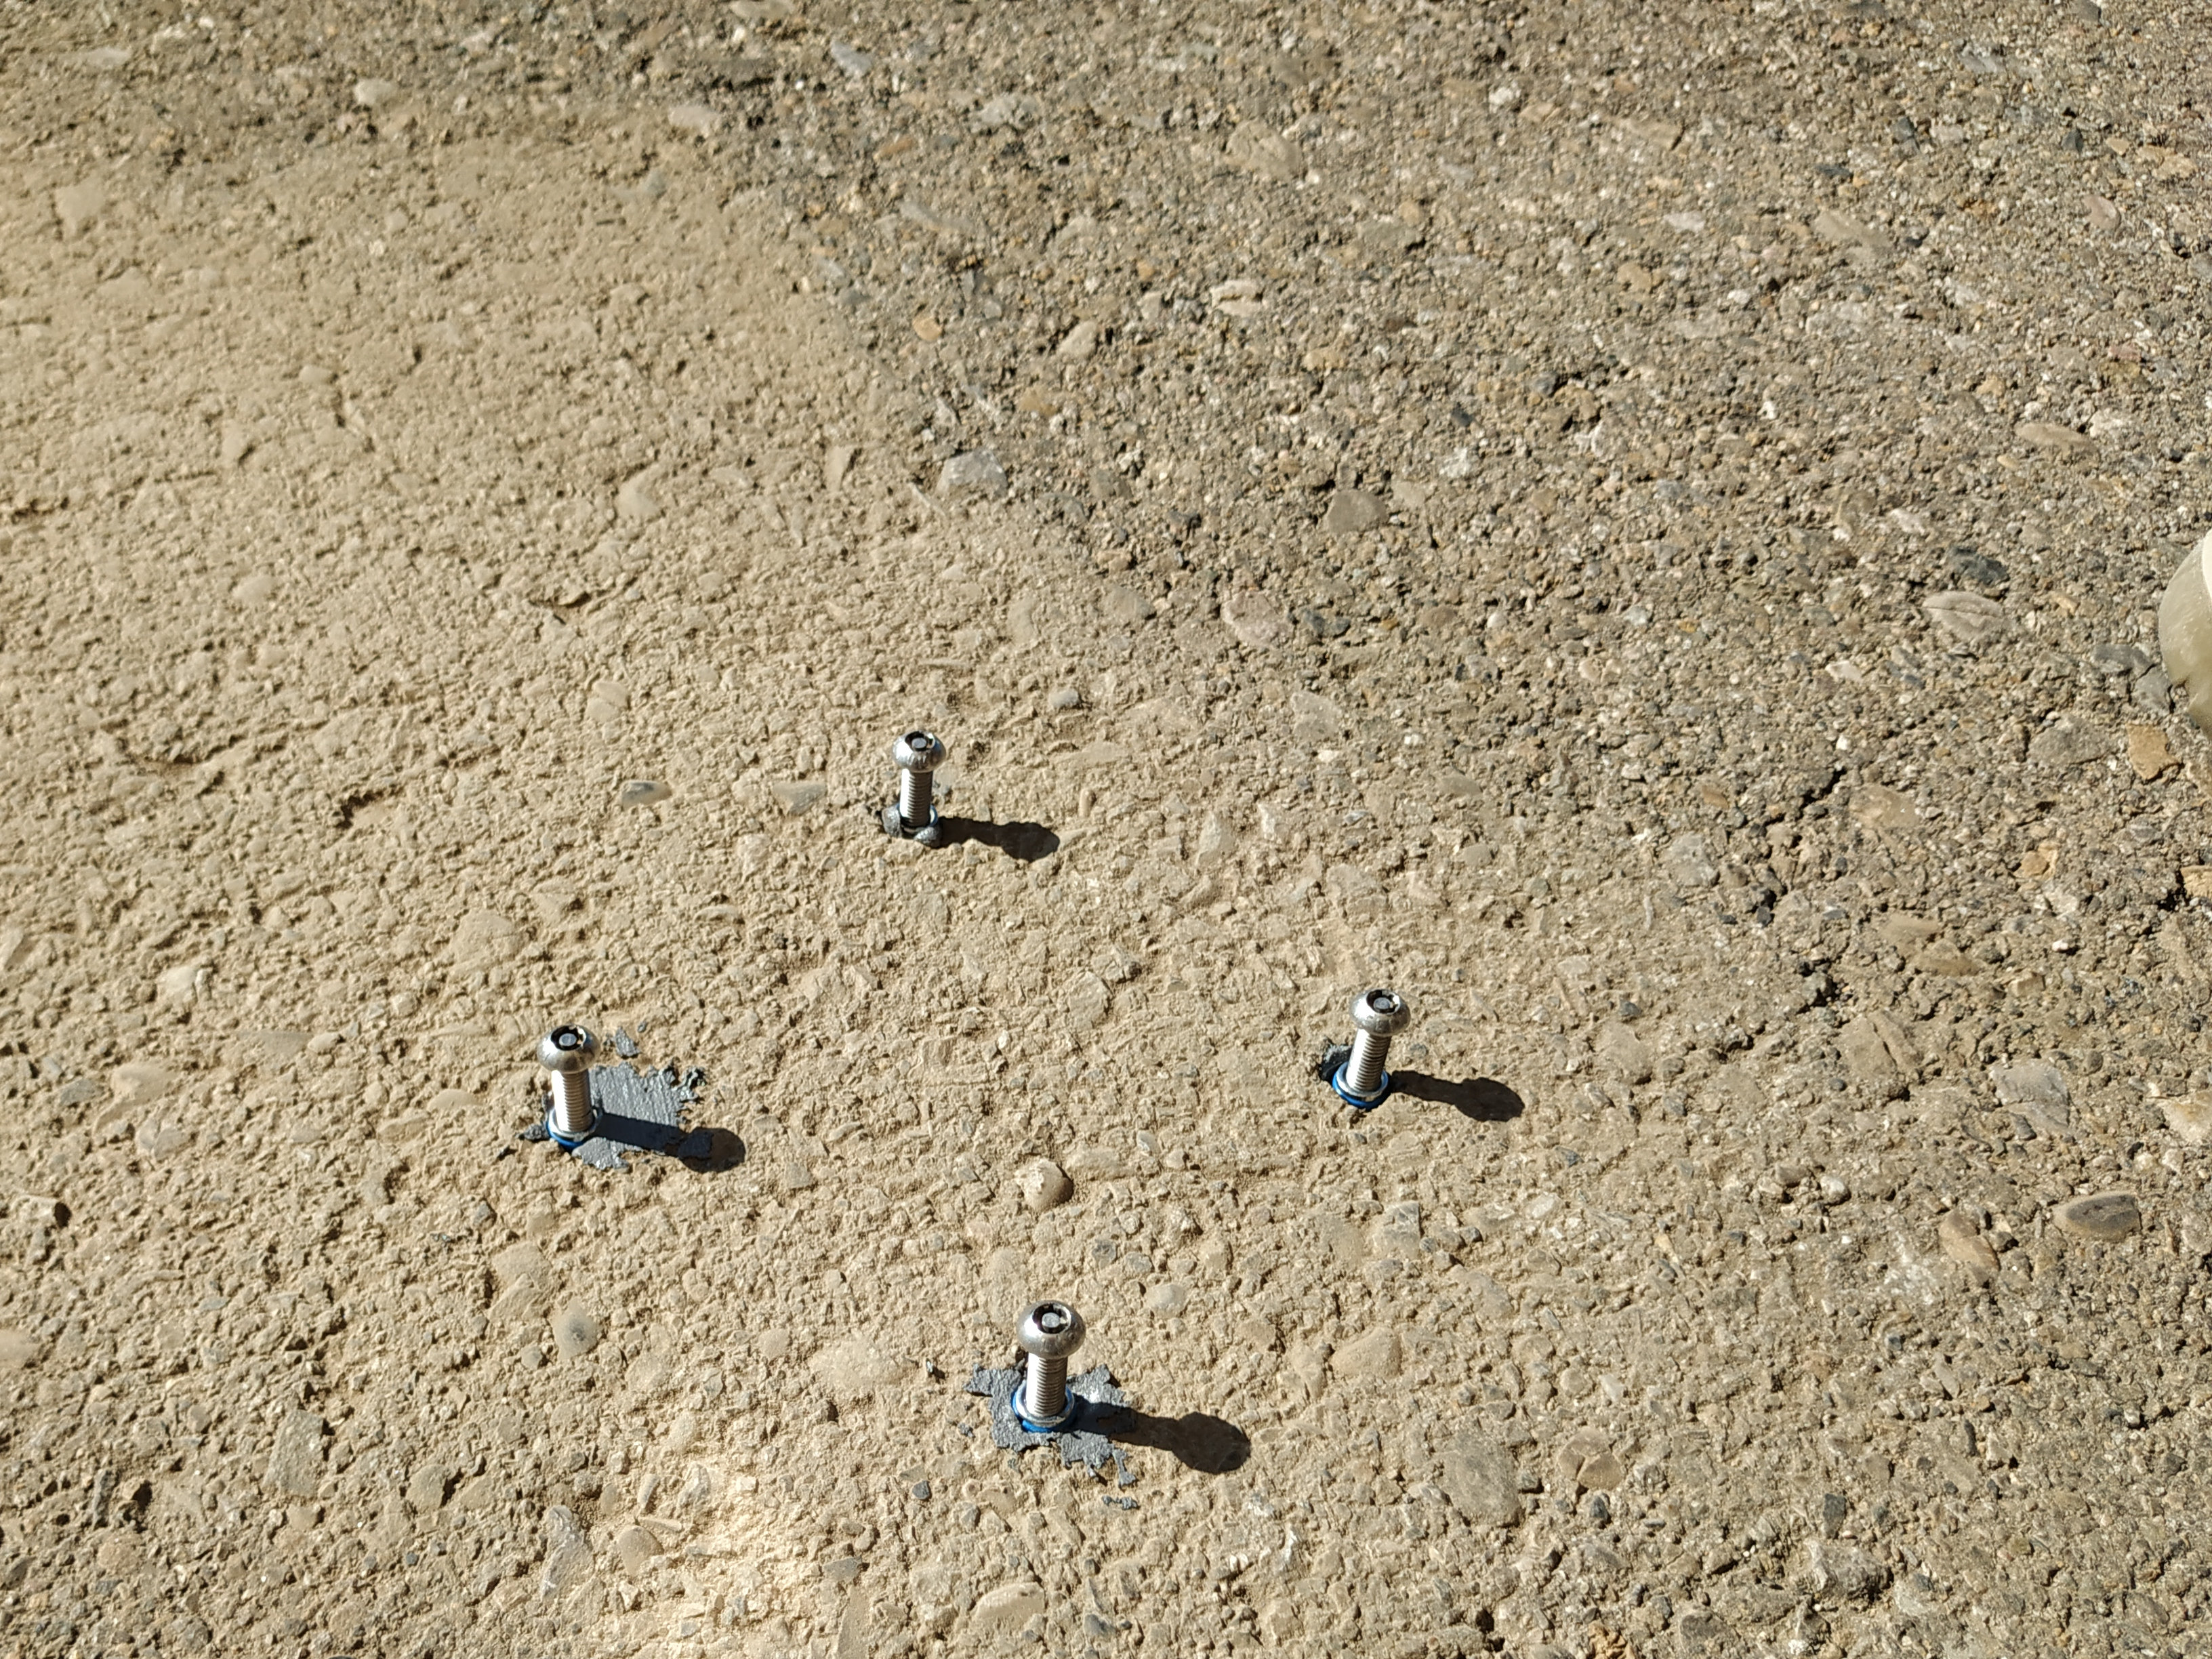
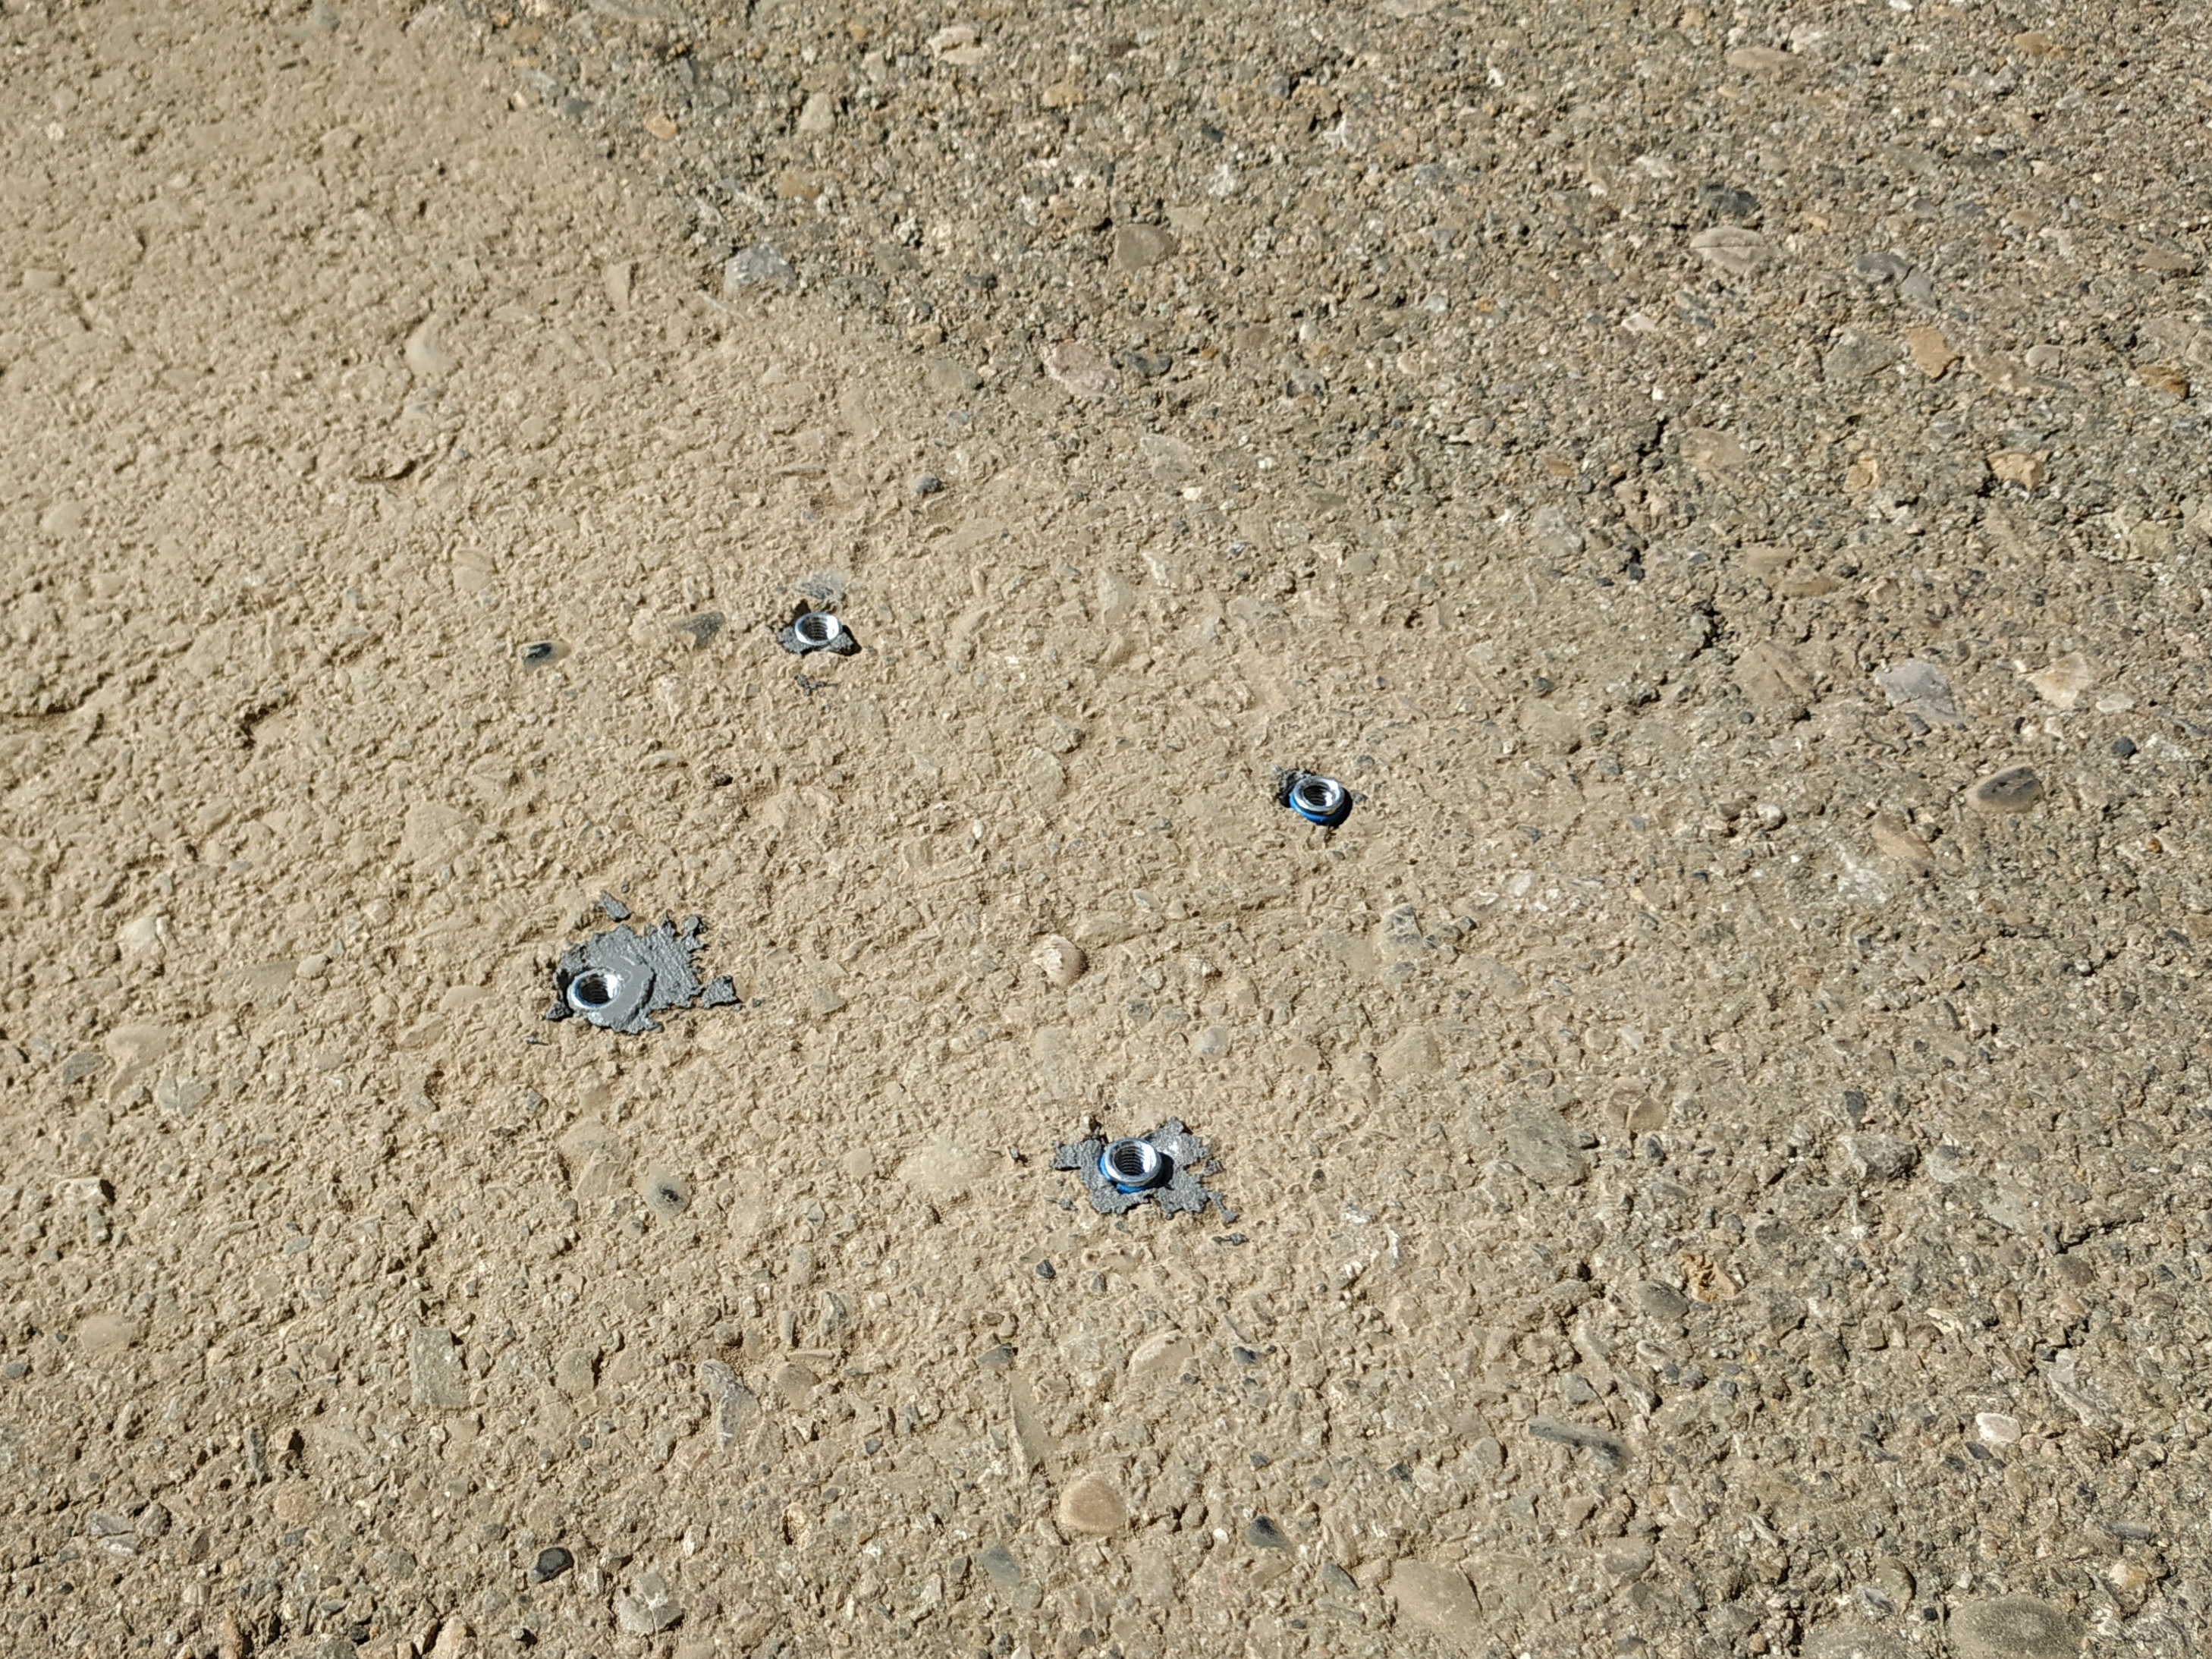
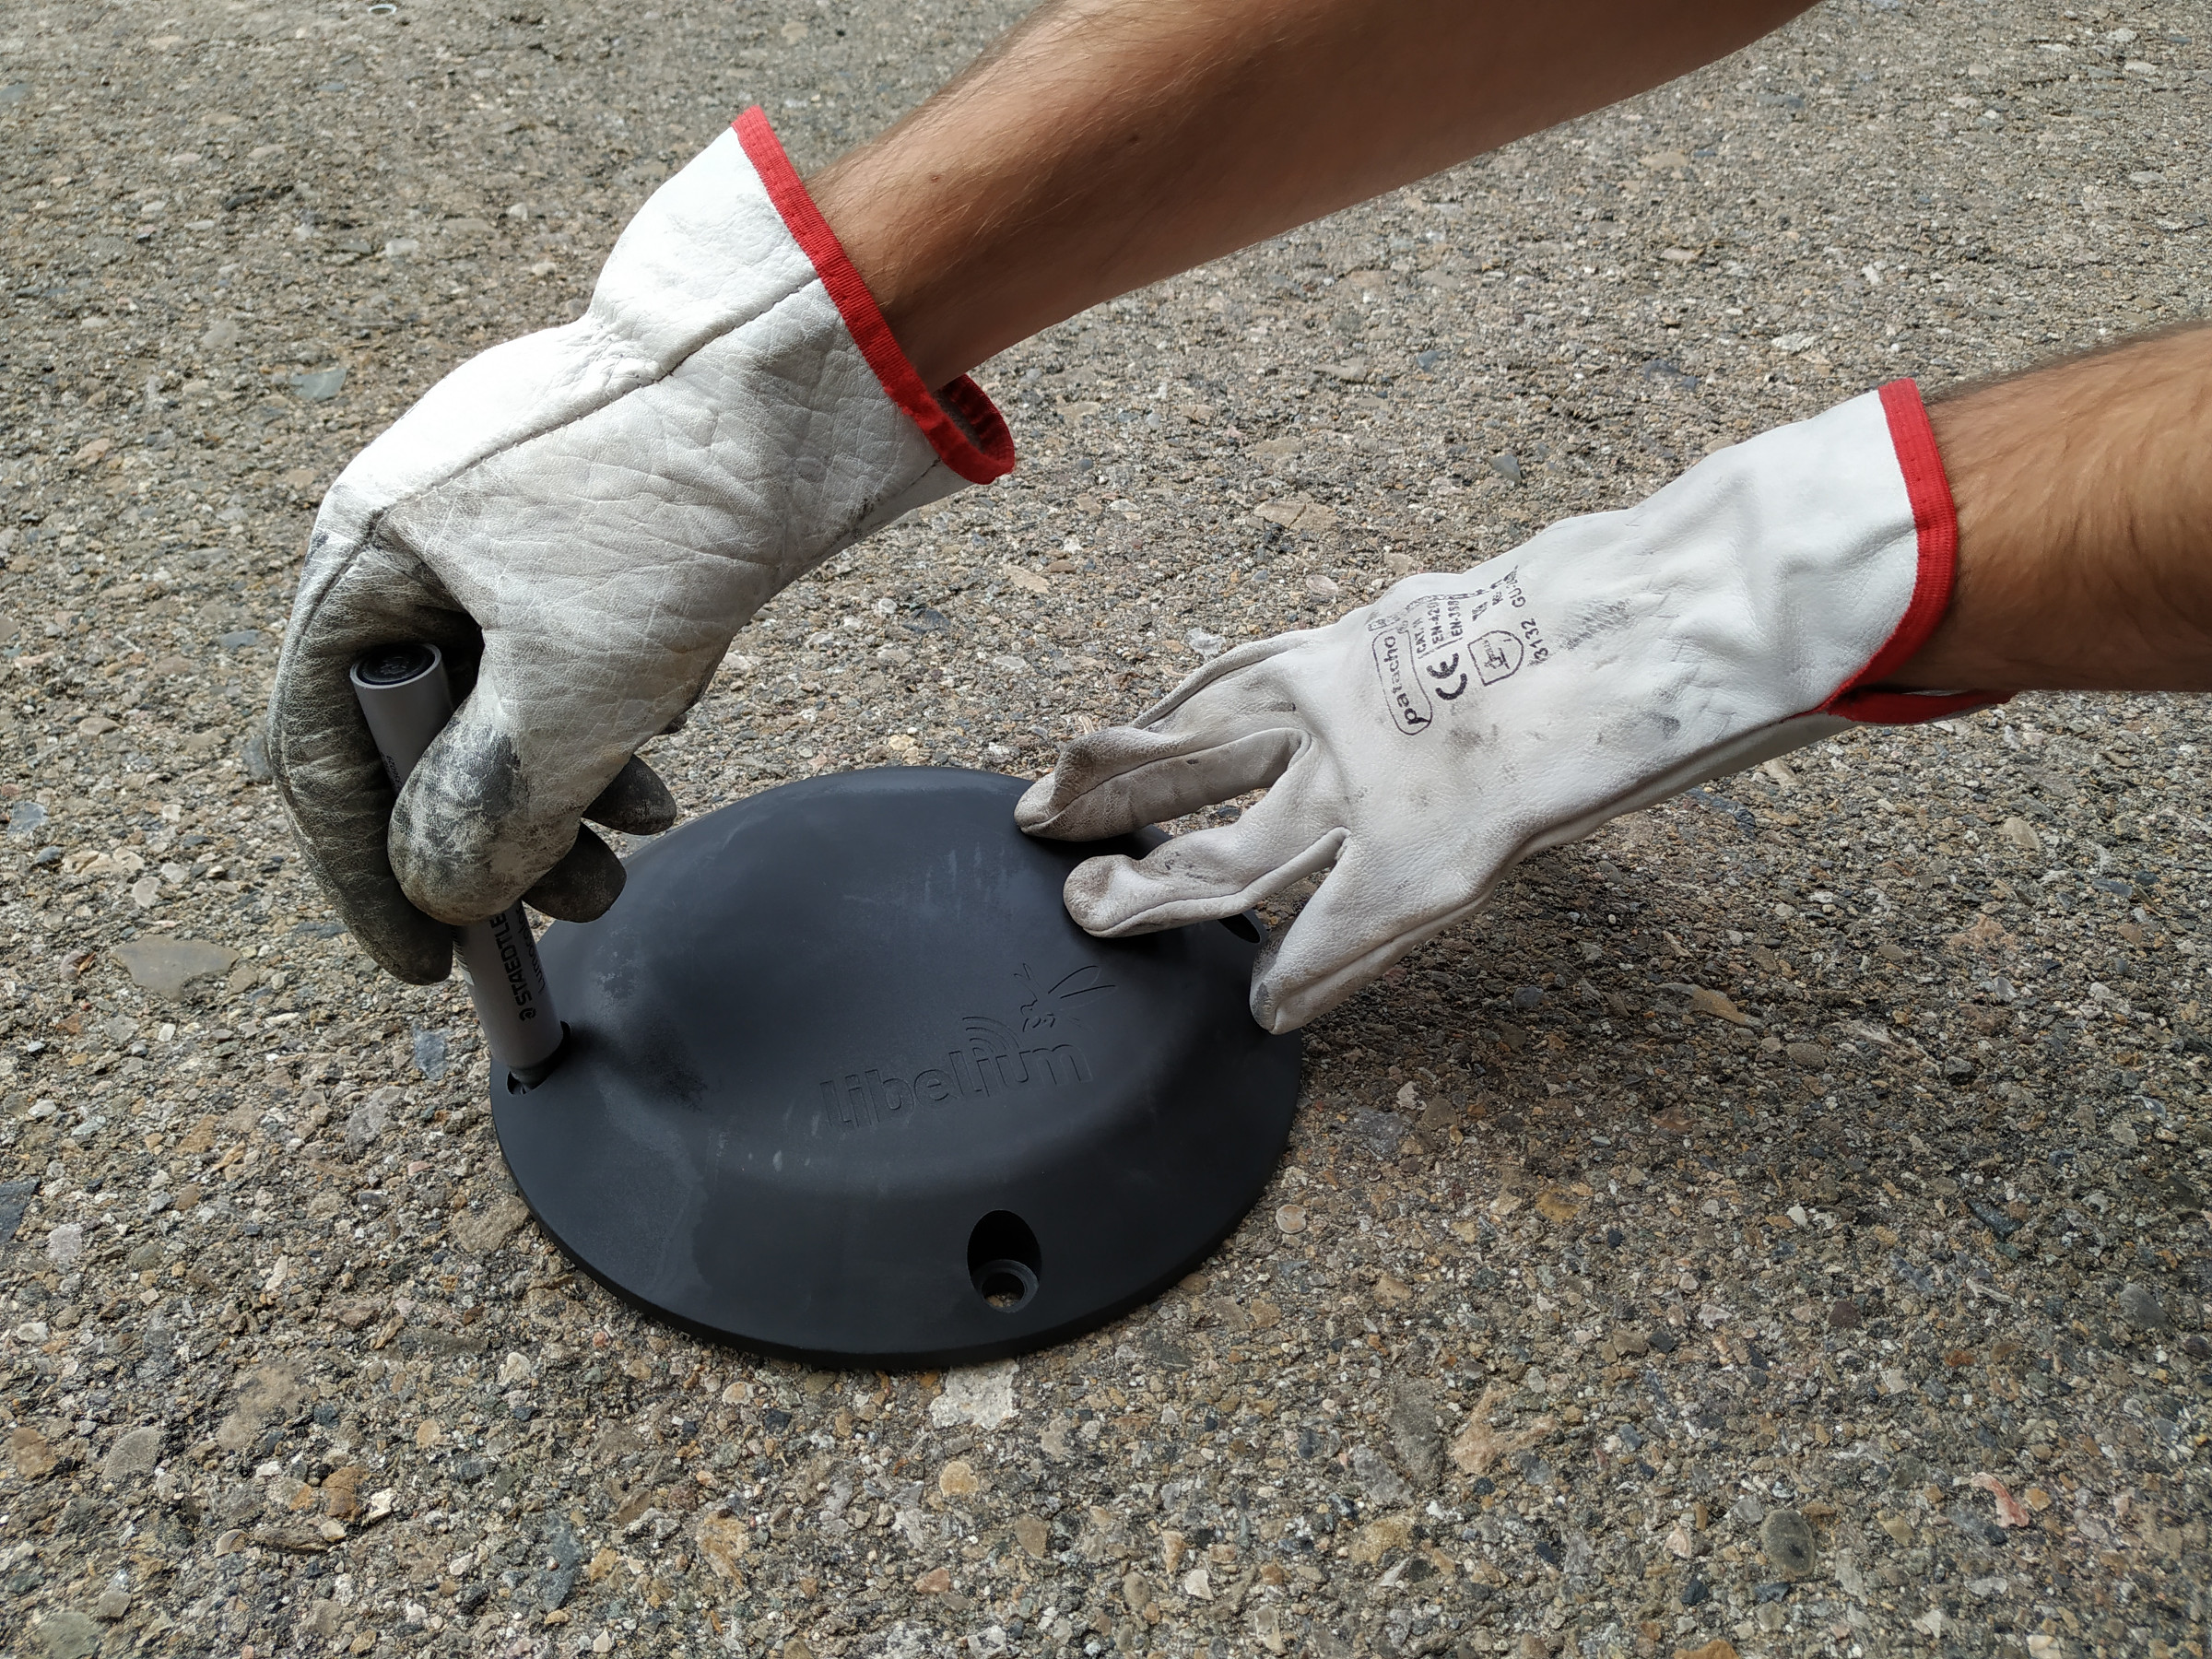
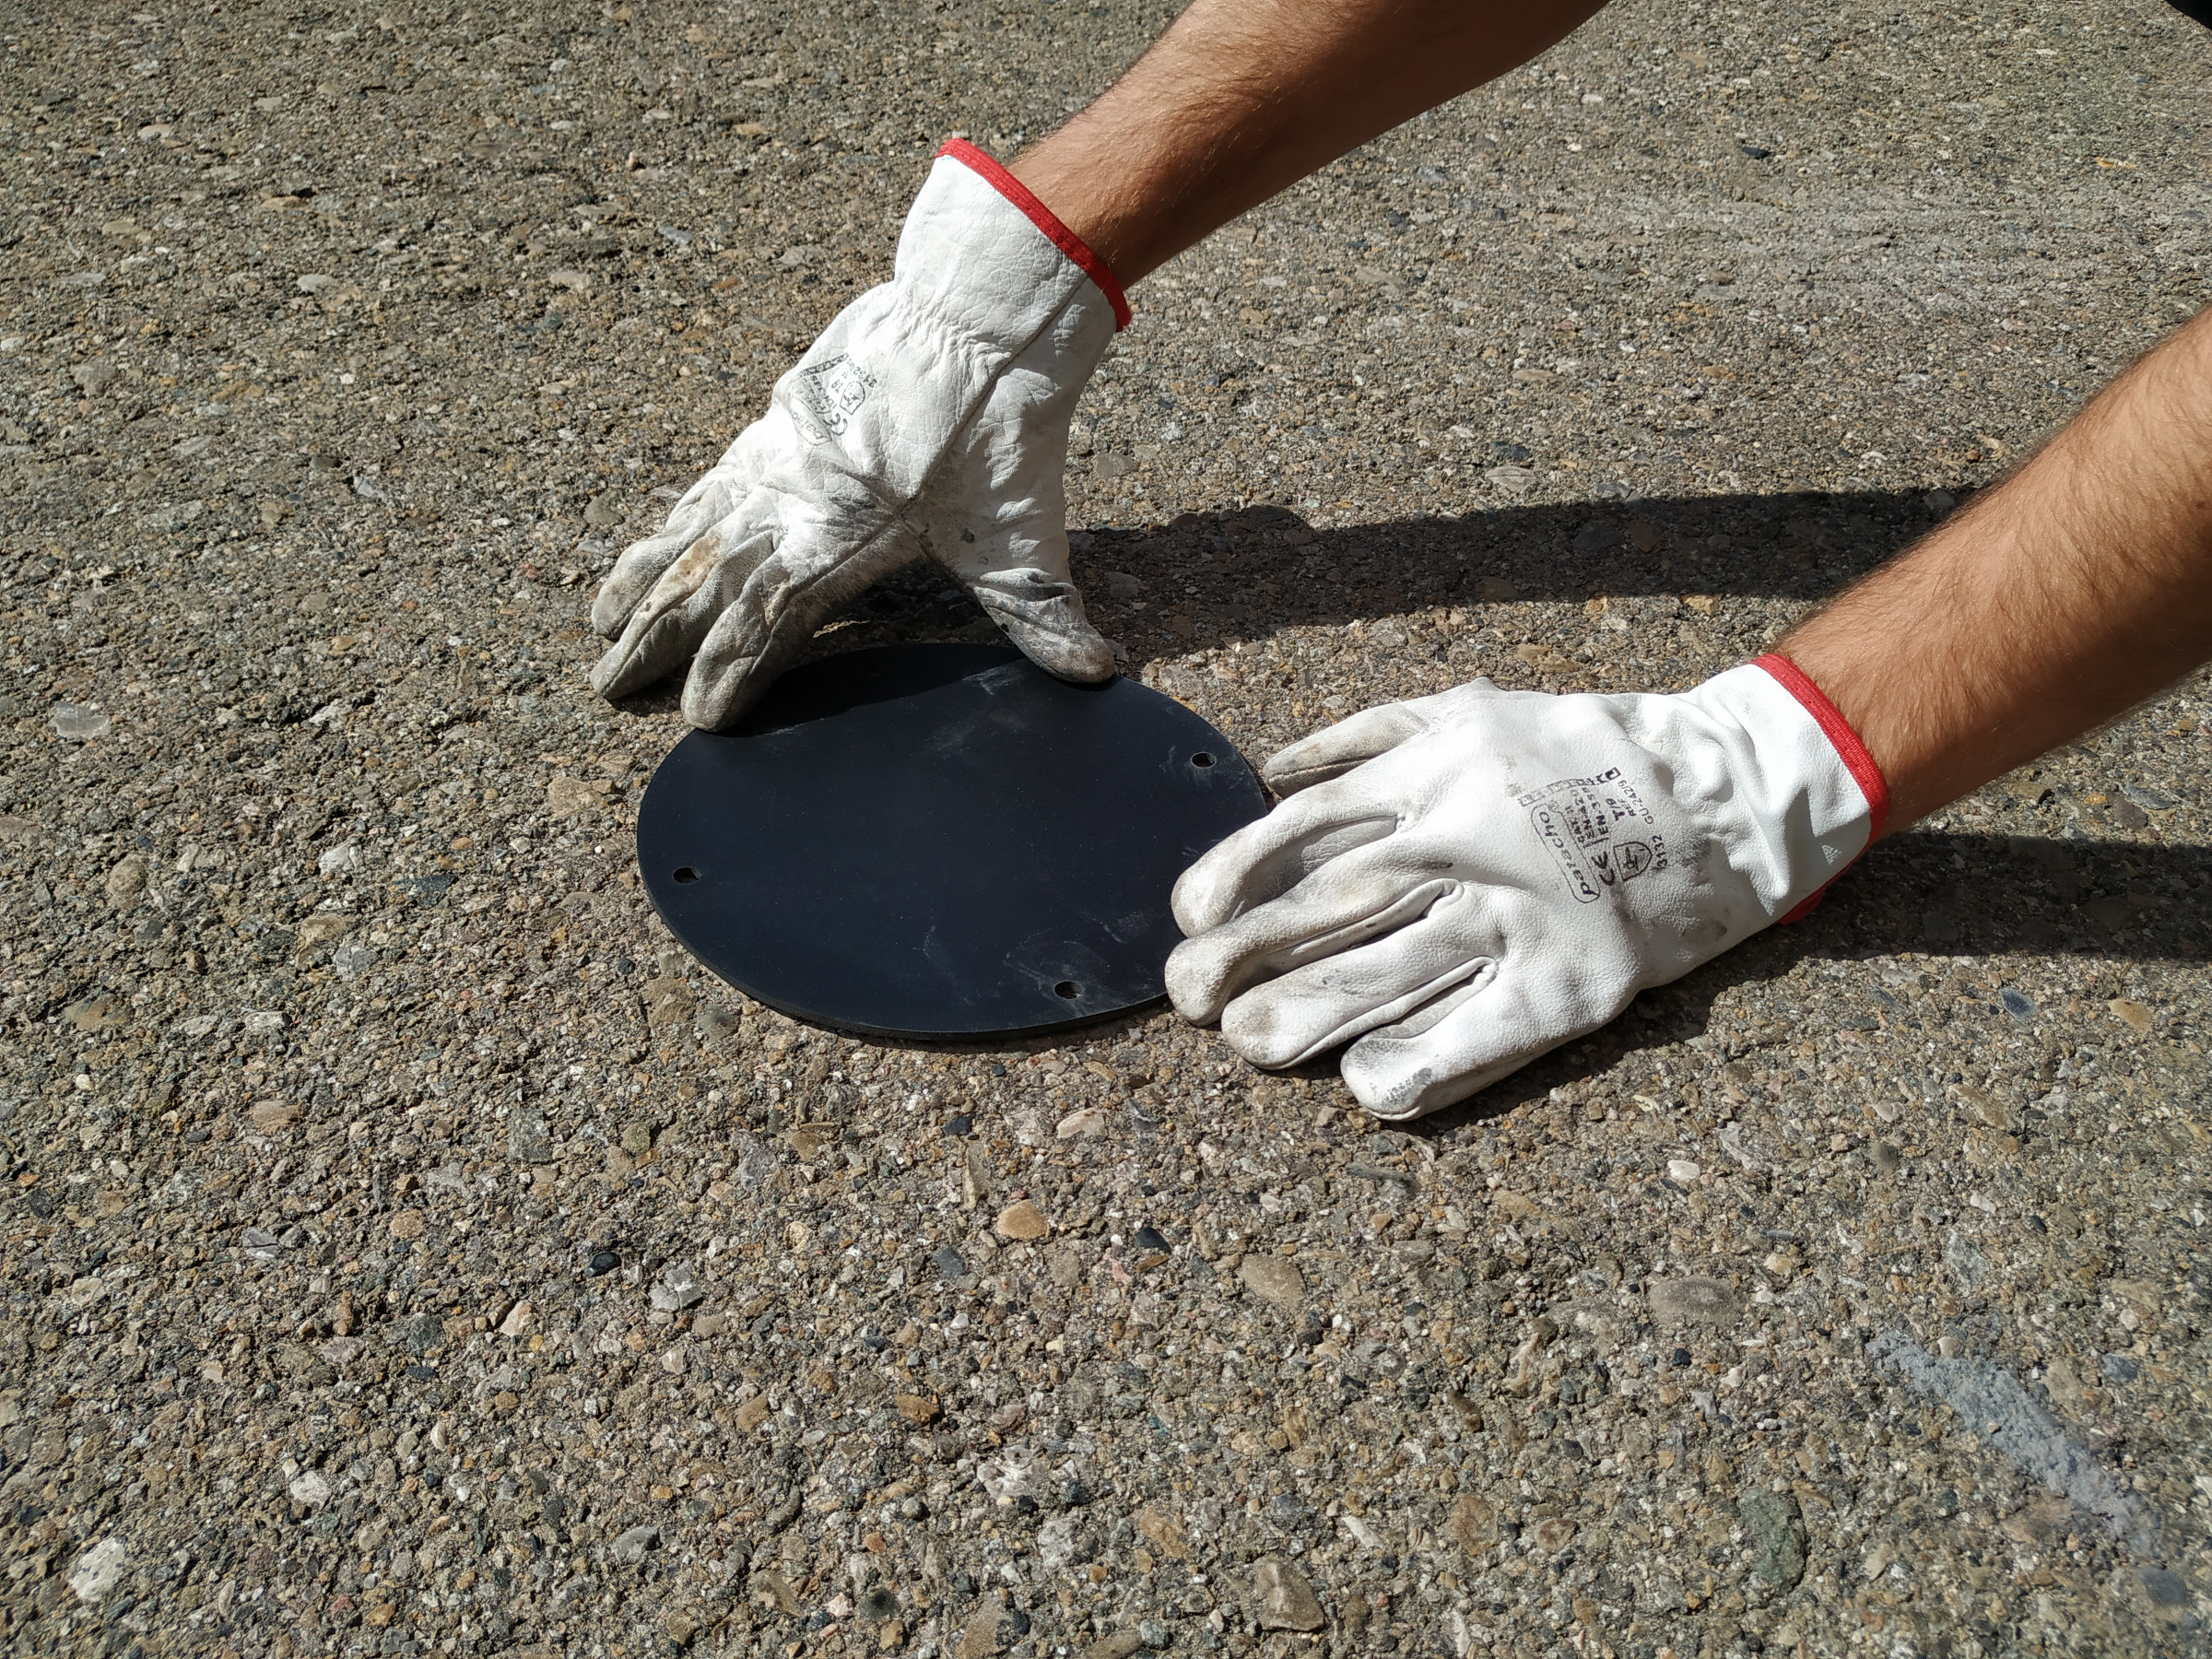
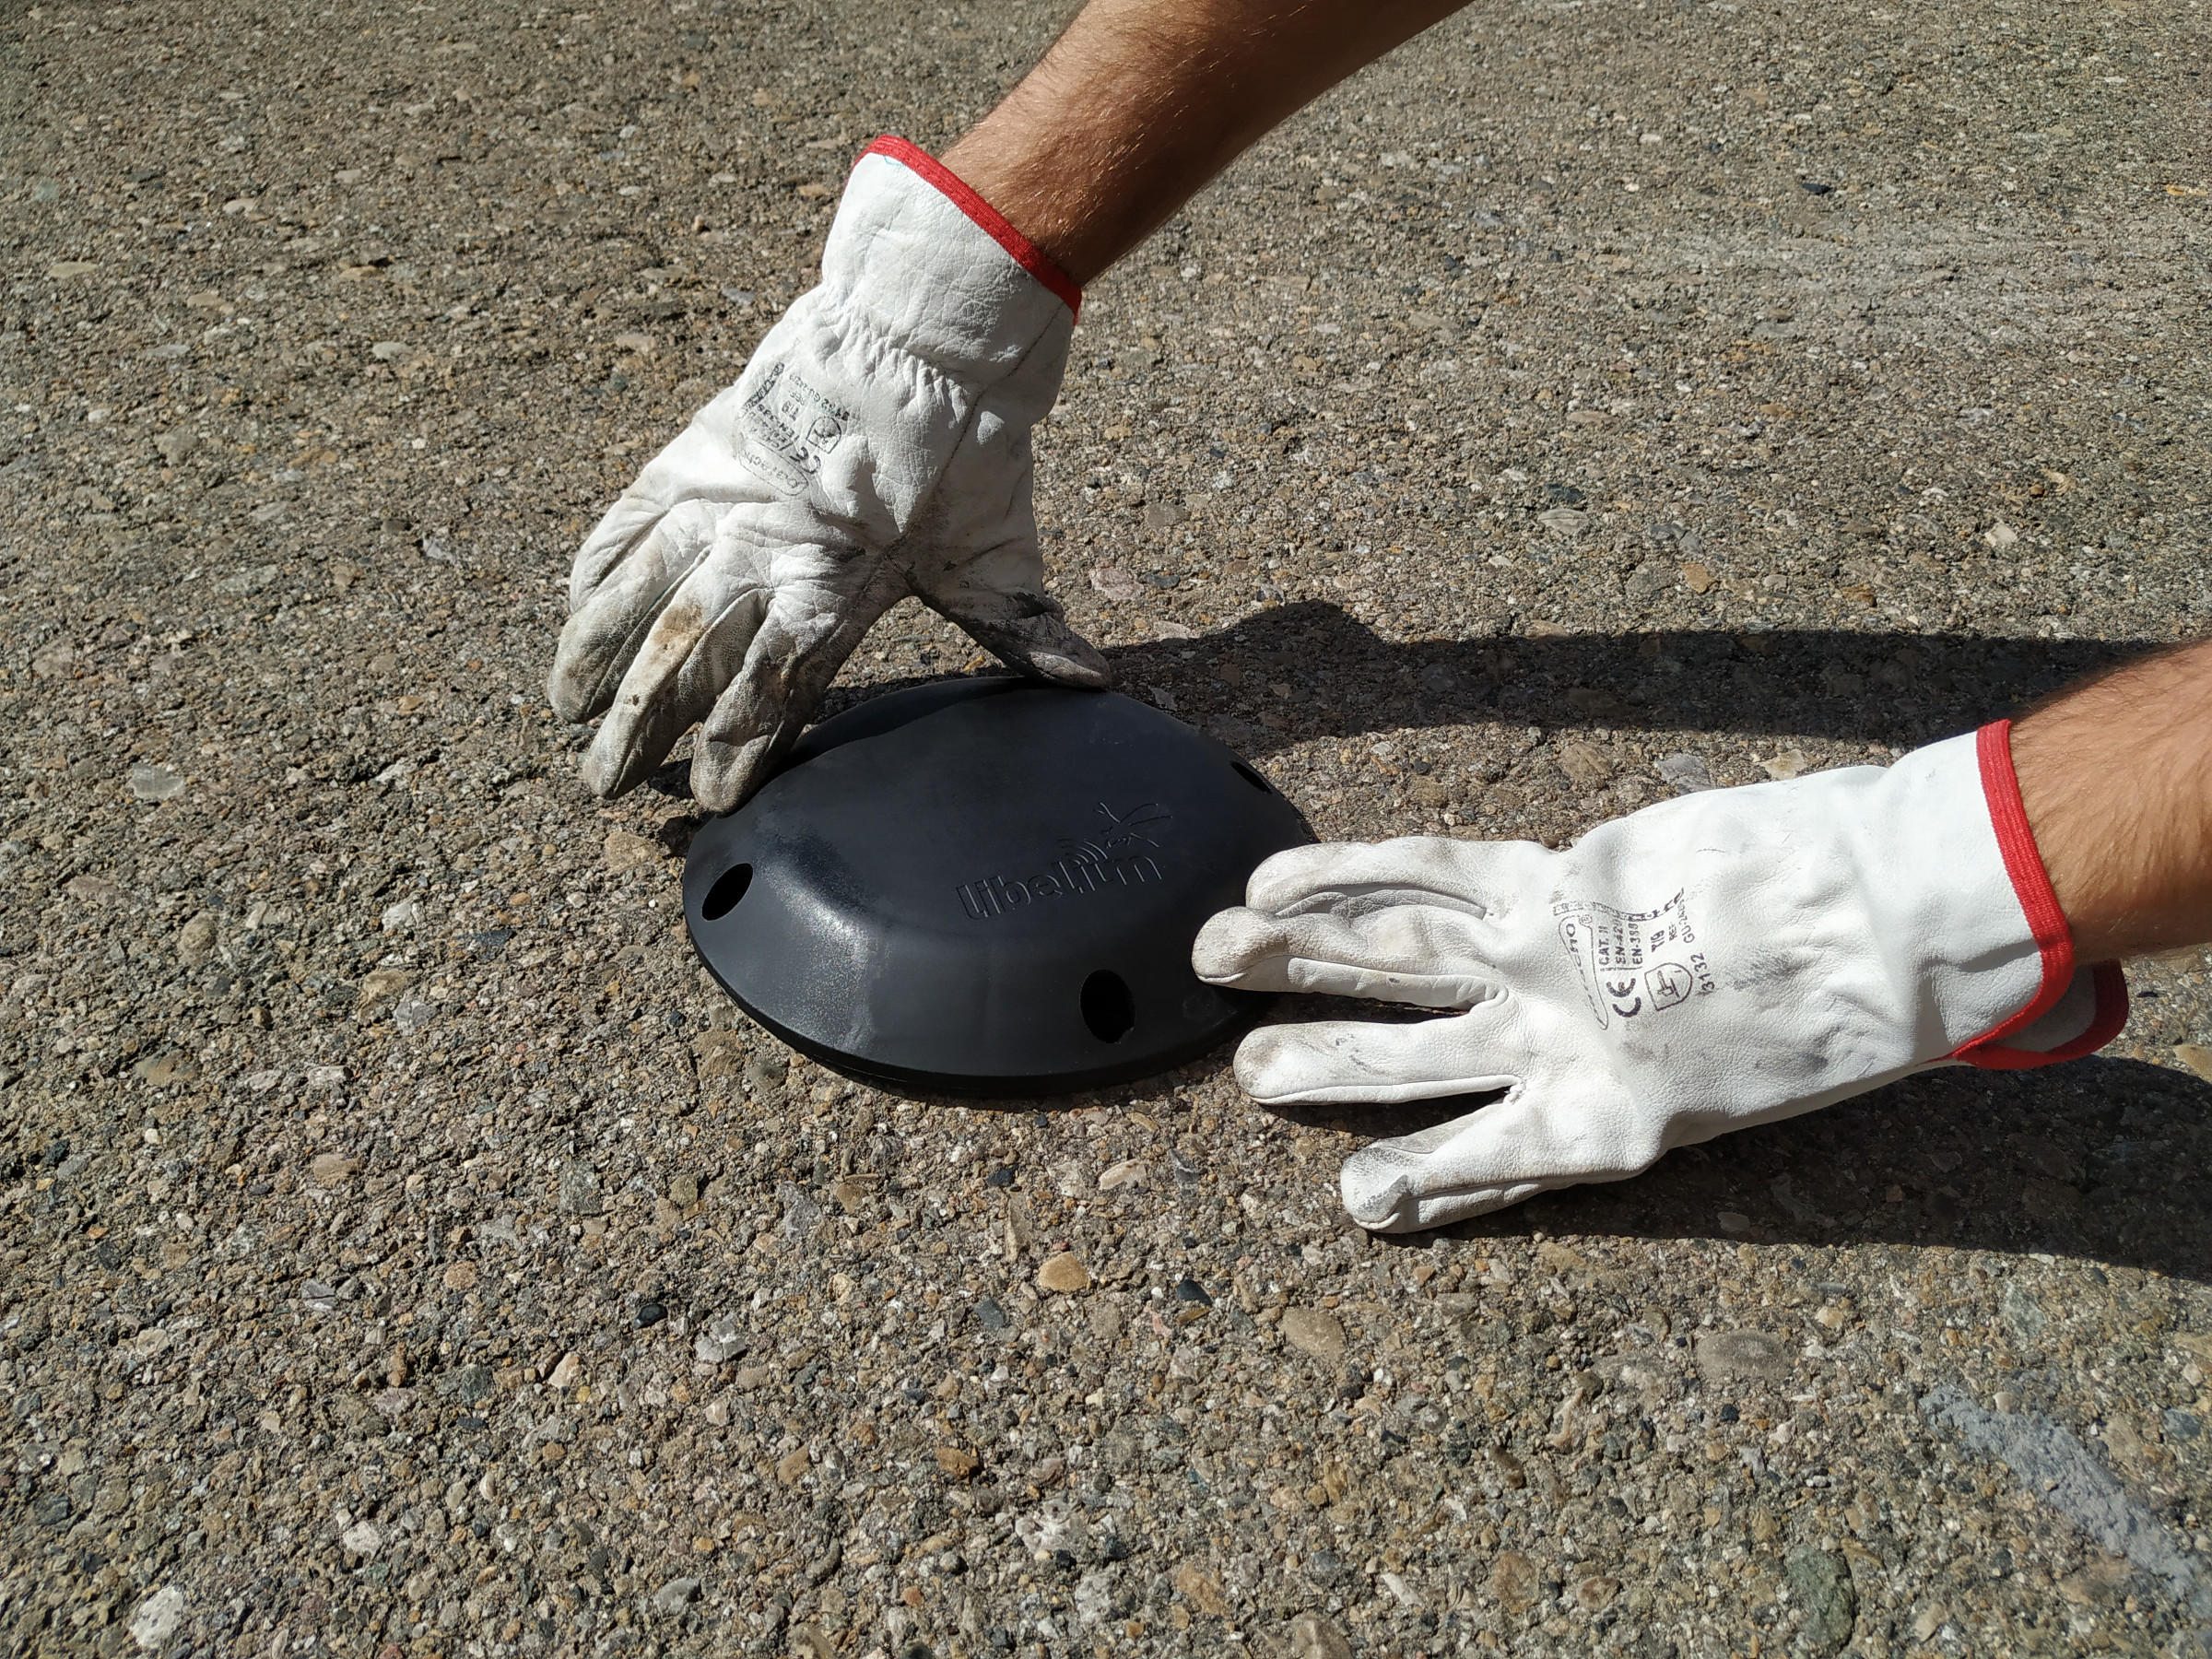
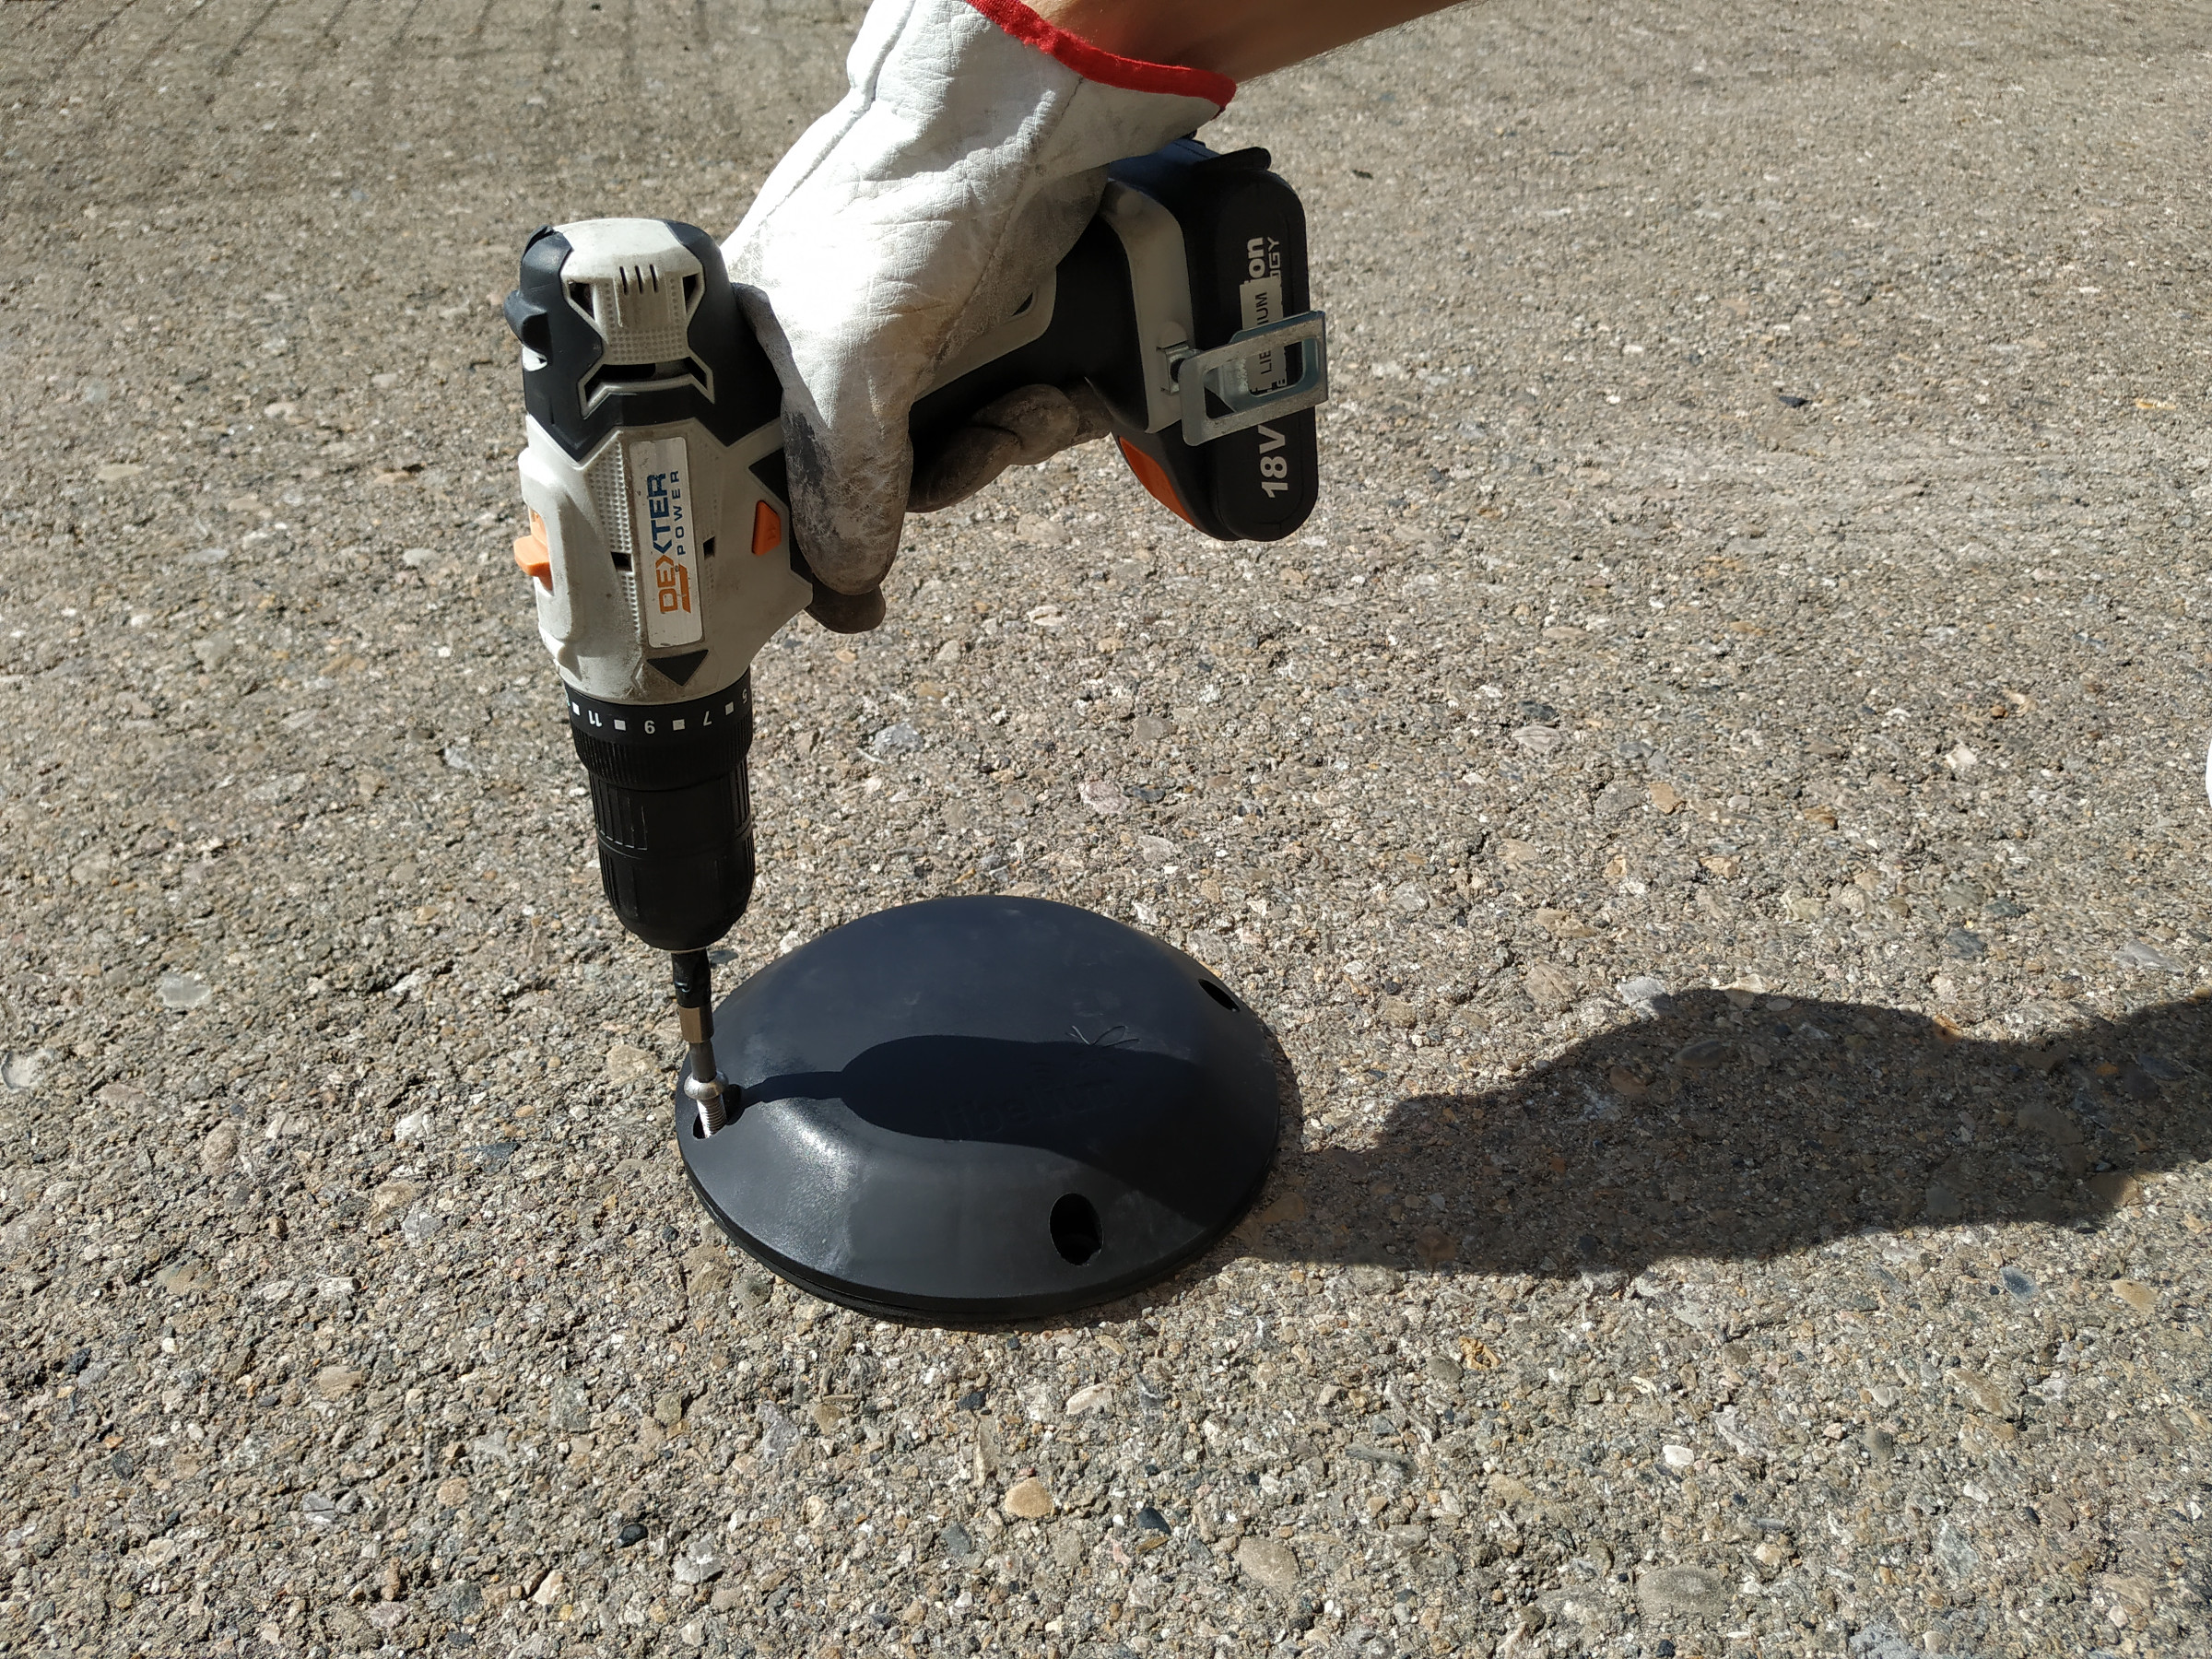
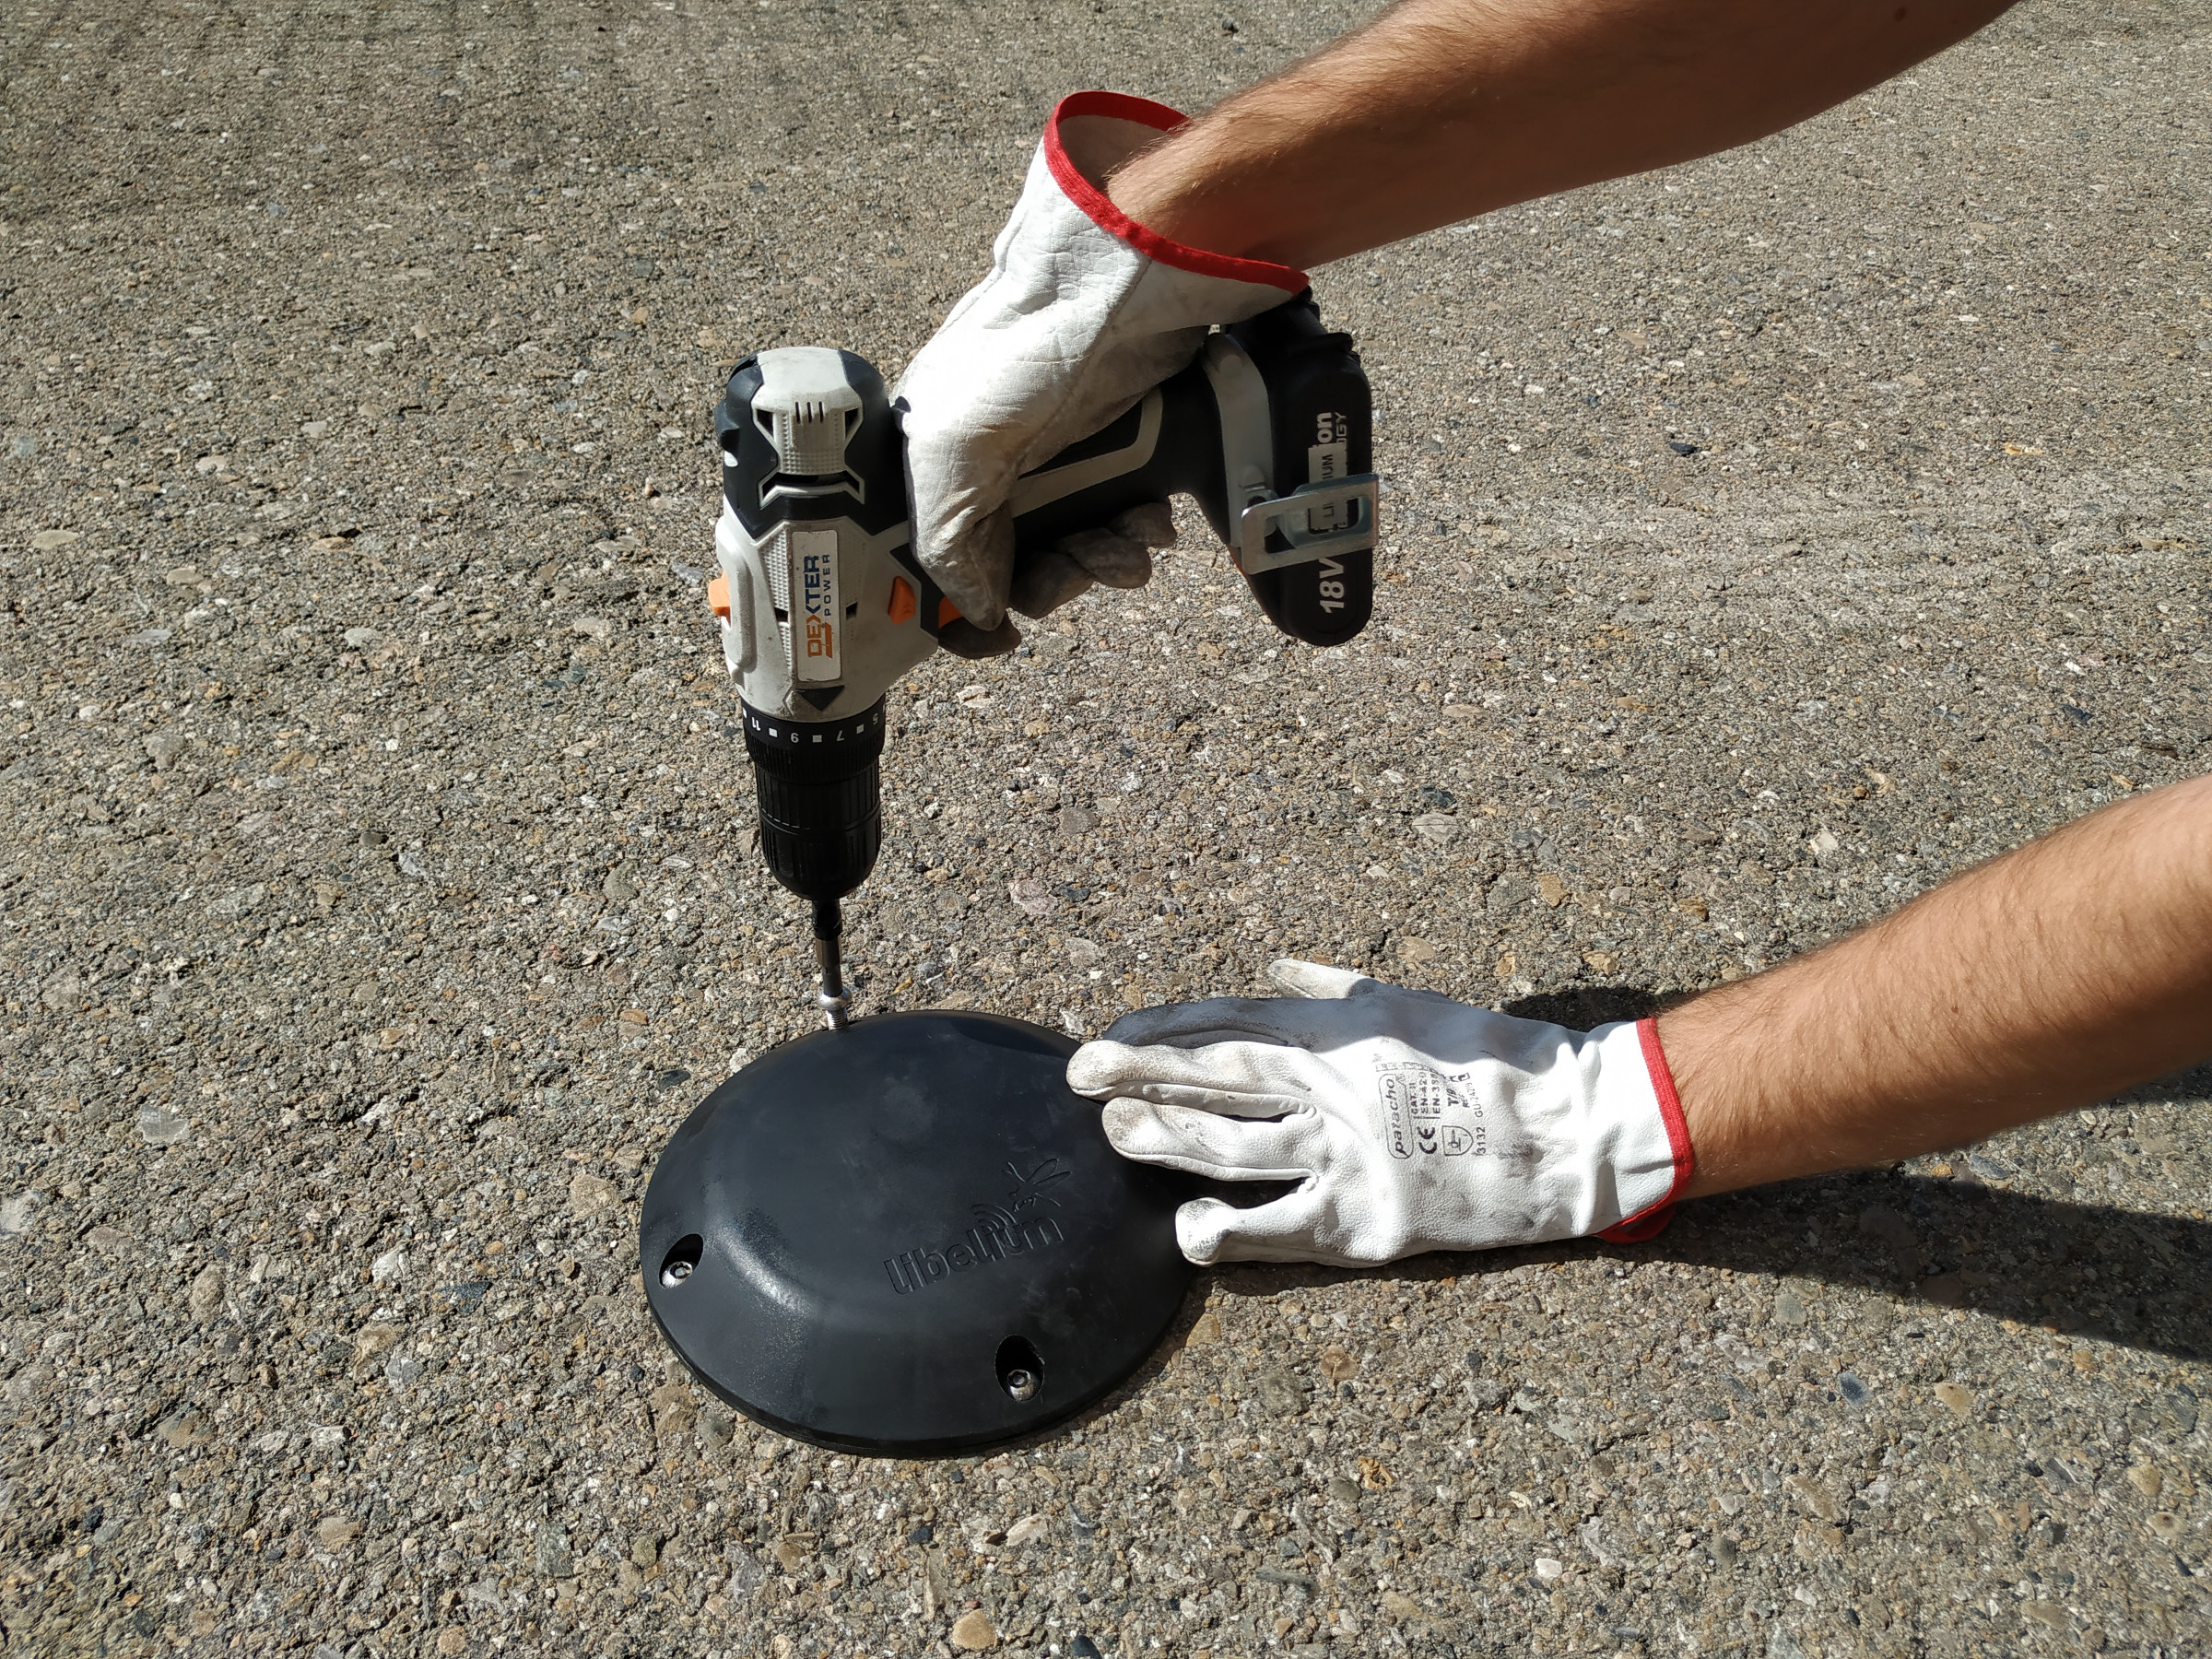
Step 8: Place the node. Place the black rubber circle on the ground. To enable the correct screwing of the screws inside the anchors, make sure that there is no dust in the internal thread of the anchor. Install the node in its final position and screw the 4 special (anti-vandalism) screws provided. Anti-vandalism screws are recommended to avoid problems: anyone could unscrew a node if fixed with standard screws.
Semi-underground node installation
This is a possible installation in order to provide vandalism immunity and also rain/puddle immunity. So the node partially inserted in the ground and the vaulted enclosure minimizes the water issues.
Regarding the installation process, the next steps explain how to correctly install the device:
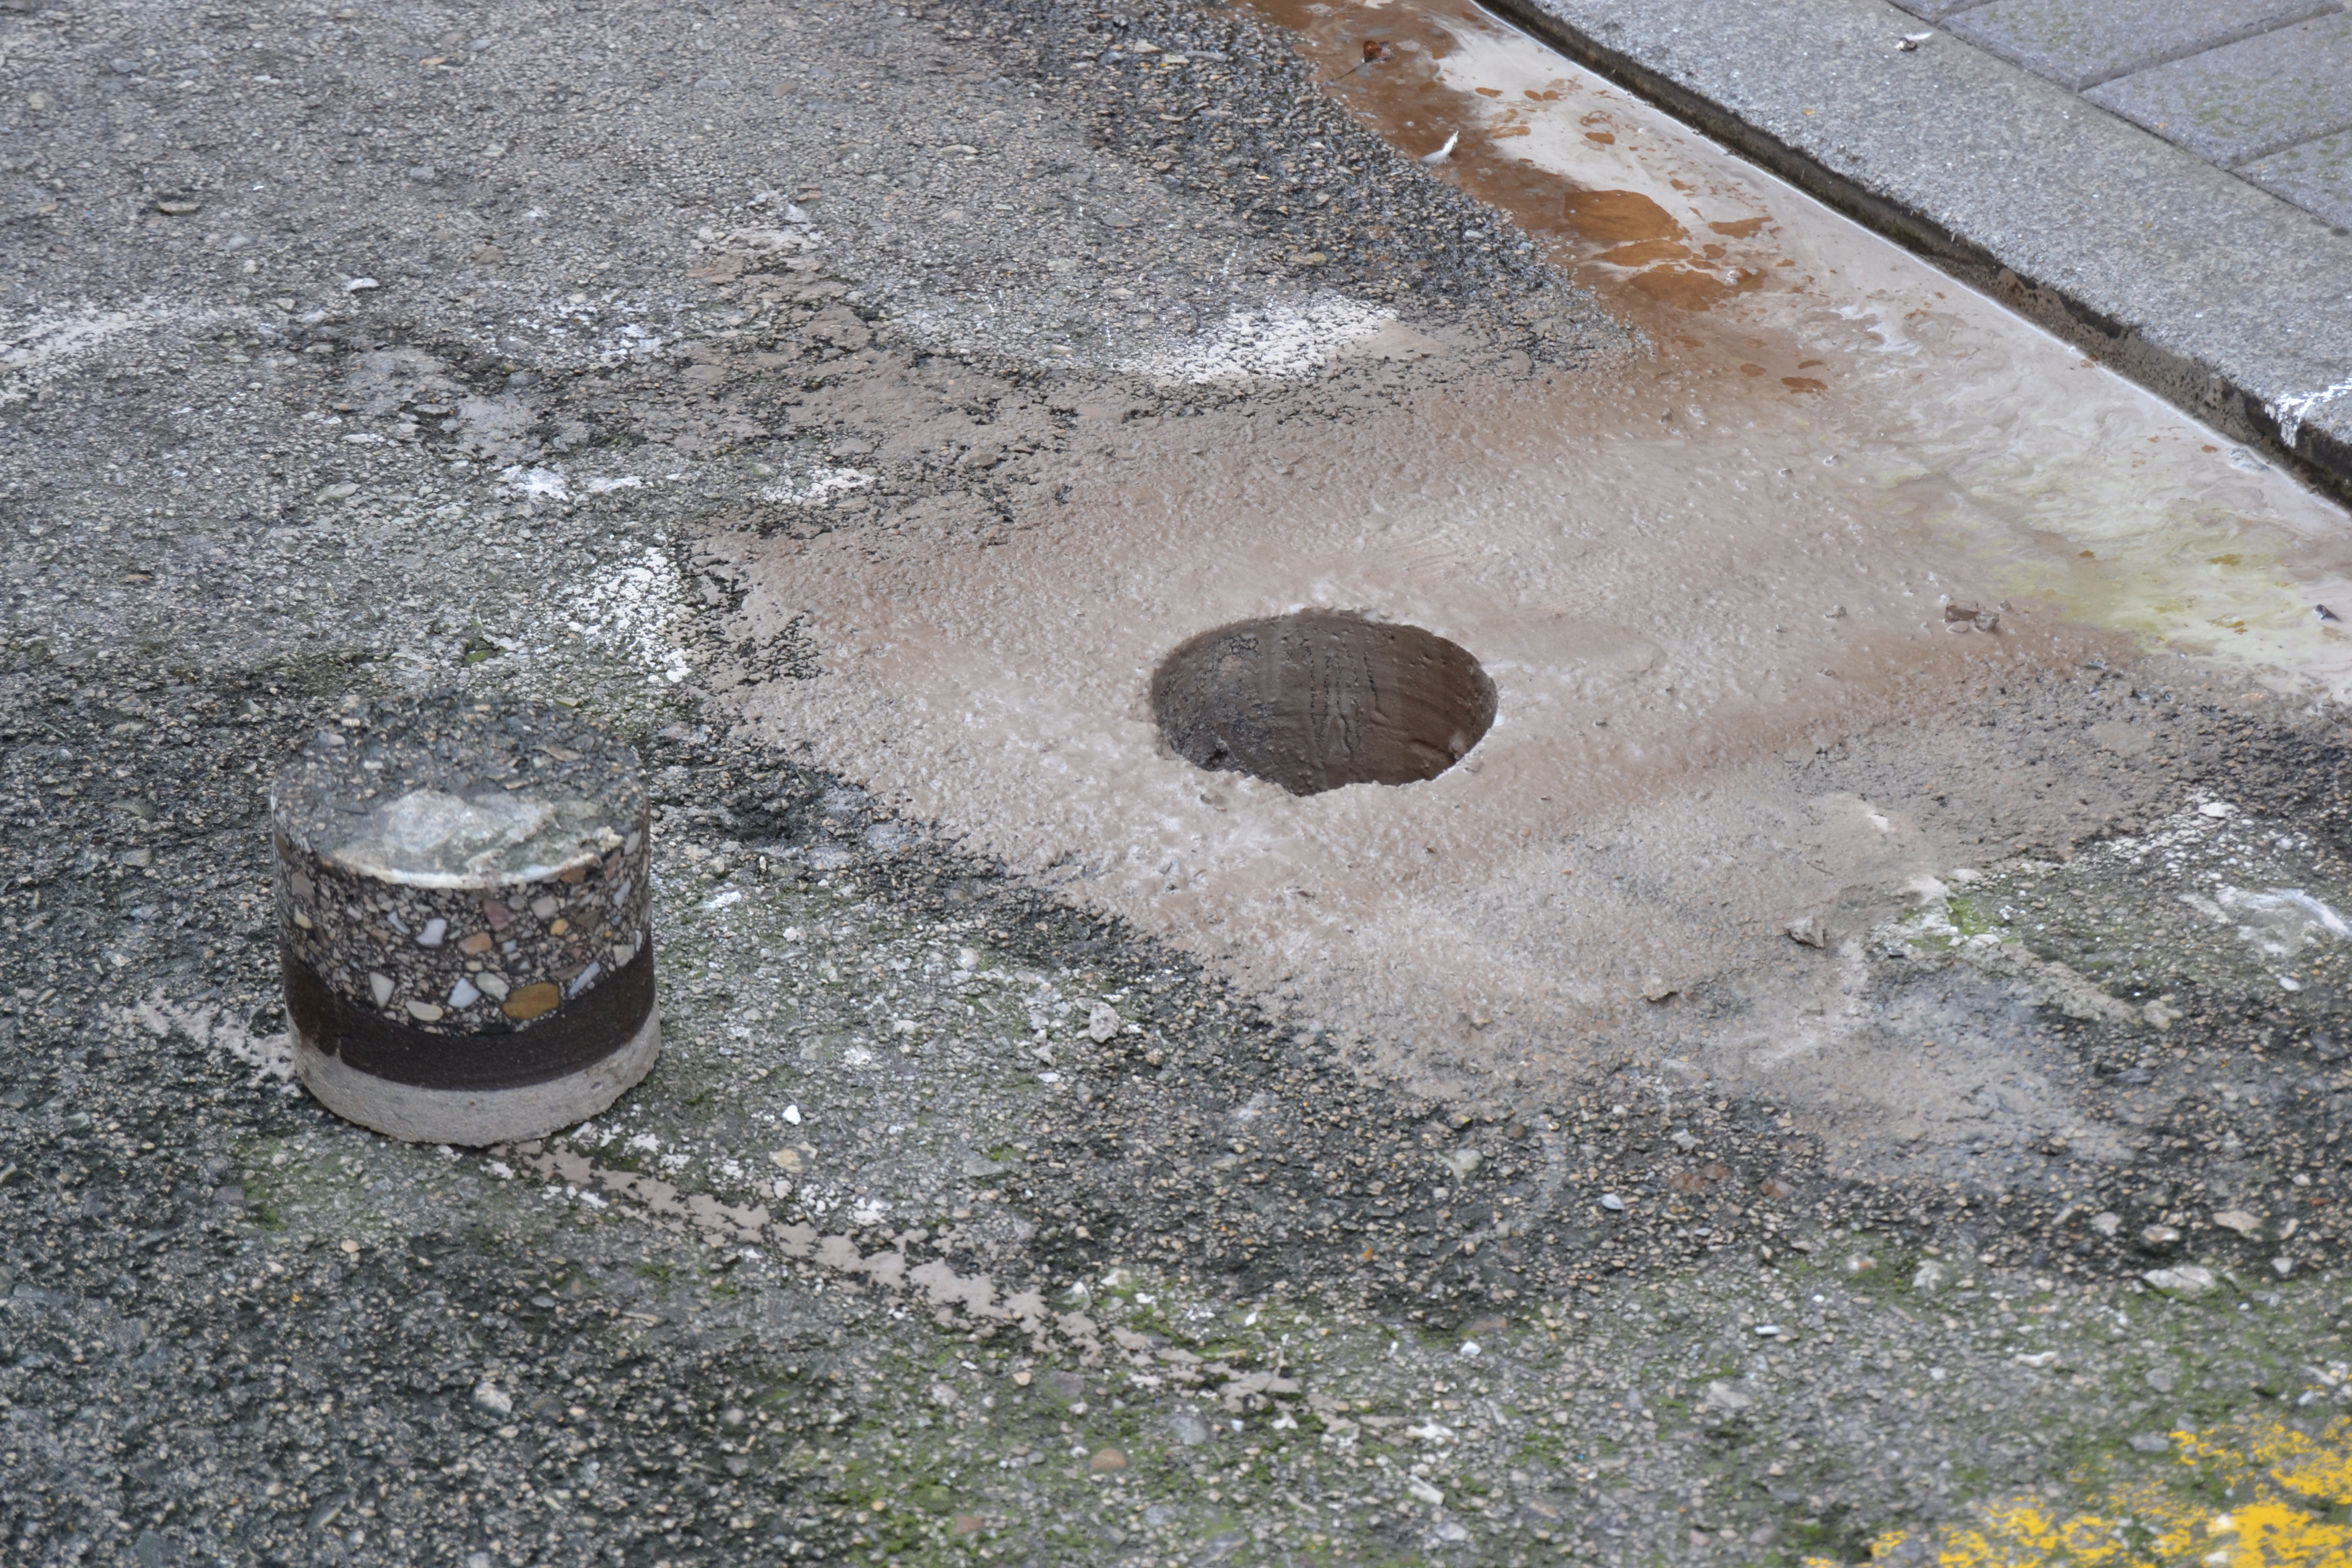
Step 1: Drill the hole. Use a hole saw or other dedicated tool to drill a hole into the pavement bigger enough for the enclosure (minimum diameter 202 mm). Try to perforate it deep enough to insert the Smart Parking node completely without rising over the surface, be sure that the enclosure remains under the pavement line approximately 10 mm.
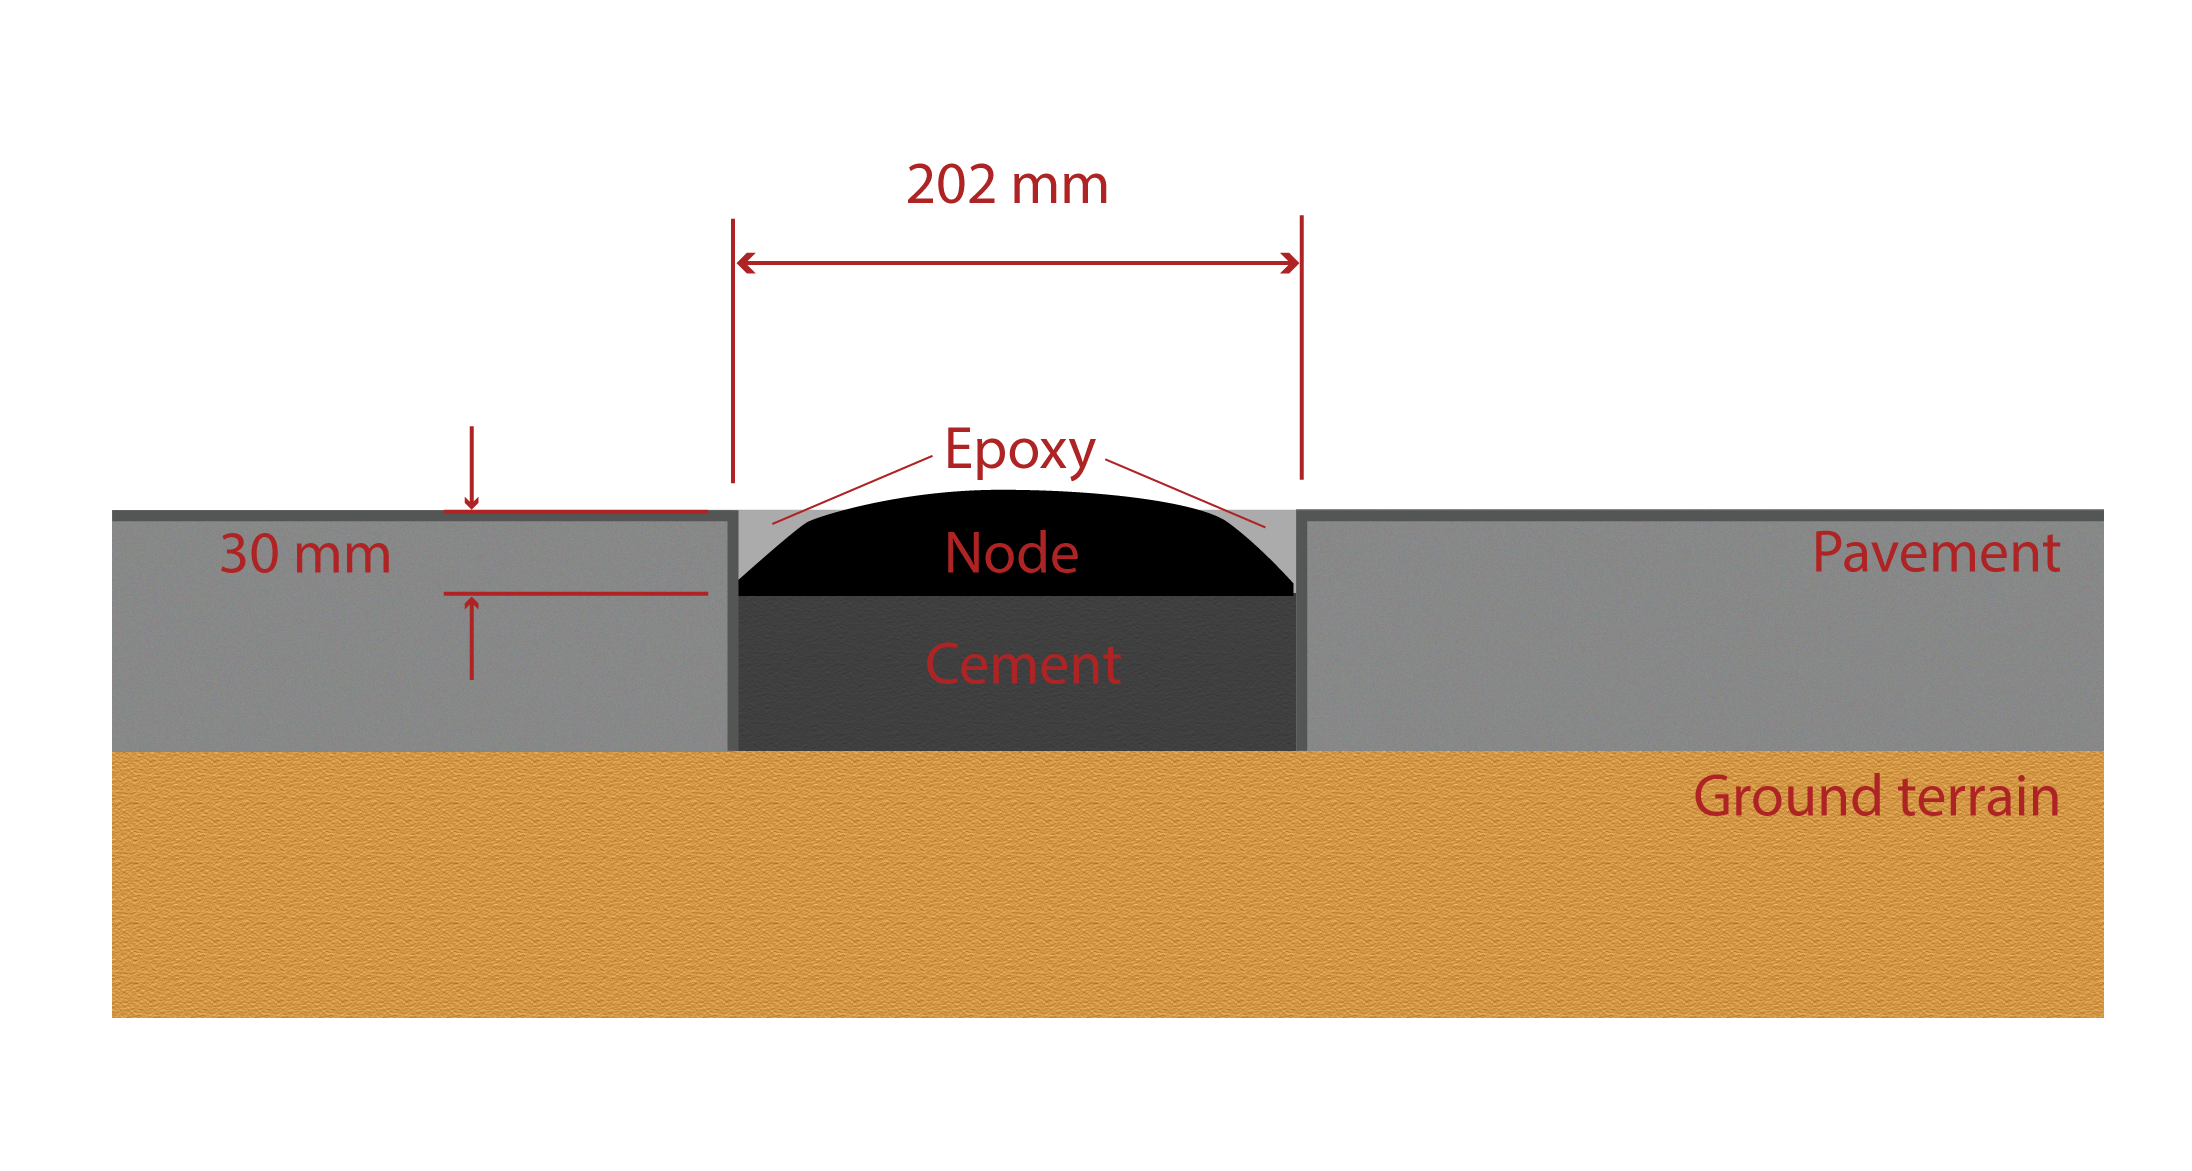
Step 2: Place the node into the pavement hole. Below the device, a layer of cement must be spread to elevate the device to the correct horizontal position independently of the depth of the hole. The diameter of the hole must be at least 202 mm.
Step 3: Fill the hole. Finally, the node needs to be fixed to the pavement using Epoxy resin (commonly used for filling road fissures). This resin should fill all the space between enclosure and pavement. Also, it should completely cover the top of the enclosure ensuring protection against water, bad environmental conditions and vandalism. The Epoxy resin tested by Libelium provides a curing time around 6-12 hours at 20 ºC and RH 50%. So the parking installation must not be used prior this curing time.


In this installation, it is crucial that the upper side of the enclosure is not covered with Epoxy or other material. Only the side slides can be covered, the center of the node must be clean to allow the radar signal work properly.
In the node placement step, the vaulted enclosure must exceed the horizontal pavement layer by 6-7 mm approximately. The next figure shows how the node is placed:
Step 4: Start the node using the magnet. Proceed with the "Magnet start-up" process in order to initialize the node.
Node start-up
After the node is installed, you must follow the "Magnet start-up" steps explained in the "Magnet start-up process" section. This process is based on 3 consecutive magnet resets waiting at least one second between each reset. In the future need of resetting the node manually, just a single magnet reset will be needed.
Once the node has been started, it will begin to run the firmware step-by-step as explained in the "How the node works" section.
In the next video you can see how the "magnet start-up" is performed: magnet start-up.

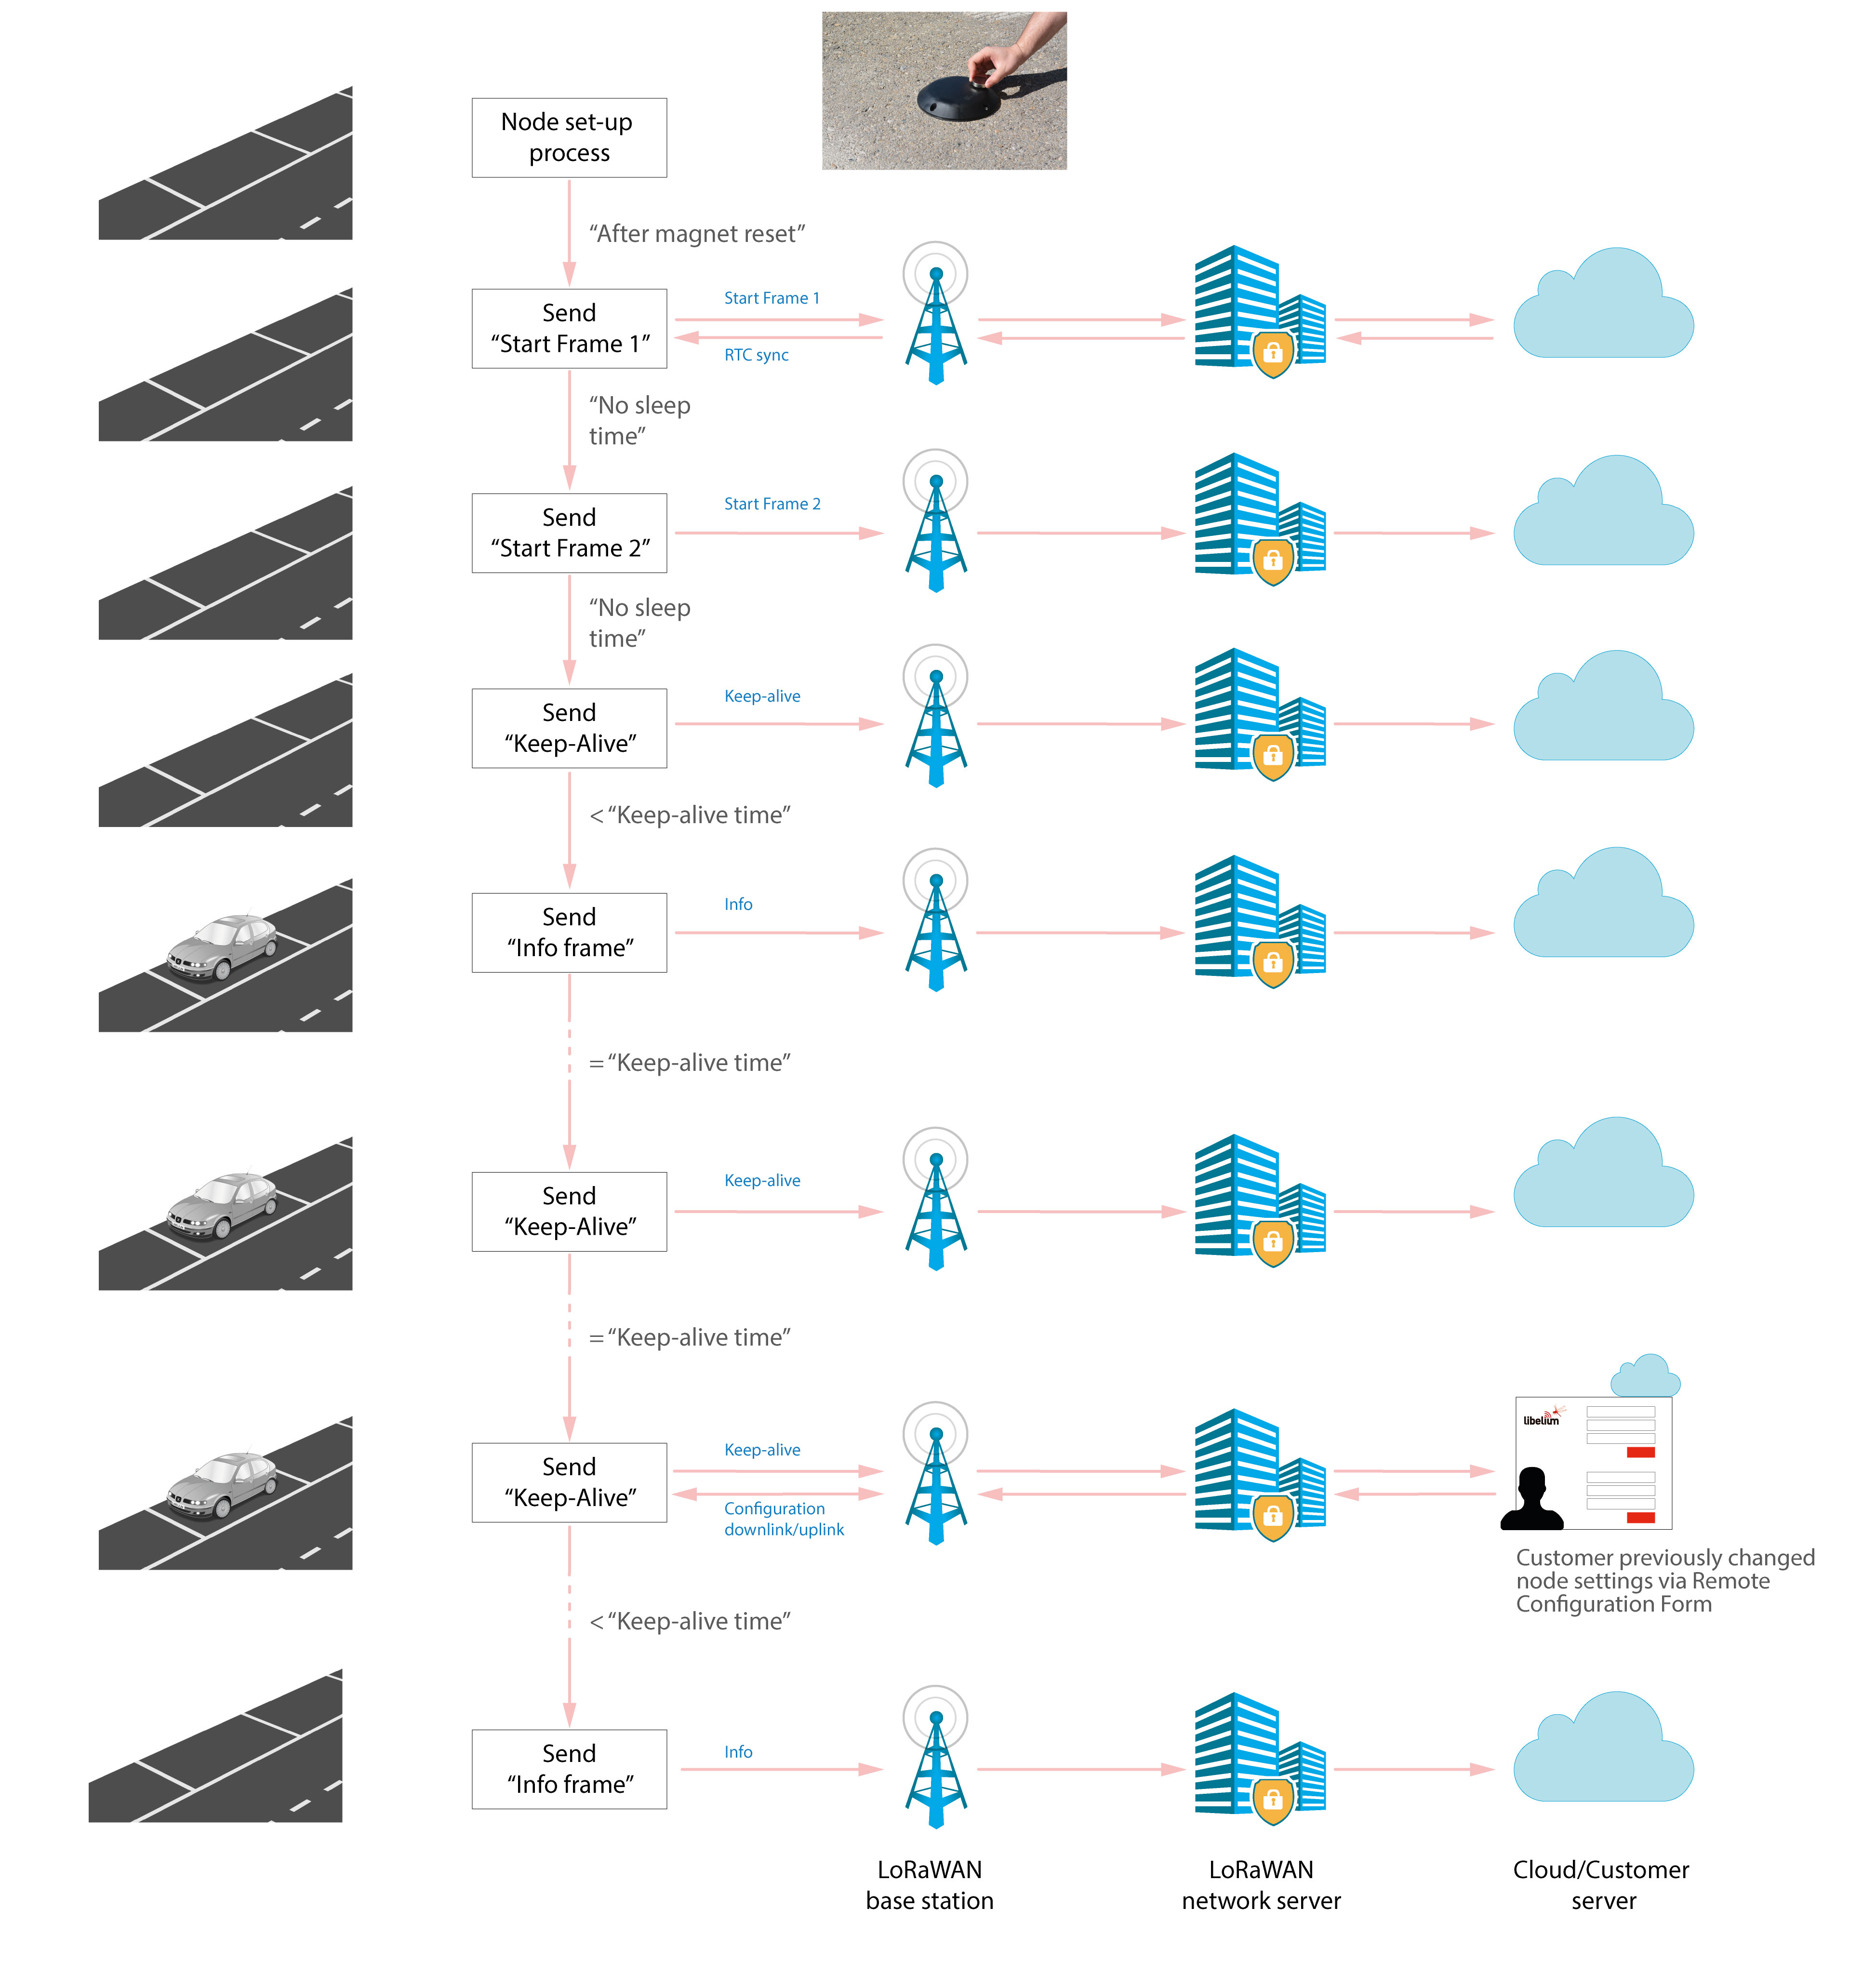
Working example
The next diagram explains how the node program works when the node is installed and started when the parking slot is free. On the left column you can see the parking slot status during the execution. On the right side you can see the frame types that are sent to Libelium Cloud depending on parking slot status changes, elapsed time and user configuration changes.