Amazon IoT
Amazon Web Services IoT enables secure, bi-directional communication between Internet-connected things (such as sensors, actuators, embedded devices, or smart appliances) and the AWS cloud over MQTT and HTTP.
More information: http://aws.amazon.com/iot/.
With this plugin, Waspmote sensor data can be directly integrated with Amazon AWS IoT broker.

Register Meshlium in Amazon IoT
To register Meshlium in Amazon IoT, you have to create a "thing" in your Amazon AWS IoT dashboard, attach a security certificate and policy statement and copy the parameters to the plugin. Follow these steps to register your Meshlium:
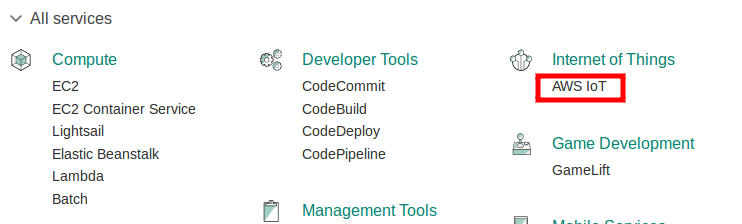
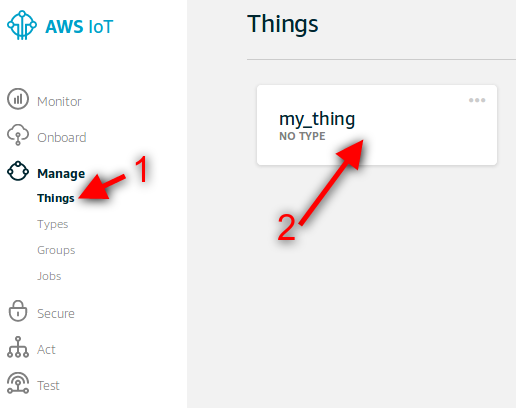
1.Select AWS IoT in the Amazon Dashboard.
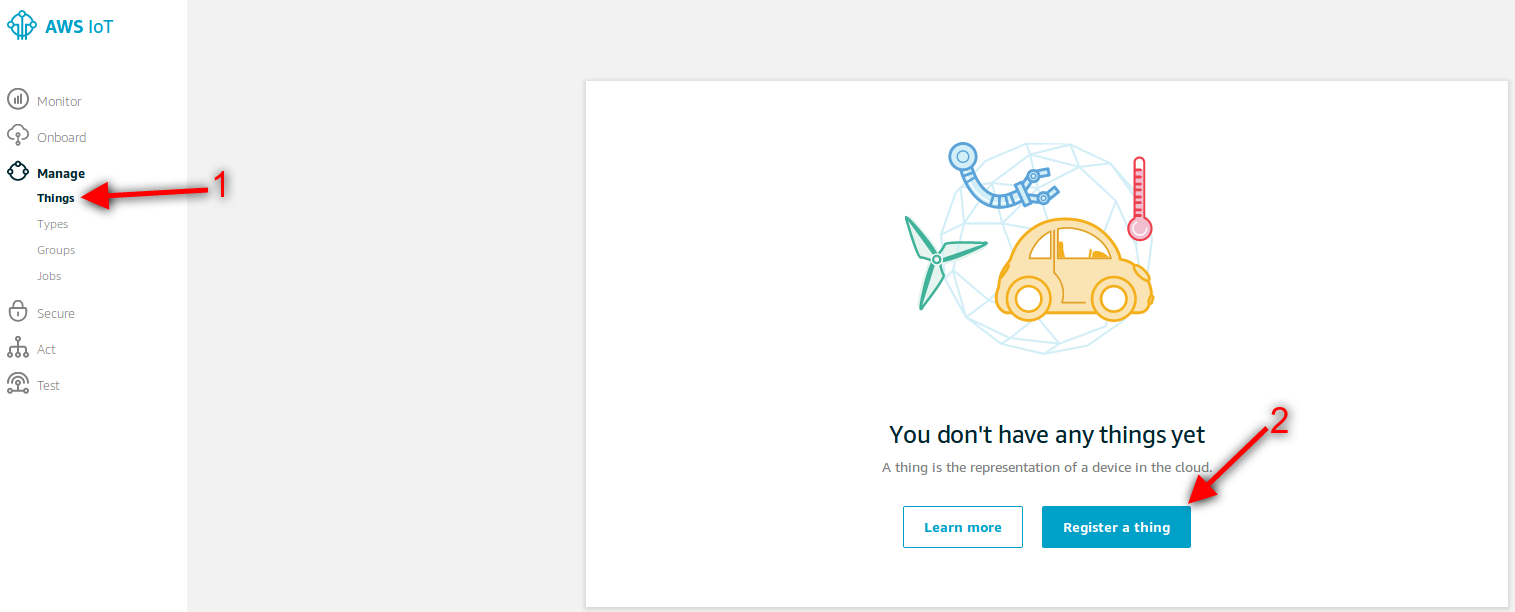
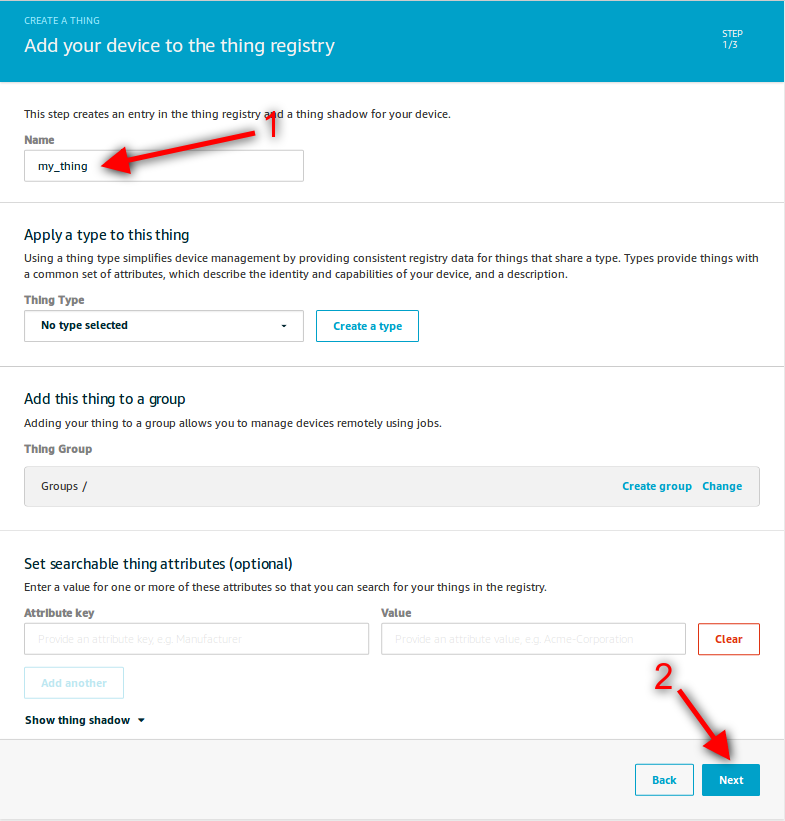
- Create a "Thing".

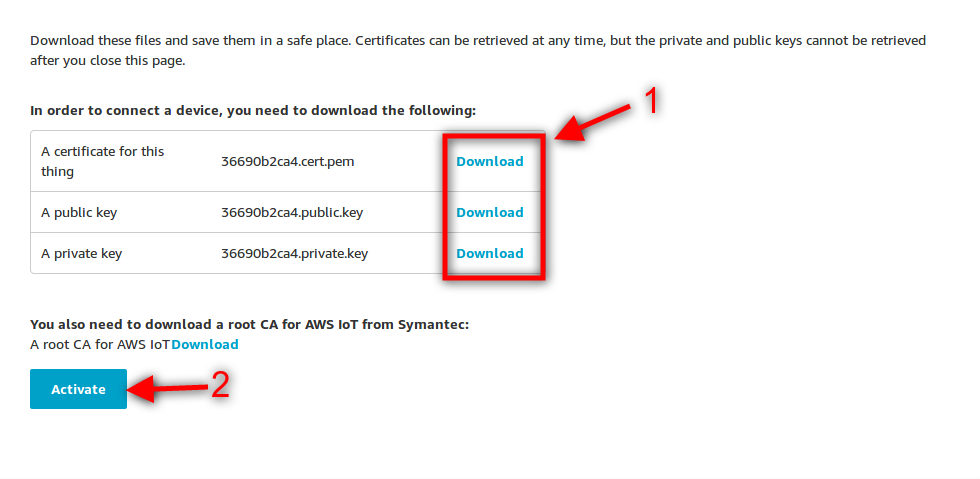
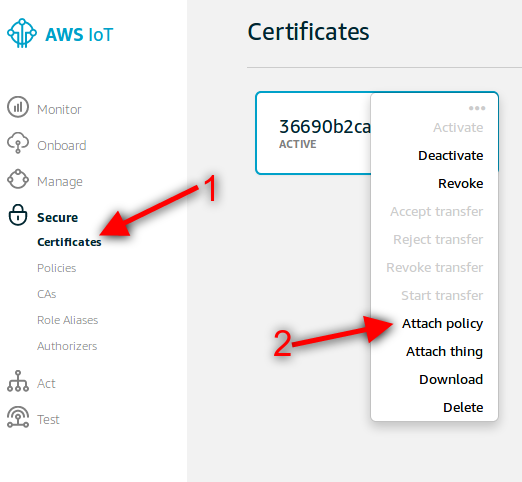
- Create a security certificate and download the files for later use.

- Create a policy with the parameters iot.* and *.
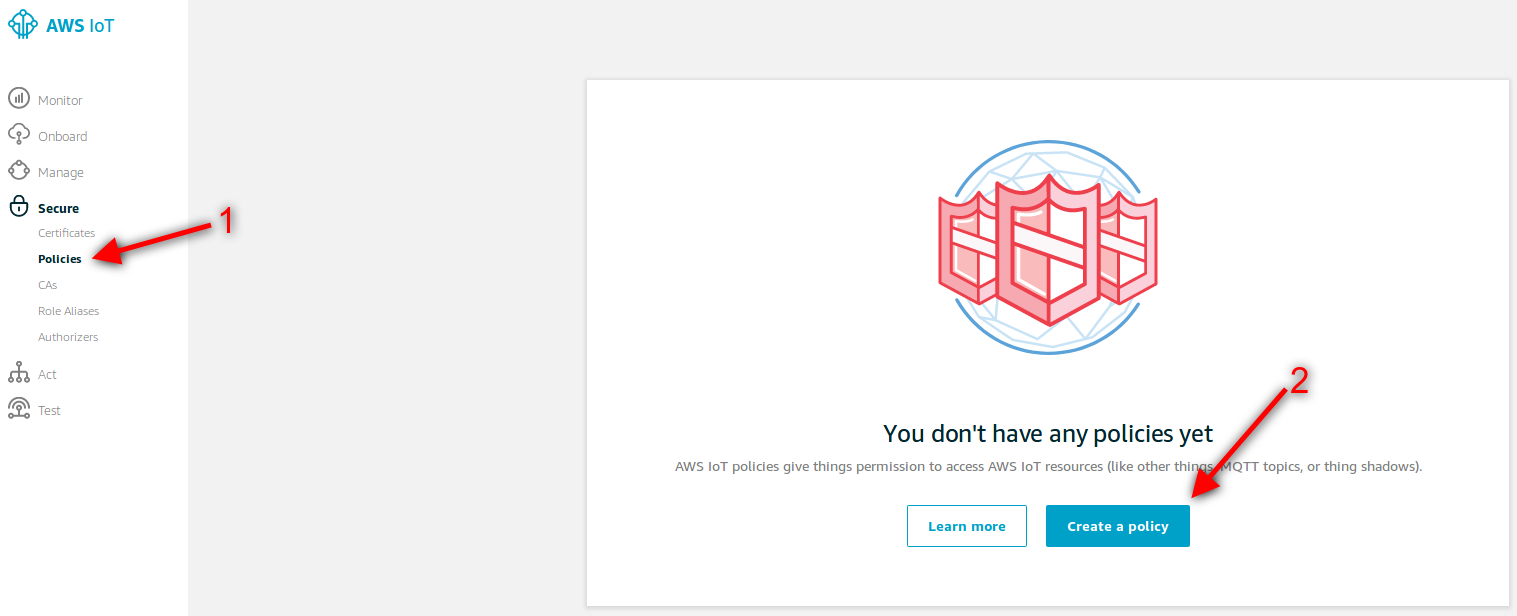
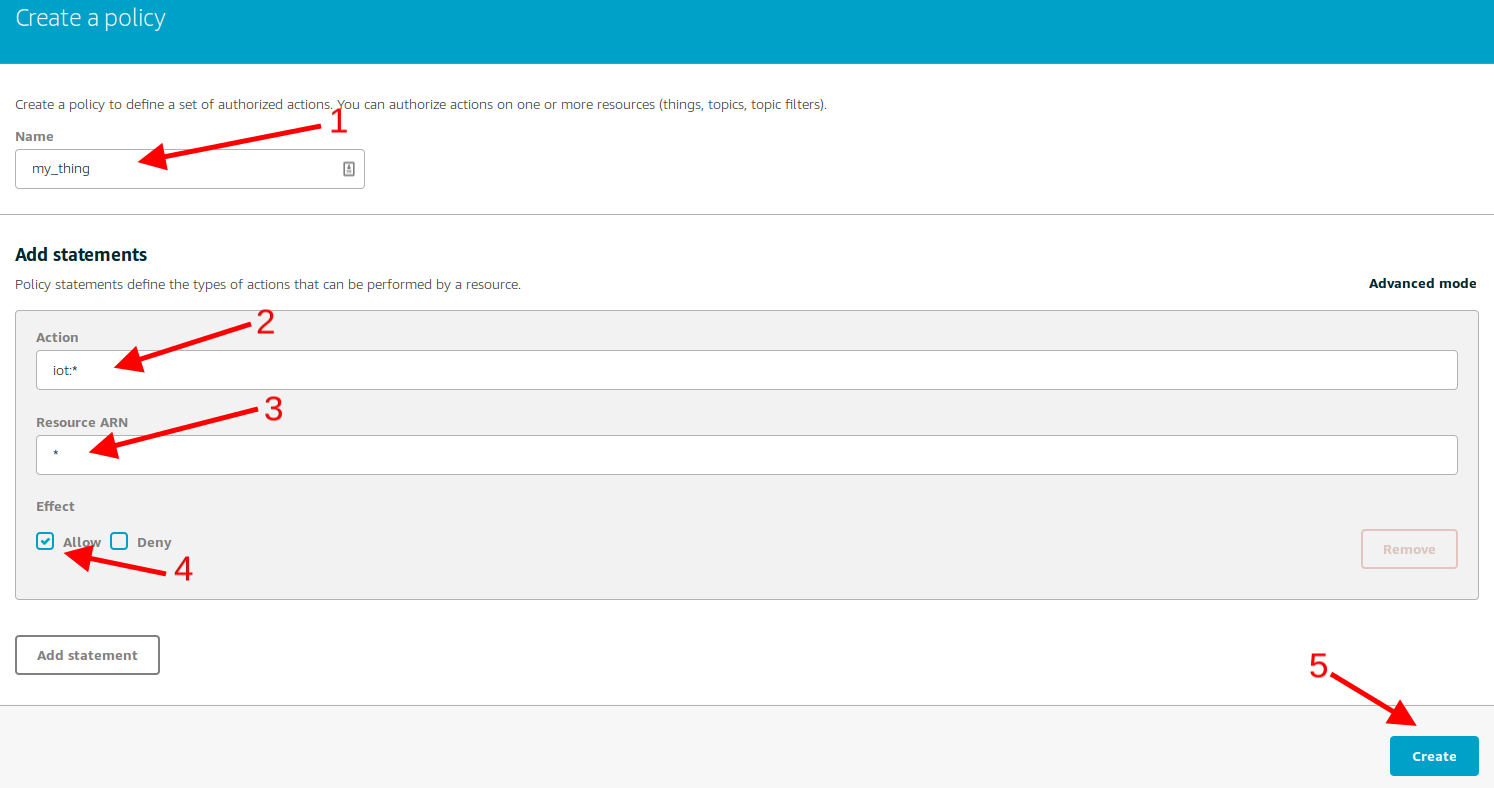
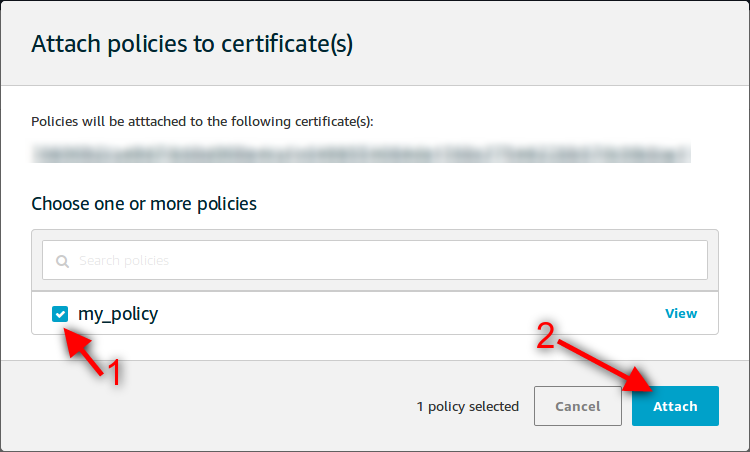
- Attach a policy.
- Copy the HTTPS connection string for later use.
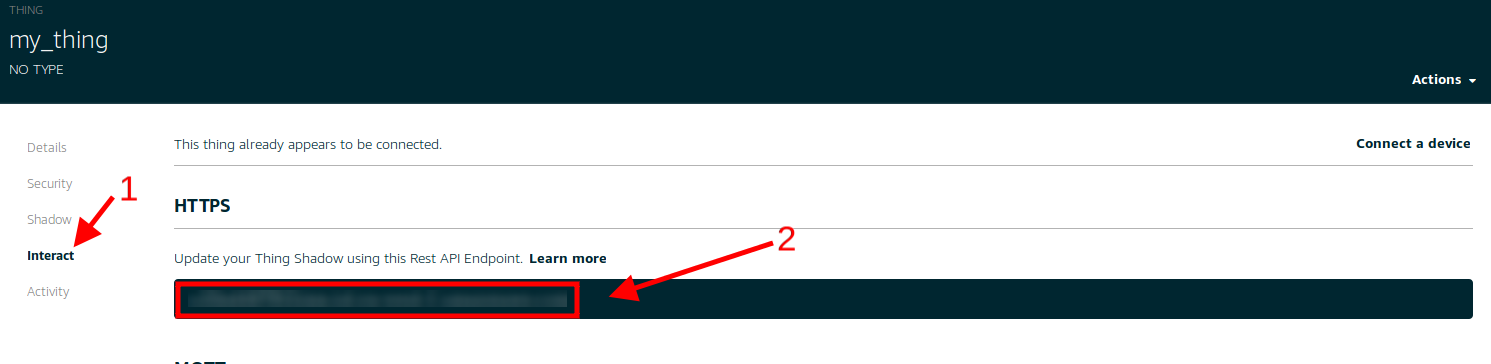
It is important to annotate the configuration displayed and save the credential files when connecting the device. You will need these files and parameters later for the Meshlium configuration.
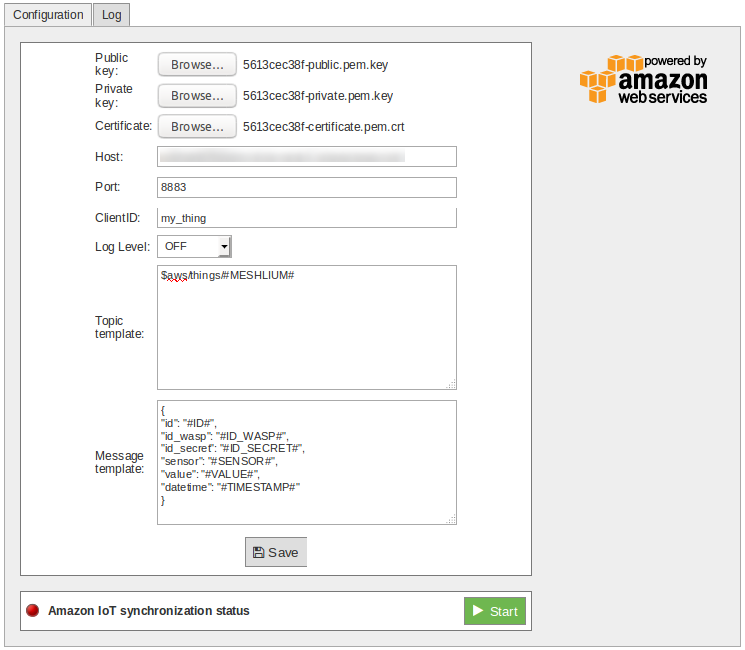
Configuration
You will use the previously obtained configuration from the AWS IoT platform to certificate your Meshlium as a valid sender of MQTT messages.
In the Configuration panel, the user can set:
- Public key: User public key file previously downloaded.
- Private key: User private key file previously downloaded.
- Certificate: Certificate file previously downloaded.
- Host: HTTPS connection string previously annotated.
- Port: AWS IoT MQTT port (by default 8883 for MQTT).
- ClientID: AWS IoT Client identification.
- QoS: Quality of Service levels for publishing and subscribing to a topic.
- Log Level: Generate log messages. From fewer to more details, the levels are: OFF, ERROR, INFO, DEBUG, REPORT. Default is OFF.
- Topic template: Topic of your message. The user can use these wild-cards creating a personalized structure:
- #ID#: Unique identifier for data.
- #MESHLIUM#: Host name of the Meshlium unit.
- #ID_WASP#: Identifies the Waspmote unit.
- #ID_SECRET#: Secret identifier.
- #SENSOR#: Identifies the sensor.
- #VALUE#: Value obtained from the sensor.
- #TIMESTAMP#: MySQL TIMESTAMP type ('YYYY-MM-DD HH:MM:SS' UTC).
- Message template: Data structure of your message. The user can use these wild-cards creating a customized content:
- #ID#: Unique identifier for data.
- #MESHLIUM#: host name of the Meshlium.
- #ID_WASP#: Identifies the Waspmote unit.
- #ID_SECRET#: Secret identifier.
- #SENSOR#: Identifies the sensor.
- #VALUE#: Value obtained from the sensor.
- #TIMESTAMP#: MySQL TIMESTAMP type ('YYYY-MM-DD HH:MM:SS' UTC).
Controlling synchronization
Once configured the server/broker, the user can launch the Meshlium Amazon IoT script (Start button). The program will search for the received frames on the local database, and will send them to the Amazon IoT platform via MQTT protocol. The status indicator displays the current state, saying "Running" or "Stopped".

You can stop the Amazon IoT program anytime clicking on the "Stop" button.

Once the synchronization is running, you can check the reception of the messages on the Amazon IoT service using the MQTT message monitor:
https://docs.aws.amazon.com/iot/latest/developerguide/view-mqtt-messages.html