ThingPlus
{warning.fa-dot} This Cloud Connector is no longer available since November 2020
Thing+ allows customers to build their own IoT services with high speed, reliability, scalability, and cost competitiveness, connected by a SaaS or PaaS IoT platform. When Thing+ Embedded devices connect to the Thing+ Cloud (public or private), customers can visualize various data graphs and charts from sensors directly on the Thing+ Portal. Device registration is easy as the Thing+ Portal provides dashboard widgets, a trigger-condition-action-based rule engine for alert notifications or to control actuators, and results in the form of an event timeline.
Get API Key
- Get the "Gateway ID" to register:
- Open the Meshlium Manager System.
- Click Cloud Connector.
- Open the ThingPlus plugin.
- You can see ThingPlus configuration and "Gateway ID".
- Copy the "Gateway ID".
- Get the API Key:
- Go to your ThingPlus service (if you have no registered service, register your service) https://yourservice.thingplus.net.
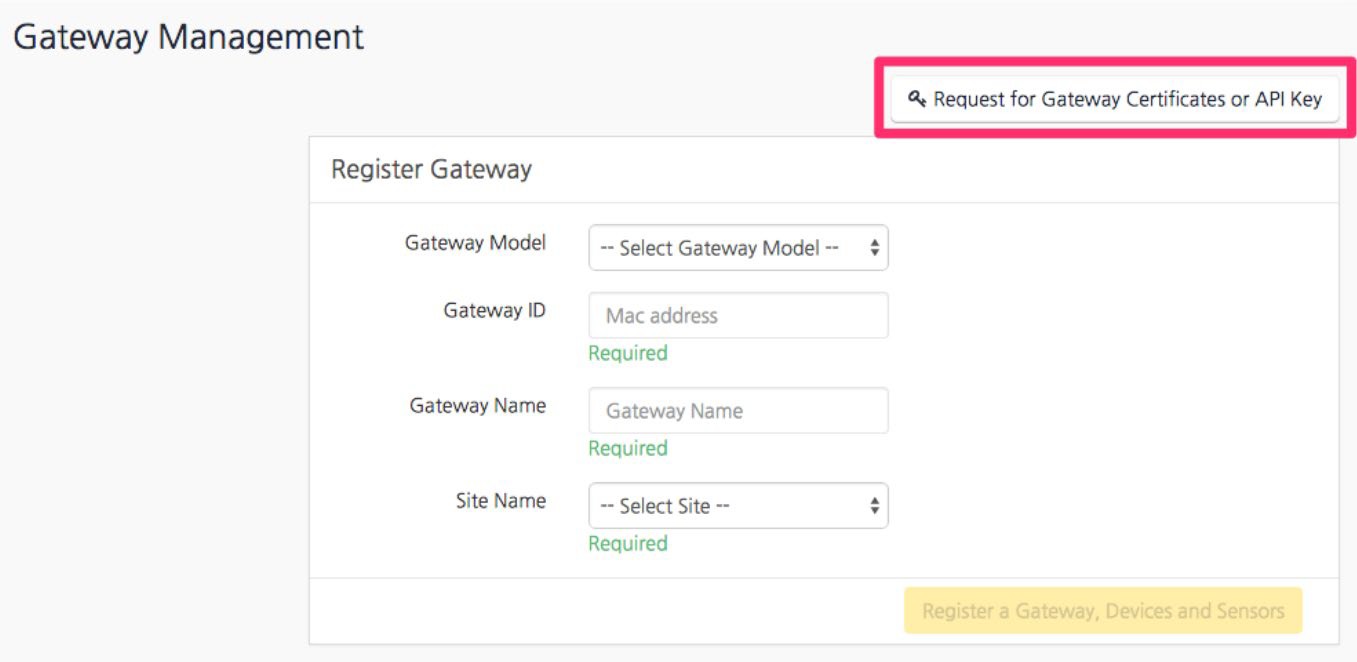
- Go to Gateway Management page (via upper right menu).
- Click the + button in the upper right corner.
- Click "Request for Gateway certificates or API Key" button.
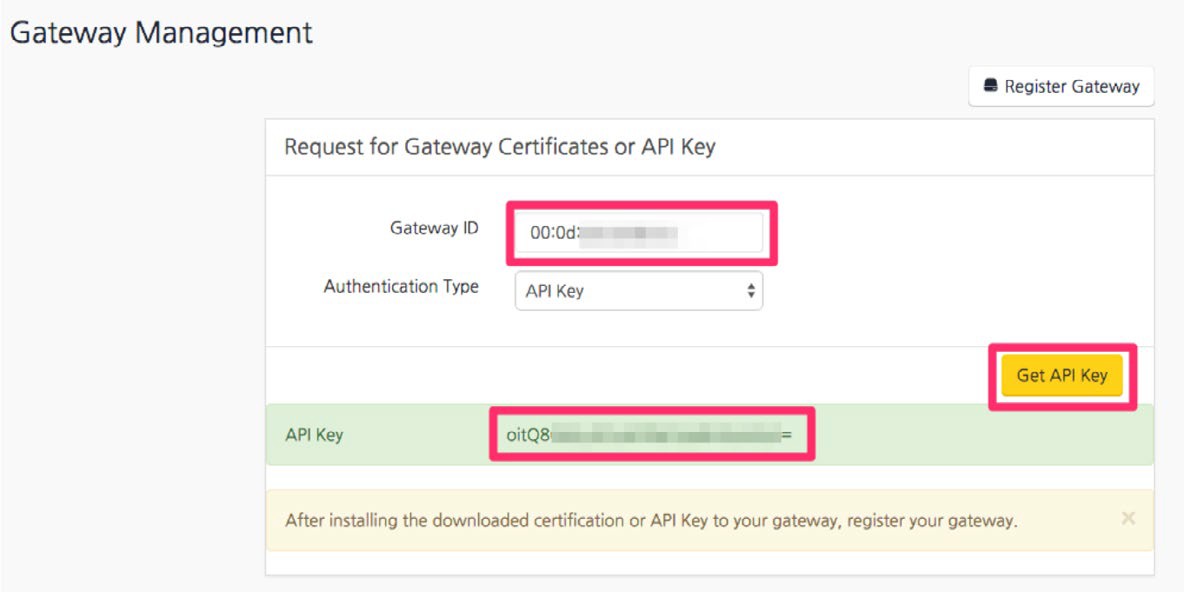
- Fill form.
- Gateway ID.
- Select "API Key" (Authentication Type).
- Click "Get API Key".
- Copy the "API Key".
- Set "API Key" in the Meshlium Manager System.
- Go to ThingPlus configuration again.
- Paste the "API Key".
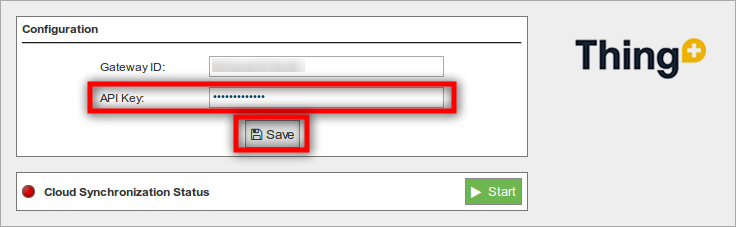
- Click the "Save" button (ThingPlus gateway app will restart).
- If the status is "STOPPED", then click on the "Start" button after saving API Key.
Register Gateway and Sensors
- Go to your ThingPlus service.
- Go to Gateway Management page (via upper right menu).
- Click the + button in the upper right corner.
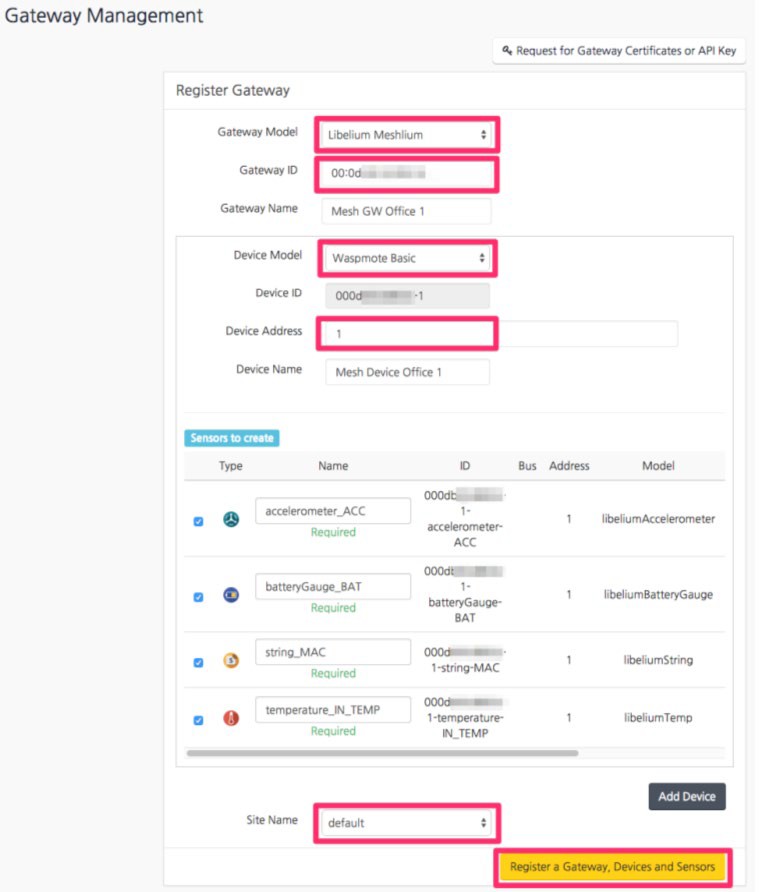
- Fill the form:
- Select Gateway Model as "Libelium Meshlium".
- Input Gateway ID (the same MAC address when registering gateway).
- Select Device Model as "Waspmote Basic".
- Input Device Address (Waspmote address is the id_wasp field).
- Input Device Name.
- Select Sensors to register (all sensors are selected as default).
- Select Site Name (default).
-
Click "Register a Gateway, Devices and Sensors" button:
- ThingPlus gateway app will restart and send the sensor data in a few minutes.
- You can see the sensor data at Dashboard or Sensor page.