Network interfaces setup
Access the network interfaces setup clicking on the button "Interfaces":
Ethernet setup
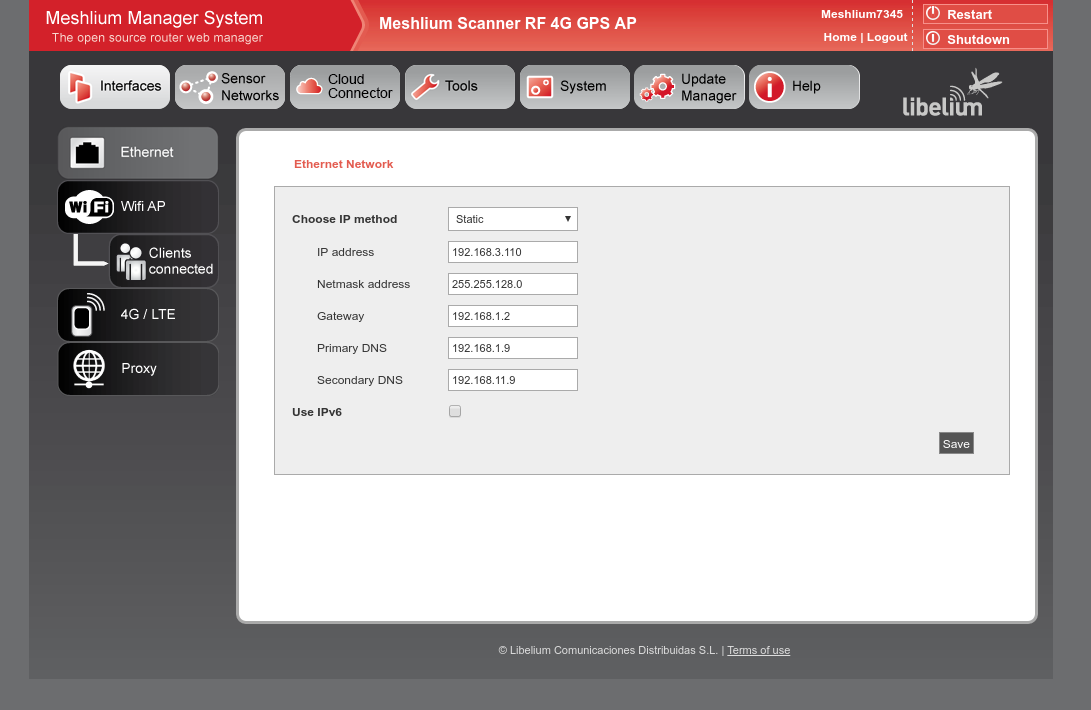
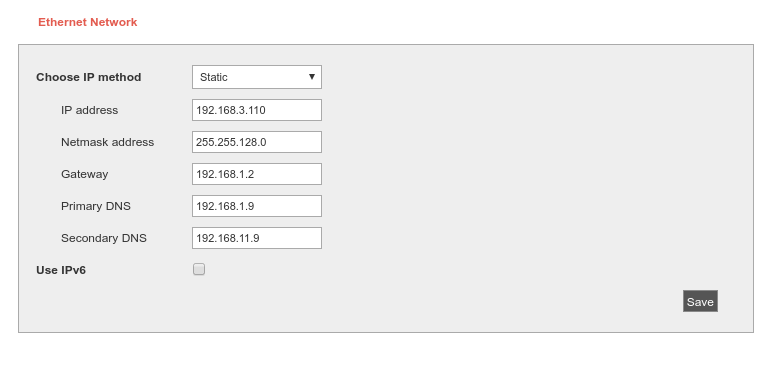
By default Meshlium comes with the Ethernet interface activated to get dynamically the IP using the DHCP service. In case a static configuration is required the next parameters can be configured:
You can also use IPv6 (Internet Protocol version 6) by setting the check box "Use IPv6". IPv6 is a version of the Internet Protocol (IP) intended to replace IPv4. The next parameters can be configured:
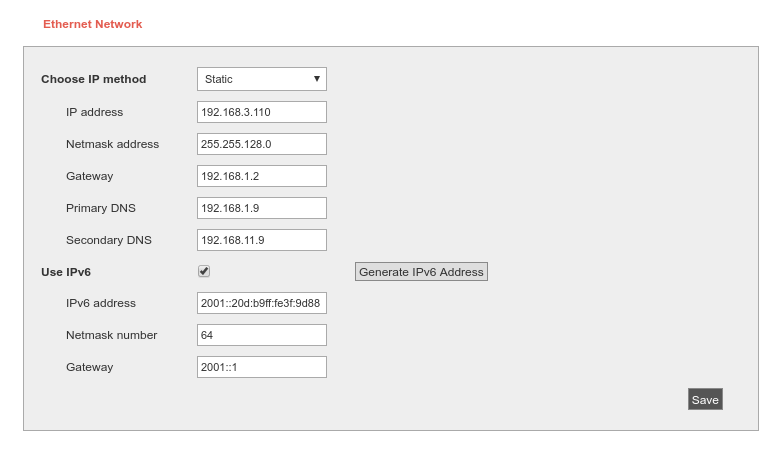
In many cases, IPv6 addresses are composed of two logical parts: a prefix of 64-bit (2001::) and a 64 bit part that is generated automatically from the MAC address of the interface.
The button "Generate IPv6 address" performs this task.
After saving the new options and once you have restarted Meshlium you have to validate the new configuration before the next 5 minutes, if not, the factory default configuration will be restored to avoid leaving Meshlium without connectivity. See section “Network setup confirmation” for more information.
To check IPv6 configuration, after save and restart Meshlium, go to Tool -> Ping. Select Ethernet (IPv6), by default ipv6.google.com appears as destination host.

If your Internet Service Provider does not support external IPv6 addresses yet, you can change it to a local address.


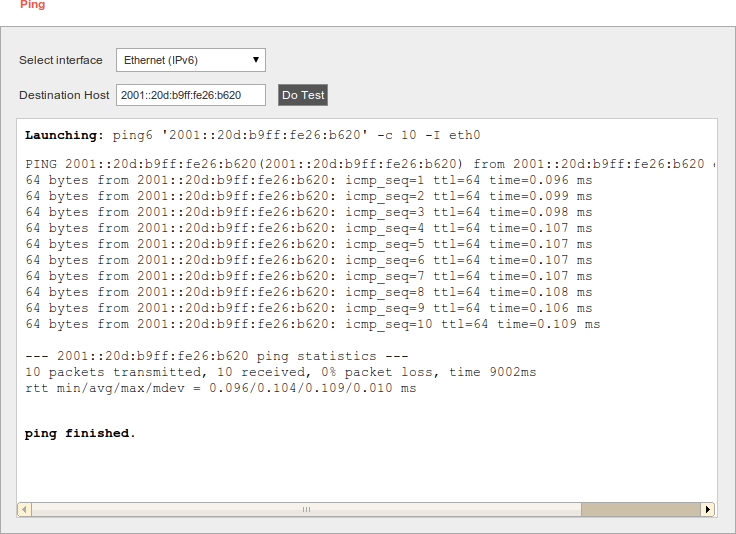
Then press "Do Test". If something like next image appears, you have IPv6 correctly configured.
WiFi Access Point setup
Meshlium is a WiFi Access Point and can supply network connectivity trough WiFi. The most useful feature of the AP is to provide access to Manager System from a tablet or laptop without any physical connection with Meshlium.
By default the AP hast the ESSID "meshliumXXXX" where XXXX are the last four digits of Ethernet MAC. This allows to identify different Meshliums installed nearby.
Configuration
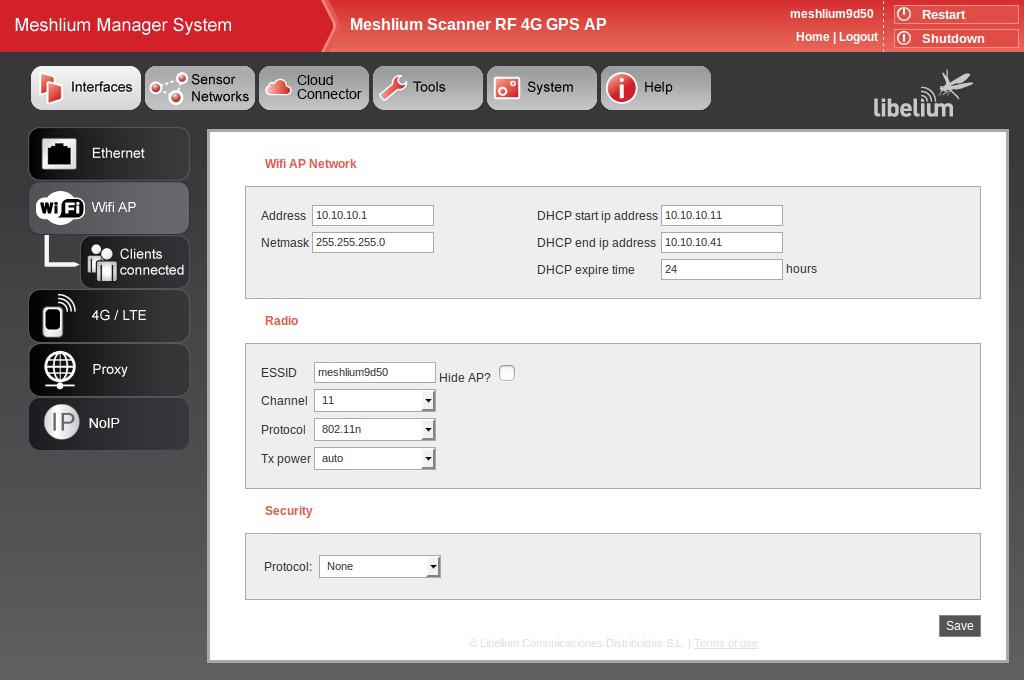
There three sections in the configuration page: Network, Radio and Security.
Network
Here you can change the IP of the device in the network and the DHCP setup. Here can be setup:
- IP address of the AP.
- Netmask of the Address.
- DHCP range. The address range in the DHCP setup must be inside the network defined by the IP address and netmask of the AP.
- DHCP lease time.

Radio
These are specific WiFi parameters. Here can be setup:
- ESSID of the network. This is the name that appear in the devices that are searching WiFi networks. It can be public or hidden, allowing only connections manually started.
- Channel. It is possible to change the radio channel which is used for transmission, according to the next diagram.

- Protocol. It is possible to use 802.11g and 802.11n.
- Tx power. It allows to control the transmission power, thus the range of the AP.

Security
The WiFi AP can be protected with encryption. WPA and WPA2 are available.
WPA-PSK can be used with a password from 8 to 63 characters.
We recommend use WPA2 in order to get the a good security in the network.

Saving
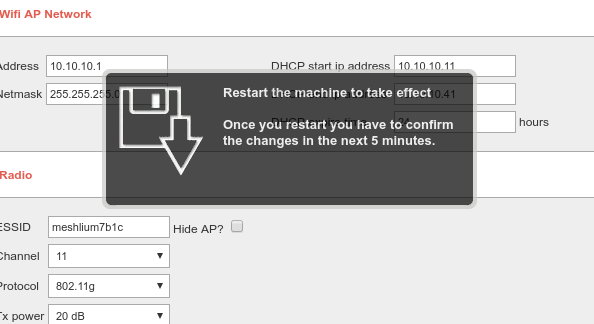
After saving the setup, a message will warn the user about setup confirmation. A reboot is needed to apply new settings. The setup has to be confirmed within 5 minutes after reboot. More info in “Network setup confirmation”.
Clients connected
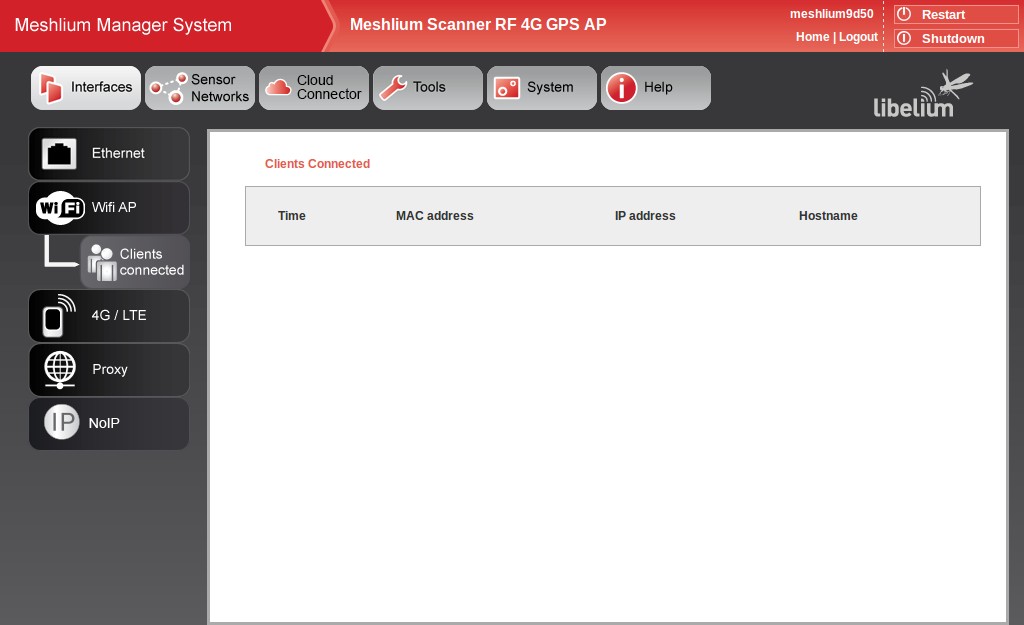
This section shows the list of clients connected to the WiFi AP, showing information like the MAC address and the IP assigned. It is a quick way to know how many devices are connected and who are they.
Network setup confirmation
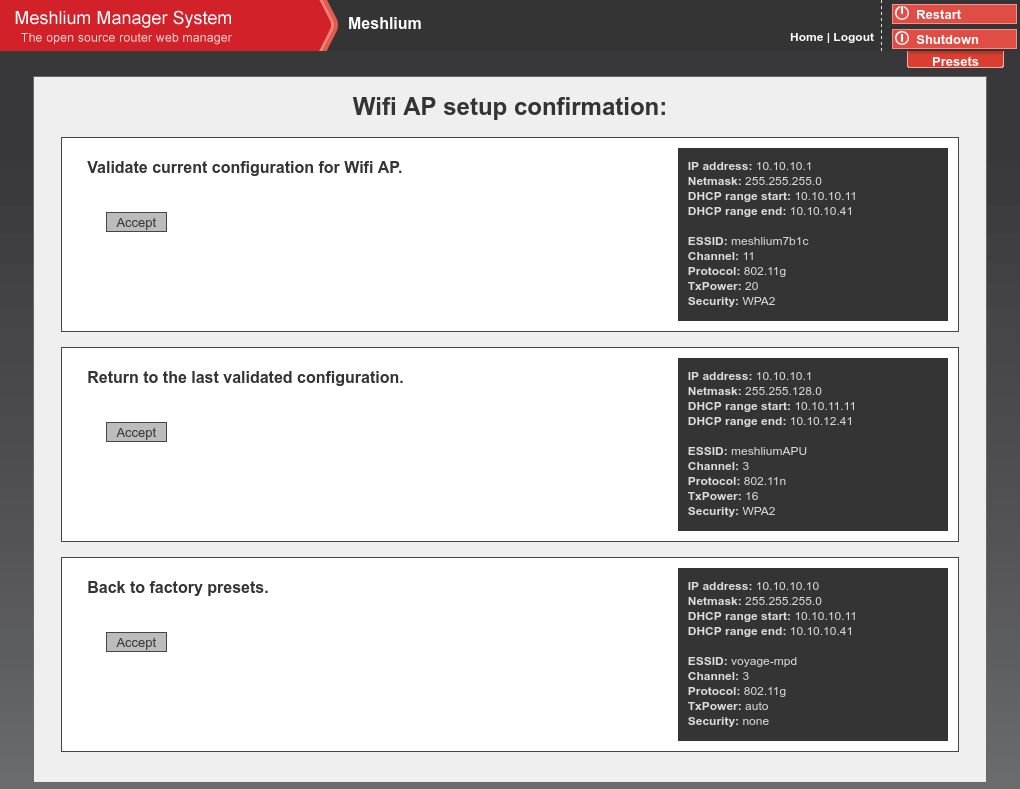
After changing Ethernet or WiFi AP setup, a reboot is needed to apply new settings. After this reboot, the user has to confirm the settings in order to definitely apply them. If after 5 minutes of the reboot the user has not confirmed the new settings, last validated settings will be applied again. If there are no validated settings, default settings will be applied.
In the confirmation screen the user can select to confirm new settings, change to last validated settings or change to default settings. All the information of every setup will be shown. After the confirmation is done, the new settings will be stored as last validated settings for future confirmations.
The system will show a confirmation window for every setting changed, one for Ethernet setup and one for WiFi AP setup, so it can be independently confirmed.
4G Setup
This plugin allows to set-up the parameters of the modem connection. There is a list with some initial configurations depending on the country and the operator. However, this list may not be updated with the last valid configuration of your mobile provider. Ask your mobile company for the information required to connect (APN, Username, Password) and add the PIN code of the SIM card used (leave empty if there is no PIN).
We recommend to disable the PIN in the SIM card as this will make easier the test and validation process and will avoid to block the SIM card.
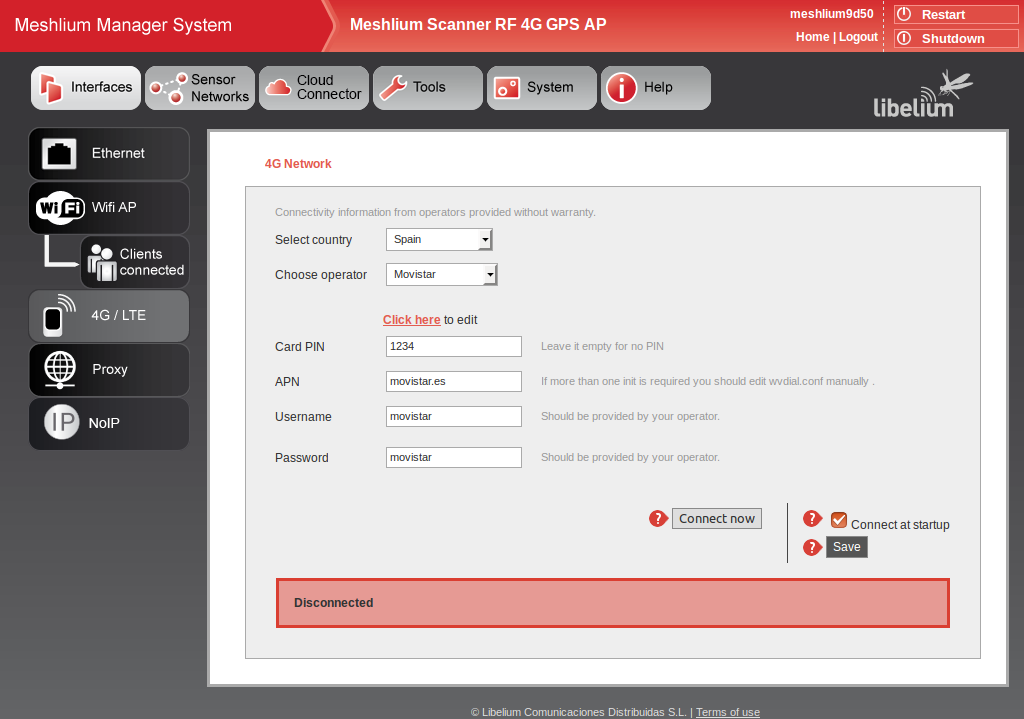
After setting the 4G parameters, you have to save them by pressing the "Save" button. Then you can test your connection through the "Connect now" button. It will try to connect to your carrier and get a valid IP. Once the connection has been made the default gateway of the machine is changed so all the clients connected through WiFi will reach the Internet via 4G.
Important: Once you get a valid 4G IP through the "Connect now" button, you will not be able to access Meshlium via Ethernet unless you are connected through the same Local Area Network. For this reason we recommend to make all the tests using the WiFi connection.
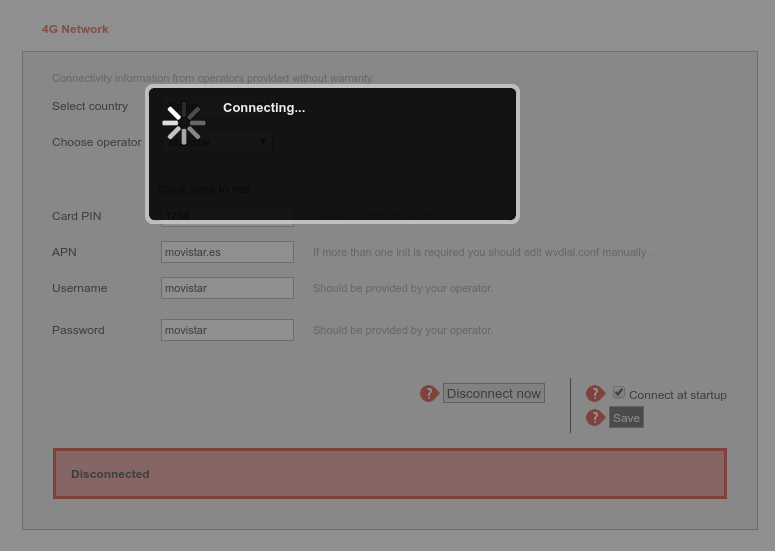
If connection is established, the IP will be shown in the interface. Once the modem is connected, a process will check the connection every 15 minutes and will try to reconnect in case of disconnection.

If you want the 4G to be the Default Gateway of Meshlium each time it starts just activate the service in the "Set as Default Gateway" check box before saving. Setting this on will connect to the Internet using the 4G radio each time Meshlium restarts.
If any problem is preventing the device to connect at boot or to reconnect after a connection fall, a message will be displayed in the plugin. The user can manually stop automatic reconnection by pressing the "Disconnect now" button.

{warning.fa-dot} Important:
Many Internet Service Provider companies do not allow access from outside the network using the IP connection. If you want to access Meshlium from the Internet, ask your provider for a public IP.
Proxy setup
This plugin allows to setup an HTTP proxy for some features of Meshlium. Here can be configured the proxy address, the port and the credentials (leave blank if not authentication needed).
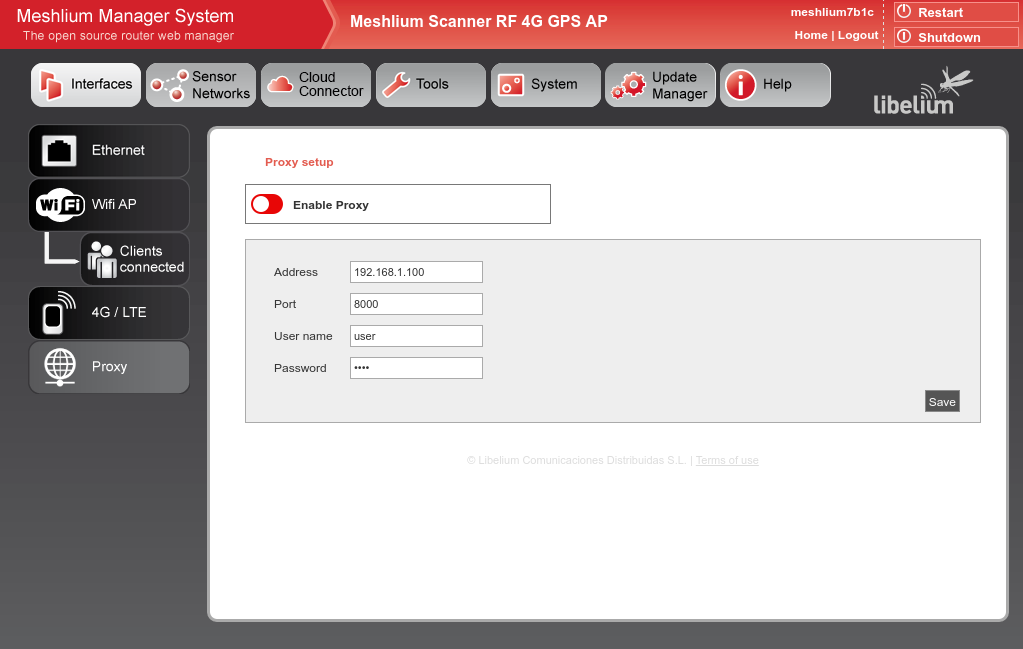
The proxy can be enabled or disabled from the control of the interface.


Note: Currently the proxy feature is only available for visualizer plugin. This feature will be gradually included in other services.
No-IP setup
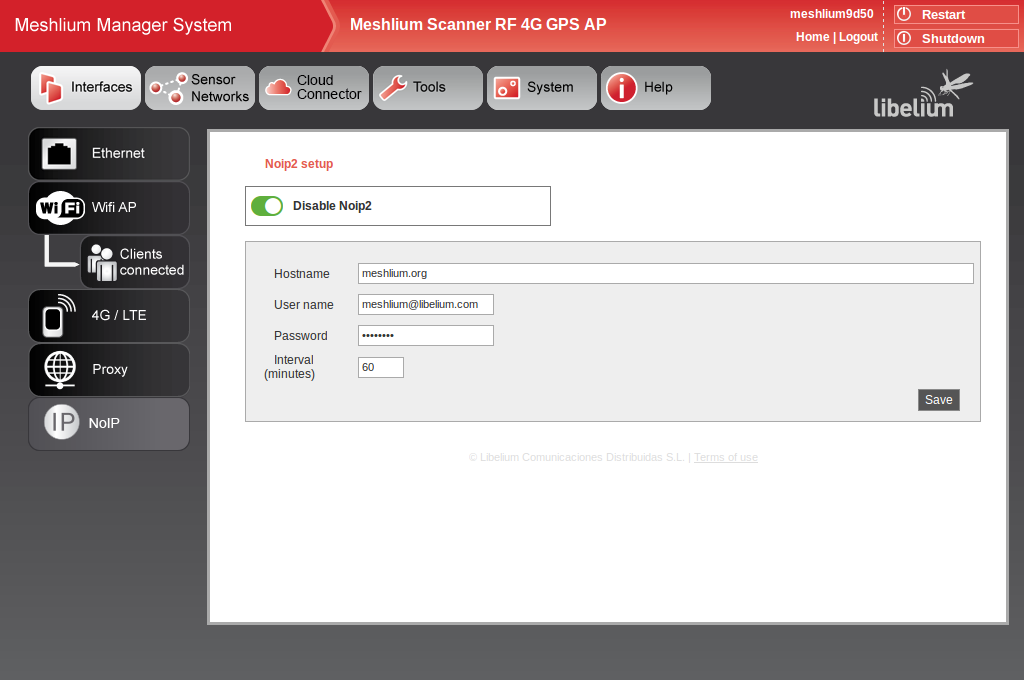
This plugin allows to setup a No-IP account (https://www.noip.com) for dynamic IP remote access.
Configure the following parameters with the information of a valid and active No-IP account, previously created in the No-IP platform:
- Hostname: Name of the host to link with the Meshlium IP.
- Username: No-IP account username.
- Password: No-IP account password.
- Interval: Update interval in minutes.
Please, refer to the interface configuration section to use a proxy.

