- How to set up Sparkcompass to receive data from the Meshlium hub
- Configuration
- Controlling synchronization
Sparkcompass
This guide will take you through connection to the Sparkcompass platform. Prior to use the Sparkcompass platform with Meshlium, set you up your own sub-domain (e.g. yoursubdomain.pacificfjord.com or yoursubdomain.sparkcompass.com). When you log into your platform instance, select the app you want to receive data from your Meshlium.
How to set up Sparkcompass to receive data from the Meshlium hub
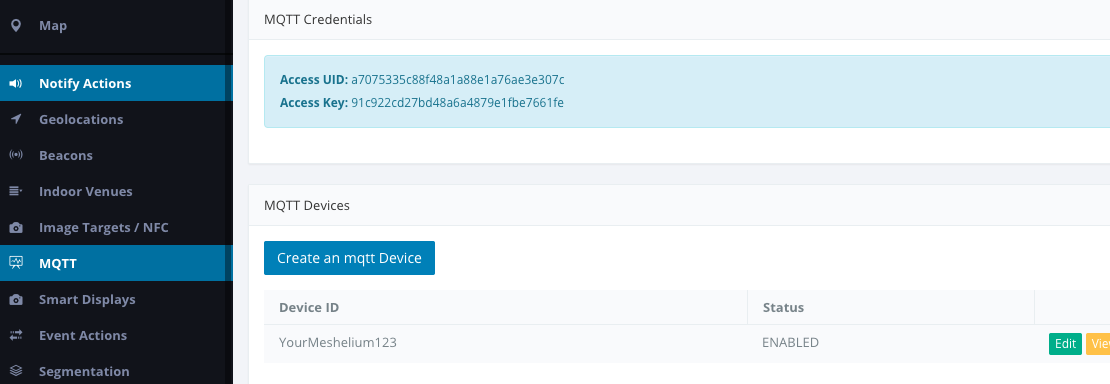
Select the MQQT tab in the Sparkcompass App where you want to receive the data coming from your Meshlium. Your Access UID and Access Key will be generated automatically. Create an MQTT device using the button shown and give it a unique Device ID (up to 23 characters).

Configuration
You will use the values obtained from the Sparkcompass platform to configure your Meshlium.
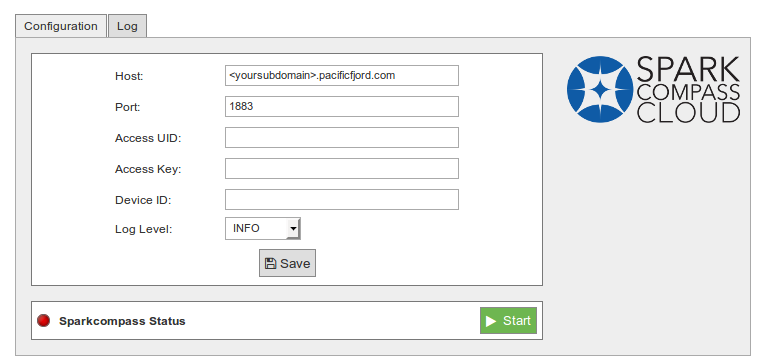
In the Configuration panel, the user can set:
- Host: yoursubdomain.sparkcompass.com (you will get this from Sparkcompass).
- Port: 1883 (unless otherwise directed).
- Access UID: as above (e.g. a7075335c88f48a1a88e1a76ae3e307c).
- Access Key: as above (e.g. 91c922cd27bd48a6a4879e1fbe7661fe).
- Device ID: as created above (e.g. YourMeshlium123).

Click the "Save" button for storing the configuration fields.
Controlling synchronization
Once configured the connector, the user can launch the Sparkcompass plugin by pressing the "Start" button. The program will search for the received frames on the local database, and will send them to the Sparkcompass. The status indicator displays the current state, saying "Running" or "Stopped".

You can stop the Sparkcompass plugin anytime by clicking on the "Stop" button.
